![[Your Homestead's Journey] Transform Your Tiny H...](https://tsanflmyhnedxsuhbxnm.supabase.co/storage/v1/object/public/blog-images/f1272fe0-0da3-4618-a89d-3617d9363d98-endpoint-post-1753485025664.jpg)
[Your Homestead's Journey] Transform Your Tiny Homestead: Build a Super-Efficient DIY Cold Frame for Year-Round Greens!
Are you dreaming of fresh, homegrown salads in the heart of winter? Do you long to jumpstart your spring garden weeks ahead of the last frost? For years, early spring on our small homestead felt like a frustrating tease. The sun would shine, the birds would sing, and I'd be itching to get my hands dirty… only to be thwarted by chilly nights and the lingering threat of frost. I tried everything: blankets, row covers, even lugging seedlings in and out of the house each day. It was exhausting! Then I discovered the magic of the cold frame, and everything changed.
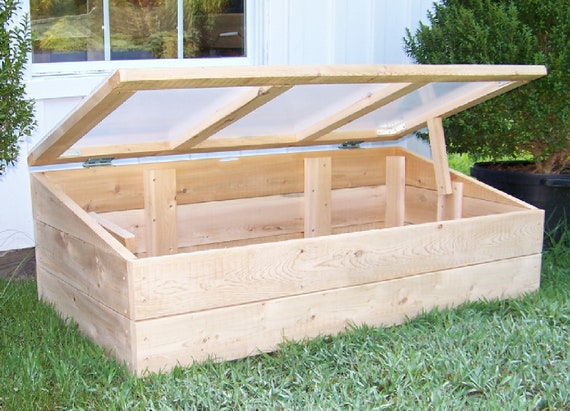
A cold frame is essentially a miniature greenhouse, a simple structure that protects plants from the elements and extends the growing season. It traps solar energy, creating a warmer microclimate inside, allowing you to start seeds earlier, protect tender seedlings, and even harvest greens throughout the winter months. And the best part? You don’t need a sprawling farm or a huge budget to enjoy the benefits. In fact, you can build a highly effective cold frame yourself, using readily available materials and a few basic tools. This guide will show you how to build a super-efficient DIY cold frame for a raised garden bed (approx. 4ft x 8ft), perfect for maximizing your yield in a small space and embracing a more self-sufficient lifestyle.
Why Build a Cold Frame?
Before we dive into the how-to, let's reinforce the why. A cold frame is a game-changer for any homesteader, especially those working with limited space. Here’s how it can benefit you:
- Extend the Growing Season: Start seeds earlier in spring and continue harvesting later into the fall, effectively adding weeks or even months to your growing season.
- Protect Against Frost: Shield tender seedlings and crops from damaging frosts and cold snaps, ensuring a higher survival rate.
- Harden Off Seedlings: Gradually acclimate indoor-started seedlings to outdoor conditions before transplanting them into the garden, reducing transplant shock.
- Grow Winter Greens: Harvest fresh salads and leafy greens throughout the winter, providing a welcome source of vitamins and nutrients when other crops are dormant.
- Increase Self-Sufficiency: Reduce your reliance on store-bought produce and enjoy the satisfaction of growing your own food year-round.
- Budget-Friendly Gardening: A DIY cold frame is a cost-effective way to achieve all these benefits, especially when using repurposed materials.
Materials List: Building Your Budget-Friendly Cold Frame
This cold frame design is tailored for a 4ft x 8ft raised garden bed but can easily be adapted to other sizes. We'll focus on using readily available and, where possible, repurposed materials to keep costs down.
- Lumber:
- (4) 8-foot 2x4s (for the base frame) - Estimated Cost: $20-$40 (depending on lumber prices; check for reclaimed lumber options)
- (2) 4-foot 2x4s (for the base frame) - Estimated Cost: Included above.
- (2) 8-foot 1x4s (for the top frame) - Estimated Cost: $10-$20 (again, reclaimed options are great)
- (2) 4-foot 1x4s (for the top frame) - Estimated Cost: Included above
- (2) 2-foot 2x4s (for the hinge support) - Estimated Cost: included above
- Glazing Material:
- Repurposed Window (approx. 4ft x 8ft or smaller; can use multiple windows) OR
- Heavy-Duty Polyethylene Sheeting (6mil or thicker) - Estimated Cost: $15-$30 (available at most hardware stores)
- (Optional) Greenhouse Film - more durable and better light transmission if you want to invest a bit more.
- Hardware:
- 3-inch Exterior Screws (for framing) - Estimated Cost: $10-$15
- 1 1/4-inch Screws (for attaching hinges and other small parts) - Estimated Cost: $5-$10
- (2) Hinges (for attaching the lid) - Estimated Cost: $5-$15
- (Optional) Hook and Eye Latch (to secure the lid) - Estimated Cost: $2-$5
- Tools:
- Saw (circular saw or hand saw)
- Drill with screwdriver bits
- Measuring tape
- Pencil
- Safety glasses
- Gloves
Where to Source Materials Affordably:
- Reclaimed Lumber: Check with local construction sites, demolition companies, or online marketplaces like Craigslist or Facebook Marketplace for used lumber.
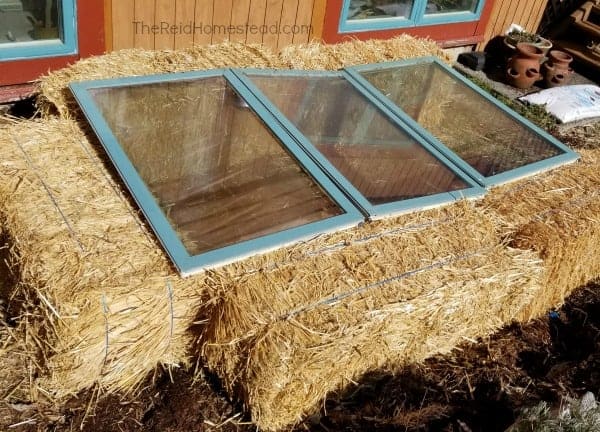
- Recycled Windows: Scour architectural salvage yards, thrift stores, or ask friends and neighbors if they have any old windows they're willing to part with.
- Upcycled Plastic Sheeting: Consider using heavy-duty plastic sheeting from construction projects or even repurposing clear tarps.
Step-by-Step Instructions: Building Your DIY Cold Frame
Follow these steps to construct your cold frame. Remember to always prioritize safety and wear appropriate protective gear.
Step 1: Build the Base Frame
- Cut the 2x4 lumber to size: two 8-foot pieces and two 4-foot pieces.
- Assemble the frame by joining the pieces together to form a 4ft x 8ft rectangle. Use the 3-inch exterior screws to secure the corners. Ensure the frame is square by measuring the diagonals; they should be equal.
Step 2: Add a Slope (Optional but Recommended)
Adding a slight slope to the cold frame lid allows for better water runoff and increased sunlight penetration, especially during the low-angle winter sun.
- Cut one of the 4-foot 2x4s into 2 pieces approximately 6" on one end, sloping to 12" on the other. These will be the supports for the back end of the lid.
- Screw these pieces into the inside corners on one of the 4 foot ends.
Step 3: Construct the Lid Frame
- Cut the 1x4 lumber to size: two 8-foot pieces and two 4-foot pieces.
- Assemble the lid frame by joining the pieces together to form a 4ft x 8ft rectangle. Use the 1 1/4-inch screws to secure the corners. Again, ensure the frame is square.
Step 4: Attach the Glazing Material
For Repurposed Windows: Carefully clean the window(s). Place the window on top of the lid frame and secure it using screws.
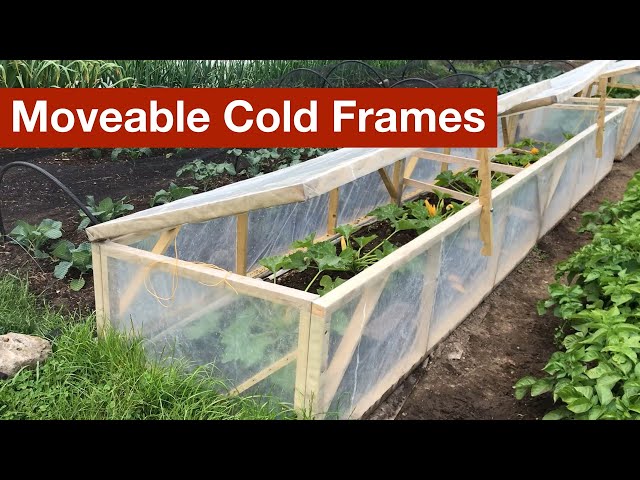
For Polyethylene Sheeting: Lay the sheeting over the lid frame, ensuring it extends beyond the edges. Staple the sheeting to the frame using a staple gun, pulling it taut as you go. Trim off any excess sheeting with a utility knife.
Step 5: Attach the Lid to the Base
- Position the lid frame on top of the base frame, aligning it carefully.
- Attach the hinges to the back of the base frame and the corresponding edge of the lid frame. Use the 1 1/4-inch screws.
Step 6: Add Finishing Touches
- (Optional) Install a hook and eye latch on the front of the cold frame to secure the lid in the closed position.
- Inspect the cold frame for any sharp edges or splinters and sand them down.
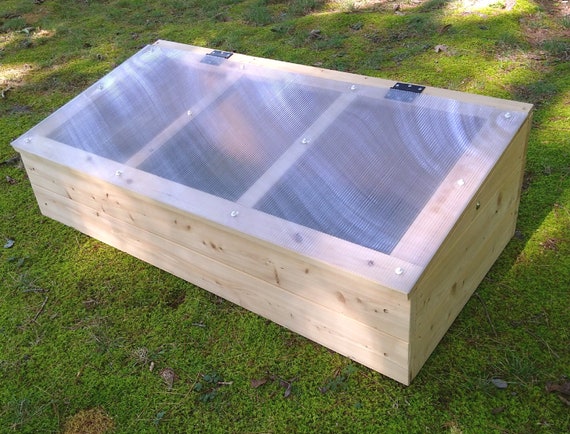
Step 7: Placement and Orientation
Choose a sunny location for your cold frame, preferably with southern exposure to maximize sunlight exposure. Place your cold frame over the raised garden bed.
Troubleshooting Tips: Addressing Common Challenges
- Uneven Ground: If your raised bed is on uneven ground, shim the base of the cold frame with wood scraps to ensure it's level.
- Condensation: Condensation can build up inside the cold frame, creating a humid environment that promotes fungal diseases. To prevent this, ensure adequate ventilation by propping open the lid slightly on sunny days.
- Choosing the Right Glazing: While repurposed windows are a great option, they can be heavy and difficult to handle. Polyethylene sheeting is lightweight and affordable but less durable. Consider your budget and needs when choosing a glazing material.
- Keeping the Heat In: Adding insulation to the North-facing side of the cold frame will help trap in more heat.
Maintenance & Best Practices: Maximizing Your Cold Frame's Effectiveness
- Ventilation: Proper ventilation is crucial to prevent overheating and humidity build-up. On sunny days, open the lid of the cold frame to allow for airflow. As the weather warms up, gradually increase the amount of ventilation.
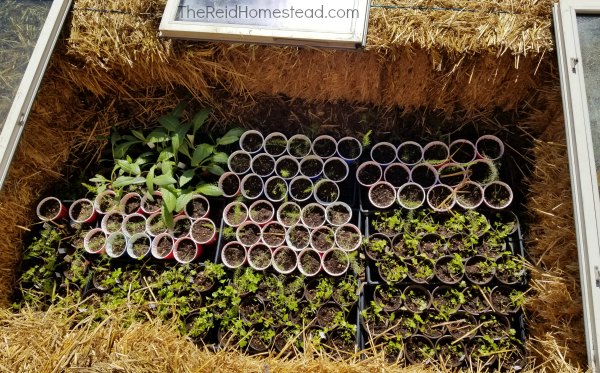
- Watering: Water plants in the cold frame as needed, but be careful not to overwater. The enclosed environment retains moisture, so you may need to water less frequently than you would in the open garden. Water in the morning to allow the foliage to dry before nightfall, minimizing the risk of fungal diseases.
- Pest Control: Monitor plants regularly for pests and diseases. Take action promptly to prevent infestations from spreading.
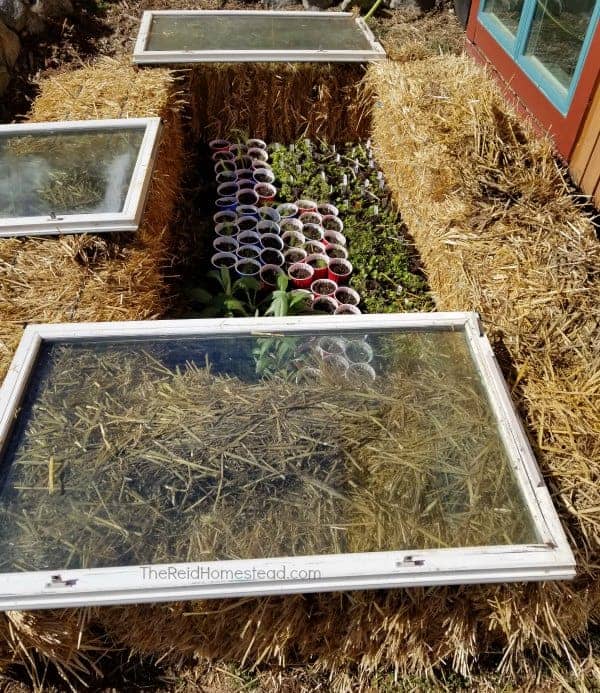
- Crop Selection: Choose crops that are well-suited to cold frame growing, such as lettuce, spinach, kale, radishes, and other leafy greens. You can also use the cold frame to start seedlings of warm-season crops like tomatoes, peppers, and eggplants.
- Mulching: Mulching helps retain moisture and regulate soil temperature, both of which are beneficial for plants growing in a cold frame.
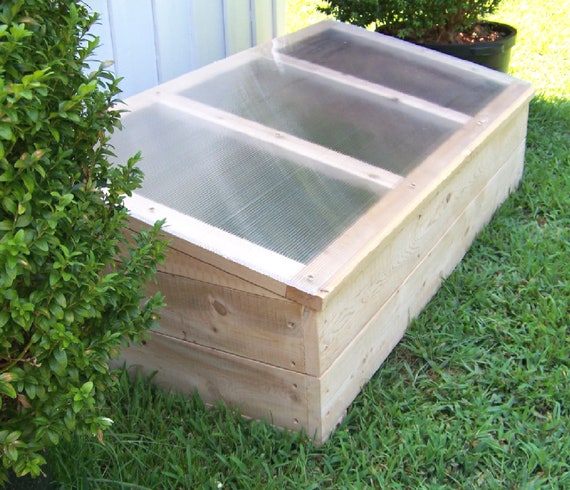
Examples of plants to grow in a cold frame.
- Lettuce: Plant early in the spring, and with the correct ventilation your plants will thrive.
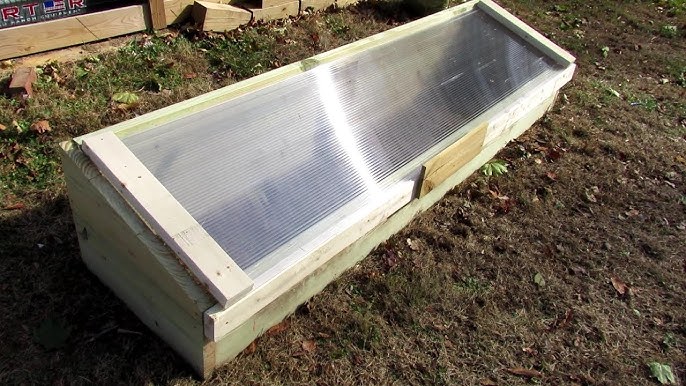
- Spinach: Known to grow well in colder temperatures. This is a perfect plant for your cold frame.
- Kale: Kale is another easy to grow plant for cold frame gardening.
Ready to Extend Your Growing Season?
Building a DIY cold frame is a simple and rewarding project that can significantly enhance your homesteading efforts. By following these steps and incorporating the tips provided, you can create a super-efficient growing environment that allows you to enjoy fresh, homegrown food year-round, even in a small space. Don't let the changing seasons dictate your gardening schedule. Take control and embrace the power of the cold frame!
Now it’s your turn! Share your own cold frame experiences and photos in the comments section below. We'd love to see your creations and learn from your insights.
And for more tips on seed starting, companion planting, and other season extension techniques, be sure to check out our related articles on the Better Homes and Harvests website. Happy gardening!