Worm Tower Magic: Upcycle Your Way to Garden Gold
Imagine transforming your daily kitchen scraps – those coffee grounds, vegetable peels, and forgotten bits of fruit – into the richest, most nourishing fertilizer your garden has ever seen. Sounds like magic, right? Well, it's not magic, but the results certainly feel that way! This magic comes in the form of a worm tower, a contained vermicomposting system that’s surprisingly easy to build and incredibly rewarding to use.
In this guide, we'll take you step-by-step through the process of building your own upcycled worm tower. Perfect for homesteads, backyards, patios, or even balconies, it's a sustainable and efficient composting solution that reduces waste, creates nutrient-rich compost (worm castings and worm tea!), and is wonderfully space-saving. Get ready to turn trash into treasure and unlock the secrets to a flourishing garden!

An upcycled worm tower providing nutrients to a flourishing garden.
Why Worm Towers are Perfect for Homesteaders
For us homesteaders, sustainability and resourcefulness aren't just trends, they're a way of life. That’s where a worm tower truly shines. Here's why it's a must-have addition to any homestead, big or small:
- Space-Saving Solution: Got a small garden, a patio, or just a balcony? No problem! Worm towers are incredibly compact, making them ideal for situations where traditional compost piles simply aren't feasible. They take up minimal space while providing maximum composting power.
- Efficient Composting: Worms are composting champions! They are voracious eaters, diligently processing food scraps into valuable compost in a fraction of the time it takes in a traditional compost pile. Their insatiable appetites turn your waste into garden gold quickly and efficiently.
- Nutrient-Rich Compost: The real magic lies in the worm castings. These are a potent soil amendment, packed with nutrients and beneficial microbes. This "black gold" improves soil structure, water retention, and overall plant health, giving your garden a significant boost.
- Reduced Waste: A worm tower helps you divert kitchen scraps and other organic waste from landfills, contributing to a more sustainable lifestyle and reducing your environmental footprint. It's a small change that makes a big difference.
- Closed-Loop System: By feeding your worms your food scraps and using their castings in your garden, you create a beautiful closed-loop system where waste becomes a valuable resource. This cycle embodies the spirit of homesteading and self-sufficiency.
Key Takeaway: Worm towers offer an efficient and sustainable way to compost, especially for homesteaders with limited space. They embody the principles of reducing waste, reusing resources, and enriching the soil, all while fitting seamlessly into a sustainable lifestyle.
Gathering Your Upcycled Materials: Turning Trash to Treasure
One of the most rewarding aspects of building a worm tower is the opportunity to upcycle materials that would otherwise end up in the trash. This not only reduces waste but also saves you money and adds a unique, rustic charm to your garden. Here’s what you'll need to gather:
- Container Selection: The heart of your worm tower is the container system. Ideal options include plastic totes, buckets, or even old barrels. The trick is to use 3-5 containers of the same size. At least one needs a tight-fitting lid, and one will act as the drainage collector. Consider using food-grade plastic (check for the recycle symbols) or lining non-food-grade containers with a food-safe plastic to prevent any leaching of harmful chemicals into your compost.
- Drilling and Preparation: You’ll need to drill holes to facilitate proper drainage, ventilation, and worm migration between the bins. Use a drill to create drainage holes at the bottom of all containers except the lid. Drill ventilation holes near the top of each container, and larger holes (using a hole saw if you have one) to allow the worms to move freely between the stacked bins.
- Bedding Material: Worms need a comfortable and nutrient-rich bedding material to thrive. Excellent options include shredded cardboard (avoid glossy paper and colored inks), newspaper, coconut coir, or peat moss. Moisten the bedding before introducing the worms.
- Tools Needed: Gather the basic tools you'll need for the project: a drill, a hole saw (optional but helpful), gloves (for handling materials), a measuring tape, and a marker for marking drill points.
- Sourcing Sustainably: Get creative in sourcing your materials! Ask at local restaurants or cafes for discarded buckets or totes. Check online marketplaces for free or low-cost containers. Reach out to friends and neighbors who may have materials they no longer need. Repurposing existing materials is the most sustainable and budget-friendly approach.

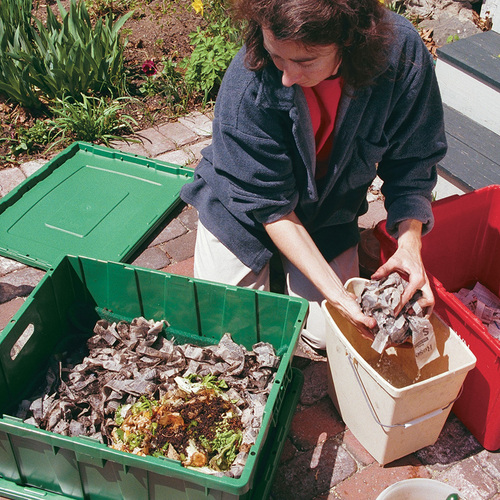
A selection of containers ready to be transformed into a worm tower.
Key Takeaway: By using upcycled materials, you can build a worm tower affordably and sustainably, reducing waste, saving money, and adding a touch of rustic charm to your homestead.
Building Your Worm Tower: A Step-by-Step Guide
Now for the fun part: putting it all together! Follow these steps to build a functional and efficient worm tower:
- Stacking and Nesting: Stack your containers, creating a tiered system. The bottom container will serve as your drainage collector for worm tea. The containers above will house the worms and bedding. Ensure the containers are stable and won't topple over. The lid should sit securely on the top container.
- Creating a Drainage System: Drill a hole near the bottom of the collector bin, and install a spigot or valve to easily drain the "worm tea," a liquid fertilizer. Alternatively, you can simply tilt the bottom bin to collect the liquid.
- Bedding Preparation: Moisten your chosen bedding material thoroughly, squeezing out any excess water. You want it to be damp but not soggy. Fill the bottom bin (the one directly above the collector) with the prepared bedding, leaving a few inches of space at the top.
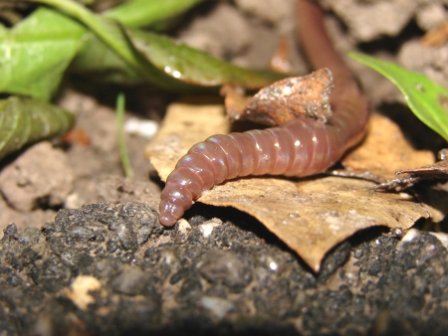
- Introducing the Worms: The best composting worms are red wigglers (Eisenia fetida). You can purchase them online or from local garden supply stores. Gently introduce the worms to their new home, placing them on top of the prepared bedding. They'll naturally burrow into the material.
- Placement Considerations: Place your worm tower in a shaded, protected location, away from direct sunlight and extreme temperatures. A shed, garage, or even a sheltered spot on your patio is ideal.
Key Takeaway: Following these simple steps will ensure a successful worm tower setup for effective composting.
Feeding Your Worms: What to Give and What to Avoid
Happy worms make for happy composting! Understanding what to feed your worms and how to maintain their environment is crucial.
- Worm Diet: Worms enjoy a variety of food scraps, including fruit and vegetable peels, coffee grounds, tea bags (remove the staples), and crushed eggshells.
- Foods to Avoid: Avoid feeding your worms meat, dairy, oily foods, and citrus fruits (in large quantities). These can cause odors and disrupt the composting process.
- Feeding Frequency: Start by feeding your worms small amounts and gradually increase the amount as they consume the food. Observe their consumption rate and adjust the feeding frequency accordingly. A good rule of thumb is to feed them when the previous feeding is mostly gone.
- Burying Food Scraps: To prevent odors and fruit flies, always bury food scraps under the bedding material. This also helps to speed up the composting process.
- Troubleshooting Tips:
- Odors: This is usually caused by overfeeding or feeding the wrong types of food. Reduce the amount of food and make sure you're avoiding meat and dairy. Add more shredded cardboard to the bedding to absorb excess moisture.
- Fruit Flies: Bury food scraps deeper and cover them with a layer of bedding. You can also use a fruit fly trap near the worm tower.
- Slow Composting: The worms may be stressed or the bedding may be too dry or too wet. Check the moisture level and adjust as needed. Add more shredded cardboard or coconut coir if the bedding is too wet. Ensure adequate ventilation.

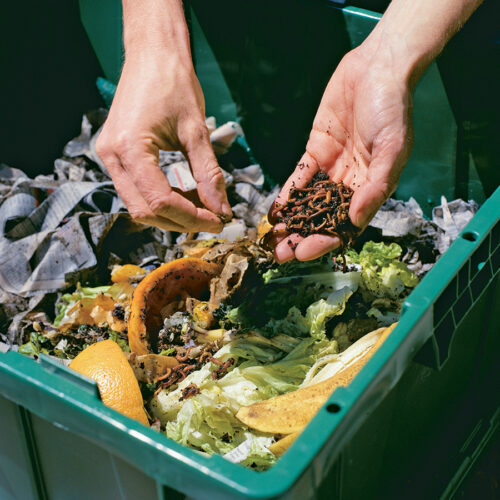
A selection of kitchen scraps ready for the worm tower.
Key Takeaway: Knowing what to feed your worms and how to maintain their environment is crucial for healthy and efficient composting.
Harvesting the Black Gold: Utilizing Worm Castings and Worm Tea
After a few months, you'll start to see the results of your efforts: nutrient-rich worm castings and worm tea!
- Harvesting Worm Castings: There are several methods for harvesting worm castings. One simple method is the migration method. Stop feeding the worms in one of the bins for a few weeks. They'll migrate to the bin with fresh food. Once most of the worms have moved, you can harvest the castings from the empty bin.
- Using Worm Castings: Worm castings are an incredible soil amendment. Use them as a soil amendment by mixing them into your garden beds before planting, top dressing your plants, or using them to make compost tea.
- Collecting Worm Tea: Periodically drain the liquid from the bottom collection bin. This "worm tea" is a potent liquid fertilizer. Dilute the worm tea at a ratio of 1:10 with water before use.
- Storing Worm Castings and Worm Tea: Store harvested worm castings in a cool, dry place. Worm tea should be used within a few days of collection to maintain its nutrient content.
Key Takeaway: Harvesting and utilizing worm castings and worm tea provides valuable nutrients for your garden, improving plant growth and health.
Embracing vermicomposting with an upcycled worm tower is a rewarding and sustainable way to enrich your garden, reduce your environmental footprint, and connect with the natural cycles of your homestead. As the growing season approaches, now is the perfect time to build your own worm tower and start turning kitchen scraps into garden gold! What are your favorite things to feed your worms? Share your tips in the comments below!
![Thriving garden using worm compost]
A thriving garden that has been fertilized using worm compost.