Worm Power: Turn Kitchen Scraps into Garden Gold with Vermicomposting
[ ]
]
Are you tired of tossing food scraps in the trash, knowing they could be put to better use? Imagine transforming those coffee grounds, apple cores, and wilted lettuce leaves into nutrient-rich fertilizer that will supercharge your garden – it's easier than you think! Vermicomposting, or composting with worms, is a sustainable and incredibly effective way to reduce waste while creating "black gold" for your plants. Whether you're a seasoned rural homeowner or a budding urban gardener with limited space, this guide will show you how to start your own vermicomposting bin and unlock the secrets to a thriving, homegrown harvest. Get ready to witness the magic of worm power and turn your kitchen scraps into garden gold!
Understanding the Basics of Vermicomposting
Vermicomposting is a biological process where earthworms, specifically red wigglers (Eisenia fetida), break down organic matter. As they munch their way through your kitchen scraps and yard waste, they excrete castings – a dark, earthy substance packed with beneficial nutrients and microorganisms. These castings are an incredible soil amendment, acting as a natural fertilizer that can dramatically improve plant growth and overall soil health.
Why choose vermicomposting over traditional composting? Several key advantages make it a standout choice for many gardeners:
- Faster Decomposition: Worms accelerate the composting process, breaking down materials much faster than traditional methods.
- Nutrient-Rich Castings: Vermicast (worm castings) contains a higher concentration of plant-available nutrients than traditional compost.
- Indoor Composting: Vermicomposting can be done indoors, making it a practical option for those with limited outdoor space or during colder months.
- Reduced Odor: When managed properly, vermicomposting produces minimal odor compared to traditional composting methods, which rely on higher temperatures to break down material.
- Fine Texture: The resulting castings have a fine, crumbly texture that is easy to work into the soil.
Before you jump in, it's crucial to choose the right worms. Forget those garden earthworms you see after a rain shower. For vermicomposting, you need red wigglers. These worms are surface dwellers, meaning they thrive in the upper layers of decomposing organic matter. You can purchase red wigglers from local nurseries, garden centers, or online retailers. A pound of worms is a great starting point for a small household, and they will quickly multiply if properly cared for.
[ ]
]
Building Your Vermicomposting Bin
Now that you understand the basics, it's time to build your worm bin! You have two main options: purchase a ready-made bin or create your own DIY version. While store-bought bins can be convenient, building your own is often more cost-effective and allows for greater customization.
Here's a simple DIY bin design using a plastic storage tote:
Materials:
- One 10-gallon plastic storage tote (dark-colored is best)
- Drill with ¼-inch and ½-inch drill bits
- Shredded paper (newspaper, cardboard, or office paper)
- Coconut coir (optional)
- Water
Instructions:
- Drill Ventilation Holes: Drill approximately 10-15 ¼-inch holes in the lid of the tote for ventilation.
- Drill Drainage Holes: Drill approximately 6-8 ½-inch holes in the bottom of the tote for drainage. Place the bin on bricks or blocks to allow for airflow underneath.
- Prepare the Bedding: Soak the shredded paper in water until it's thoroughly moist but not dripping. Squeeze out any excess water. Mix in coconut coir for added moisture retention if desired.
- Fill the Bin: Fill the tote about ¾ full with the moist bedding.
- Introduce the Worms: Gently place your red wigglers on top of the bedding and allow them to burrow in.
- Cover: Place the lid on the bin.
Other DIY options include stacking bin systems and wooden bins. Whichever design you choose, ensure it provides adequate drainage, aeration, and a dark, moist environment for your worms.
Feeding Your Worms: What to Give and What to Avoid
A well-balanced diet is crucial for happy and productive worms. Here's a guide to what your worms will love (and what they should avoid):
Worm Diet 101: Yes, Please!
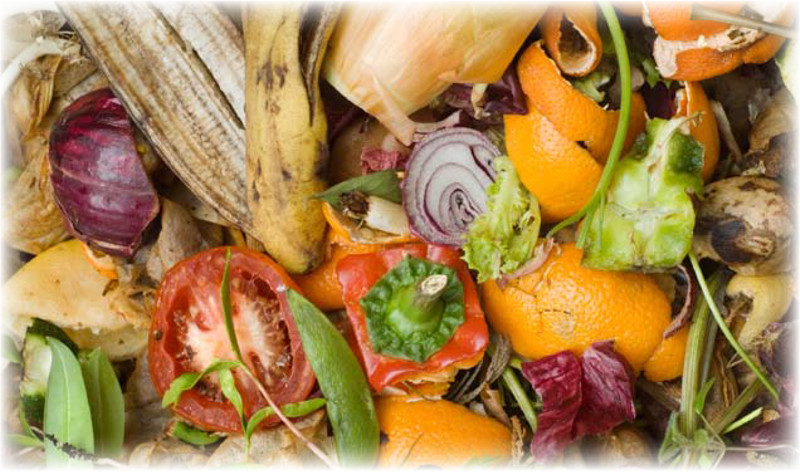
- Vegetable and Fruit Scraps: Apple cores, banana peels (in moderation), carrot tops, potato peelings, melon rinds, lettuce, etc.
- Coffee Grounds and Tea Bags: These are excellent sources of nitrogen.
- Crushed Eggshells: Provide calcium and grit, aiding in the worms' digestion.
- Bread and Pasta (in small amounts): Can attract pests if overfed.
Foods to Avoid: No, Thank You!
- Meat and Dairy: These attract pests, create odors, and can take a very long time to break down.
- Oily Foods: Oils can suffocate the worms and create anaerobic conditions.
- Citrus (in large quantities): Citrus is acidic and can disrupt the pH balance of the bin.
- Onions and Garlic: These can be toxic to worms in large amounts.
[ ]
]
Proper Feeding Techniques:
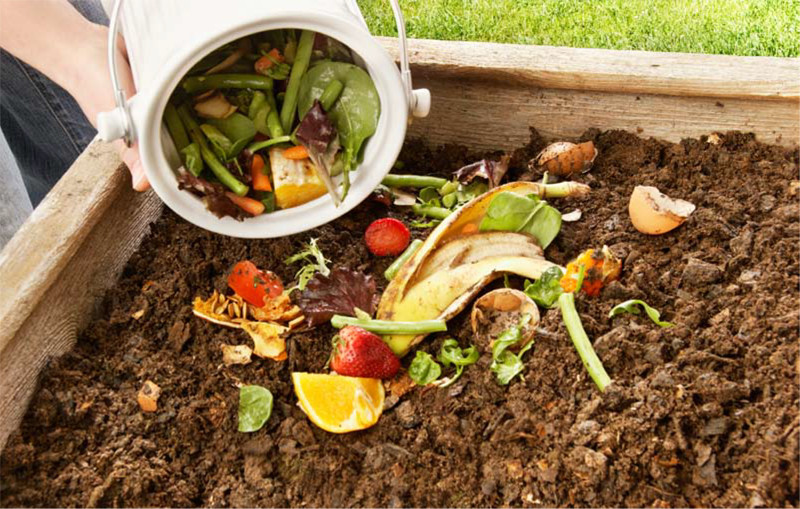
- Bury the Food: To avoid fruit flies and odors, bury food scraps under a few inches of bedding.
- Start Small: Begin with small amounts of food and gradually increase as your worm population grows.
- Vary the Diet: Just like us, worms appreciate a varied diet! Offer a mix of different food scraps to ensure they receive a balanced intake of nutrients.
- Chop it Up: Cutting up large food scraps into smaller pieces will help them decompose faster and make it easier for the worms to consume them.
How Much to Feed:
A general rule of thumb is to feed your worms about half their weight in food scraps per day. However, it's best to start small and observe how quickly they consume the food. If food scraps are piling up, reduce the amount you're feeding them.
Balancing the Diet:
It's important to balance "greens" (nitrogen-rich materials like food scraps and coffee grounds) with "browns" (carbon-rich materials like shredded paper and cardboard). This balance helps maintain a healthy composting environment and prevents odors. Aim for a ratio of about 2:1 or 3:1 (browns to greens).
Maintaining a Healthy Vermicomposting Bin
Maintaining a healthy vermicomposting bin is relatively simple, but consistent attention is key to preventing problems and ensuring a thriving system.
Moisture Level:
The ideal moisture level in a vermicomposting bin is similar to that of a wrung-out sponge. The bedding should be moist but not soggy. You can check the moisture level by squeezing a handful of bedding. If water drips out, it's too wet. If it crumbles and feels dry, it's too dry. Adjust the moisture level by adding water (if too dry) or dry bedding (if too wet).
Aeration:
Worms need oxygen to survive. Aerate the bin regularly by gently turning the bedding with a garden fork or trowel. This helps prevent anaerobic conditions and foul odors.
[ ]
]
Temperature:
Red wigglers thrive in temperatures between 55-85°F (13-29°C). If you live in a colder climate, you may need to insulate your bin during the winter months. Conversely, if you live in a hotter climate, you may need to provide shade or cooling measures to prevent the bin from overheating.
Troubleshooting:
- Fruit Flies: Fruit flies are a common nuisance in vermicomposting bins. Prevent them by burying food scraps completely, ensuring good ventilation, and using a lid with tight-fitting seals. You can also trap fruit flies with a simple vinegar trap.
- Odors: Foul odors are usually a sign of anaerobic conditions or overfeeding. Aerate the bin regularly, reduce the amount of food you're feeding, and ensure adequate drainage.
- Worms Escaping: If worms are escaping from the bin, it could be a sign that the conditions are not ideal (too wet, too dry, too acidic, or not enough food). Check the moisture level, pH, and food supply and adjust accordingly.
Harvesting and Using Worm Castings (Black Gold!)
After several months, your vermicomposting bin will be teeming with nutrient-rich worm castings – the "black gold" that will transform your garden.
When to Harvest:
The castings are ready to harvest when they have a dark, crumbly texture and an earthy smell. The bin should be mostly filled with castings, with minimal visible food scraps.
Harvesting Methods:
There are several simple methods for harvesting worm castings:
- Dump and Sort: Dump the contents of the bin onto a tarp and carefully sift through the material, separating the castings from the worms and any remaining food scraps. Return the worms to the bin with fresh bedding.
- Migration Method: Stop feeding the worms for a week or two. Then, move all the castings to one side of the bin and add fresh bedding and food scraps to the other side. The worms will gradually migrate to the fresh side, leaving the castings behind.
- Light Separation: Dump the contents of the bin onto a tarp in a bright, sunny location. The worms will burrow down to avoid the light, allowing you to scrape off the top layer of castings. Repeat this process until you have harvested all the castings.
[ ]
]
Using Worm Castings:
Worm castings are a versatile soil amendment that can be used in a variety of ways:
- Direct Application: Apply castings directly to garden beds as a top dressing or mix them into the soil when planting.
- Worm Tea: Make worm tea by steeping castings in water. Use the tea as a foliar spray or soil drench to provide plants with a boost of nutrients and beneficial microbes. To make worm tea, simply place a handful of castings in a cloth bag and steep it in a bucket of water for 24-48 hours.
- Seed Starting Mix: Add castings to your seed starting mix to provide seedlings with essential nutrients for healthy growth.
Benefits of Worm Castings:
Worm castings are a powerhouse of nutrients and beneficial microbes. They improve soil structure, water retention, and drainage. They also help suppress plant diseases and pests. Studies have shown that worm castings can significantly increase plant growth and yield.
From Scraps to Success: The Vermicomposting Journey
Vermicomposting offers a satisfying cycle: less waste going to landfill, richer soil, and healthier, happier plants. Embrace the “worm powered” approach and bring your homestead closer to a closed-loop system, minimizing waste and maximizing the bounty of your garden. Spring is the perfect time to start a vermicomposting bin, giving you plenty of time to produce nutrient-rich castings for your summer garden.
Have you tried vermicomposting? What tips would you add? Share your experiences and questions in the comments below!