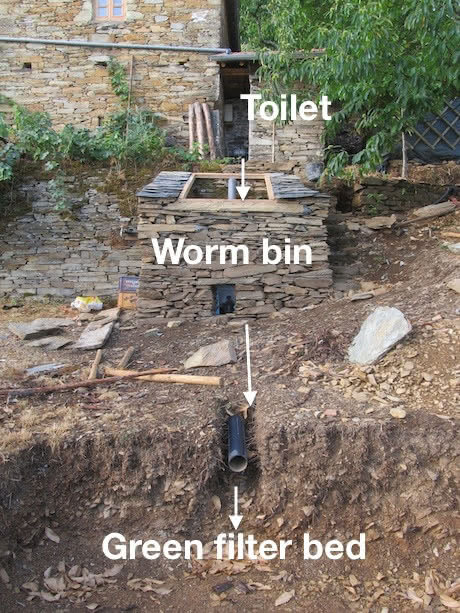
Worm Power: Build a DIY Vermicomposting System for a Thriving Homestead
Are you ready to take your homestead’s fertility to the next level? Like many, I was tired of tossing valuable kitchen scraps into the trash. It felt like a waste of resources, especially when I knew those scraps could be transformed into something incredibly beneficial for my garden. That’s when I discovered the magic of vermicomposting – using worms to break down organic waste and create nutrient-rich compost. Not only does it drastically reduce landfill waste, but it also provides your plants with the "black gold" they crave! It's a fantastic DIY homesteading project for anyone looking to boost their self-sufficient DIY lifestyle. So, grab your gloves, and let's get started on building a simple, effective vermicomposting system!
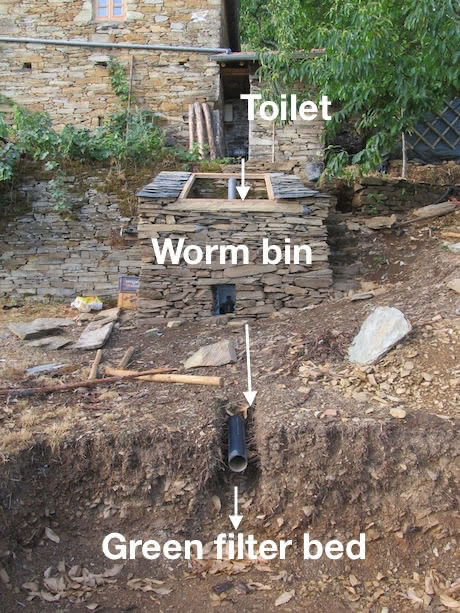
What is Vermicomposting and Why is it Great for Homesteaders?
Vermicomposting, or worm composting, is a natural process where worms, primarily red wigglers (Eisenia fetida), break down organic matter. The end product, known as worm castings, is a fantastic soil amendment, packed with beneficial microbes and nutrients that promote plant growth. For homesteaders, this translates to healthier gardens, reduced reliance on synthetic fertilizers, and a closed-loop system where waste becomes a valuable resource. It truly embodies the spirit of sustainable homesteading projects.
Step-by-Step Guide: Building Your DIY Vermicomposting System
Here's a detailed, step-by-step guide to building your own vermicomposting system. This design is simple, affordable, and perfect for beginners.
Materials List:
- Two Plastic Bins (approximately 15-20 gallon capacity each): Choose opaque bins to keep the worms happy. Dark colors work best. ($20-$40 total)
- Drill with various sized drill bits: For ventilation and drainage.
- Bedding Material: Shredded newspaper, cardboard, coconut coir, or a combination. ($0 - recycle what you have!)
- Red Wiggler Worms: Approximately 1 lb to start. You can order these online or find them at local garden centers. ($20-$40)
- Spray Bottle: For keeping the bedding moist.
- Brick or Wood Blocks: To elevate the bottom bin.
- (Optional) Spigot: For easy drainage of "worm tea." ($5-$10)
Approximate Total Cost: $45 - $90 (depending on whether you purchase worms and spigot)
Step 1: Prepare the Bins
- Drill Drainage Holes: In the bottom of one bin (this will be your working bin), drill approximately 10-15 drainage holes, about ¼ inch in diameter.
- Drill Ventilation Holes: In both bins, drill ventilation holes near the top, on all sides. Use a smaller drill bit (around ⅛ inch). Adequate airflow is essential for healthy worms.
Safety Warning: Always wear safety glasses when drilling.
Step 2: Set Up the System
- Place the bin with drainage holes inside the other bin. The bottom bin will act as a reservoir to collect "worm tea" (a nutrient-rich liquid fertilizer).
- Elevate the top bin slightly using bricks or wood blocks. This will allow for better drainage and prevent the worms from sitting in excess moisture.
Step 3: Prepare the Bedding
- Moisten your chosen bedding material thoroughly. It should be damp like a wrung-out sponge. Too wet, and the worms will drown; too dry, and they won't be able to breathe.
- Fluff the bedding and fill the working bin about ¾ full. A good mix ensures proper aeration.
Step 4: Introduce the Worms
- Gently add your red wiggler worms to the prepared bedding.
- Cover the top of the bedding with a layer of damp newspaper or cardboard to keep the worms happy and dark.
Step 5: Feeding Your Worms
- Start slowly! Worms can only eat so much at once.
- Bury small amounts of food scraps under the bedding. Good options include fruit and vegetable scraps, coffee grounds, tea bags (remove the staples!), and crushed eggshells.
- Avoid feeding them meat, dairy, oily foods, or citrus in large quantities, as these can attract pests and create unpleasant odors.
Step 6: Maintenance
Moisture: Check the moisture level regularly. The bedding should always be damp. If it's too dry, spray it with water. If it's too wet, add more dry bedding.
Feeding: Feed your worms every 2-3 days, or as needed.
Harvesting Worm Tea: If you installed a spigot, drain the worm tea every few weeks. Dilute it with water (1 part worm tea to 10 parts water) before using it to fertilize your plants.
Harvesting Worm Castings: After several months (typically 3-6), your bin will be full of worm castings. There are several methods for harvesting:
- Dump and Sort: Dump the contents of the bin onto a tarp and create a cone. The worms will burrow to the bottom, allowing you to scrape off the castings from the top.
- Migration Method: Stop feeding one side of the bin for a week or two. The worms will migrate to the side with food, allowing you to harvest the castings from the empty side.
- Divide and Conquer: If you added a second "working bin" on top, the worms will migrate upwards toward the new food source. You can then remove the original bin filled with castings.
Step 7: Using Your Worm Castings
- Mix worm castings into your garden soil to improve its structure and fertility.
- Use them as a top dressing for your plants.
- Make worm casting tea by steeping them in water and using the liquid to fertilize your plants.
Troubleshooting Tips
- Fruit Flies: Bury food scraps completely and avoid overfeeding. You can also use a fruit fly trap.
- Bad Odors: This usually indicates that the bin is too wet or that you're feeding the worms the wrong types of food. Adjust moisture levels and be mindful of what you're feeding them.
- Worms Escaping: This can happen if the bin is too wet, too dry, or too acidic. Check the moisture level and add some crushed eggshells to balance the pH.
- Slow Decomposition: Make sure the bedding is adequately moist and that the bin is well-ventilated.
Vermicomposting: A Sustainable Homesteading Win!
Building a DIY vermicomposting system is a rewarding project that aligns perfectly with the principles of self-sufficient living. It's an excellent way to reduce waste, improve your garden's health, and create a more sustainable homestead. Don't be intimidated – it's easier than you think!
Now it's your turn! Have you tried vermicomposting? What tips and tricks have you learned along the way? Share your experiences, ask questions, and post photos of your own vermicomposting systems in the comments below. Let's build a thriving community of DIY homesteaders together! Let’s connect and help each other succeed.