Worm Power: Build a Backyard Vermicomposting Oasis for Unbeatable Soil
That moment when you're overflowing with zucchini and tomatoes, feeling like you can’t possibly eat any more… but then there’s also the pile of veggie scraps, fallen leaves, and spent plants that needs a purpose. What if you could turn that waste into something even more valuable: super-rich soil teeming with life? Vermicomposting, or worm composting, offers a sustainable and incredibly effective way to recycle kitchen scraps and yard waste into a powerhouse soil amendment. Get ready to transform your "trash" into garden gold!
In this ultimate guide, we'll walk you through everything you need to know to build your own backyard vermicomposting oasis. From choosing the right system to feeding your wiggly workers, you'll discover how to create nutrient-rich compost, reduce landfill waste, boost plant growth, and even brew your own liquid fertilizer. So, ditch the guilt about food waste and join us on this journey to unlocking super soil!

Understanding Vermicomposting: More Than Just Worms
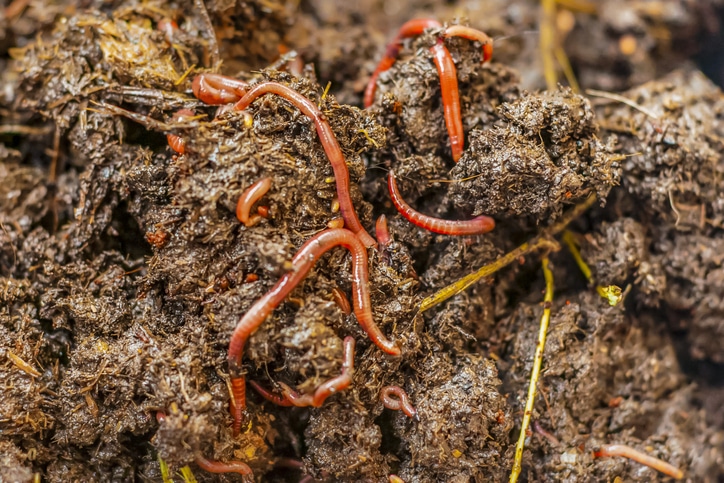
Vermicomposting is a composting method that uses worms—specifically, red wigglers (Eisenia fetida)—to break down organic matter. Unlike traditional composting, which relies on heat and bacteria, vermicomposting leverages the power of worms to efficiently transform food scraps into a nutrient-rich substance called vermicast (or worm castings). These castings are an incredible soil amendment, packed with beneficial microbes, nutrients, and enzymes that plants love.
Why choose vermicomposting? Beyond the exceptional soil quality, it's an environmentally responsible choice. The EPA estimates that food waste makes up a significant portion of municipal solid waste sent to landfills. Vermicomposting allows you to divert this waste from landfills, reducing methane emissions and conserving valuable resources. Plus, you’re creating your own fertilizer, eliminating the need to purchase synthetic alternatives.
Let's dispel some myths: A properly maintained vermicomposting system doesn't smell bad! The key is to avoid overfeeding and provide adequate ventilation. And no, it won't attract pests if you follow the guidelines we’ll discuss below. In fact, vermicompost can actually help prevent pest problems in your garden by improving soil health and plant immunity.

Key Takeaway: Vermicomposting is an easy, effective, and eco-friendly way to transform kitchen scraps into valuable resources for the organic garden.
Designing Your Worm Compost Oasis: Choosing the Right System
The beauty of vermicomposting is its adaptability. There's a system to suit every space, budget, and lifestyle. Here are a few options to consider:
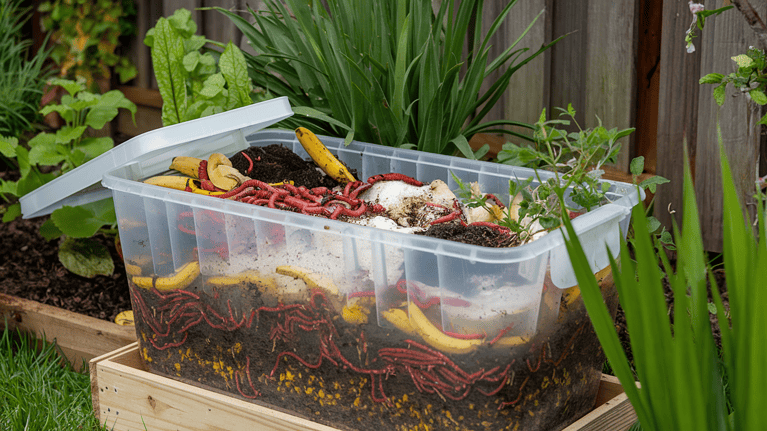
DIY Bins: These are often the most cost-effective and customizable. You can use plastic totes, wooden boxes, or even repurposed containers. The key is to ensure proper ventilation and drainage.
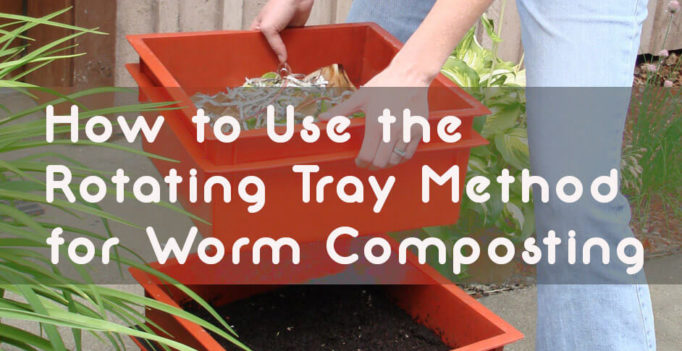
Commercial Systems (Tiered Trays): These systems are designed for convenience and ease of harvesting. They consist of multiple trays stacked on top of each other. As the worms process the food in the top tray, they migrate to the next tray, leaving behind finished compost.
In-Ground Systems (Worm Towers): Perfect for small spaces or directly feeding plants, worm towers are buried in the ground with holes allowing worms to exit to eat, then return. Food scraps are placed inside the tower, providing a constant source of nutrients to the surrounding soil.
Consider these factors when choosing a system:
- Space: How much space do you have available? A large backyard allows for multiple bins, while a small balcony might be better suited for a tiered system or worm tower.
- Budget: DIY bins are the most affordable, while commercial systems can be more expensive.
- Climate: Where will you place your bin? In warmer climates, you'll need to protect it from excessive heat. In colder climates, you might need to insulate it. Shady locations are ideal.
- Aesthetics: Do you want a system that blends seamlessly into your garden? Commercial systems often offer a more aesthetically pleasing design.
- Volume of Food Waste: How much food waste do you generate each week? This will determine the size of your system.

Key Takeaway: Select a vermicomposting system that fits your lifestyle, available space, and composting goals.
Building Your DIY Worm Bin: A Step-by-Step Guide
Ready to get your hands dirty? Here’s how to build a simple and effective worm bin from a plastic tote:
Materials:
- Plastic tote (approximately 18-20 gallons)
- Drill
- Bedding (shredded newspaper, cardboard, coconut coir)
- Red wigglers (1-2 pounds)
Instructions:
- Drill Ventilation Holes: Drill several ventilation holes in the lid and sides of the tote, near the top. This will ensure adequate airflow.
- Add Bedding: Moisten the bedding until it's damp like a wrung-out sponge. Add the moistened bedding to the tote, filling it about two-thirds full.
- Introduce the Worms: Gently introduce the red wigglers to their new home. Spread them evenly over the bedding.
Tips for Success:
- Maintain Proper Moisture Levels: The bedding should be damp but not soggy. Add water as needed to maintain the right moisture level.
- Avoid Overfeeding: Start with small amounts of food scraps and gradually increase the amount as the worm population grows.
- Provide a Balanced Diet: Offer a variety of food scraps, including fruit and vegetable scraps, coffee grounds, and tea bags.

Key Takeaway: Building a DIY worm bin is a simple and rewarding project that can be completed in an afternoon.
Feeding Your Worms: A Vermicomposting Menu
Just like us, worms have their favorite foods and foods they should avoid. Here's a breakdown of what to feed your wiggly companions:
Worms Love:
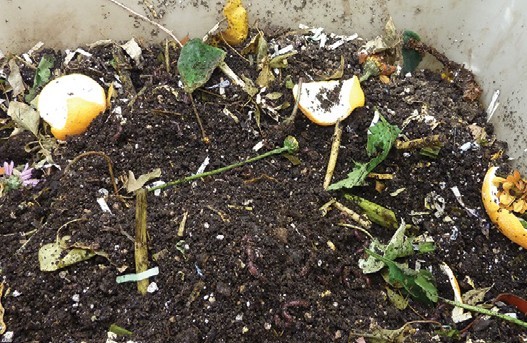
- Fruit and vegetable scraps (avoid citrus in large quantities)
- Coffee grounds (a great source of nitrogen)
- Tea bags (remove the staples)
- Crushed eggshells (provide calcium and grit)
Foods to Avoid:
- Meat
- Dairy
- Oily foods
- Citrus rinds (in large quantities, the acidity can be harmful)
Proper Feeding Techniques:
- Bury food scraps under the bedding to prevent odors and fruit flies.
- Avoid overfeeding, which can lead to anaerobic conditions and foul smells.
- Offer a balanced diet of various food scraps to ensure the worms receive all the nutrients they need.
Start by feeding your worms a small amount of food scraps (about a handful) every few days. As the worm population grows, you can gradually increase the amount of food. A good rule of thumb is to feed them about half their weight in food scraps per day. Observe how quickly the worms are consuming the food and adjust accordingly.

Key Takeaway: Feed your worms a balanced diet of appropriate food scraps and avoid overfeeding to maintain a healthy and odor-free bin.
Harvesting Worm Compost and Compost Tea: Liquid Gold
After several months, you'll have a bin full of rich, dark vermicompost ready to be harvested. This nutrient-packed substance can work wonders in your garden!
Harvesting Worm Compost:
There are a few methods for harvesting worm compost:
- Dump and Sort: This involves dumping the contents of the bin onto a tarp and manually sorting out the worms from the compost.
- Migration Method: This method relies on the worms' natural tendency to migrate towards food. Stop adding food to one side of the bin and place fresh food on the other side. Over time, the worms will migrate to the side with food, leaving behind finished compost.
How to use worm compost:
- Amend Garden Soil: Mix worm compost into your garden soil before planting to improve soil structure, drainage, and fertility.
- Potting Mix: Add worm compost to your potting mix to give your plants a boost of nutrients.
- Top-Dress Plants: Sprinkle worm compost around the base of your plants to provide a slow-release source of nutrients.
Making Compost Tea:
Compost tea is a liquid fertilizer made by steeping worm compost in water. It's a great way to provide a quick boost of nutrients to your plants.
To make compost tea:
- Fill a bucket with water (preferably non-chlorinated).
- Add a handful of worm compost to the bucket.
- Let the mixture steep for 24-48 hours, stirring occasionally.
- Strain the tea through a cheesecloth or fine-mesh sieve.
- Dilute the tea with water before using it on your plants. A ratio of 1:10 is generally recommended.


Key Takeaway: Worm compost and compost tea are powerful amendments that can significantly improve plant health and yields.
Troubleshooting and Maintenance: Keeping Your Worms Happy
Like any living system, your worm bin will require some maintenance to keep it running smoothly. Here are some common problems and how to solve them:
- Foul Odors: This usually indicates overfeeding or anaerobic conditions. Reduce the amount of food you're giving the worms and make sure the bin has adequate ventilation.
- Fruit Flies: These pesky insects are attracted to rotting food. Bury food scraps under the bedding and add a thicker layer of bedding to prevent them from laying eggs.
- Slow Composting: If the worms aren't breaking down food scraps quickly enough, make sure the bedding is damp but not soggy and that the bin has adequate ventilation. You may also need to add more worms or provide a more balanced diet.
Maintenance tips:
- Regularly check moisture levels and add water as needed.
- Turn the compost occasionally to improve aeration.
- Replace the bedding every few months to prevent it from becoming compacted.

Key Takeaway: Regular maintenance and troubleshooting are essential for maintaining a healthy and productive vermicomposting system.
Embrace the Wormy Magic
Vermicomposting is more than just a way to recycle food waste; it's a way to connect with nature, improve soil health, and create a more sustainable lifestyle. Even a small worm bin can make a big difference in your garden and the environment. By embracing the "wormy magic," you can transform your kitchen scraps into a valuable resource that will nourish your plants and enrich your soil for years to come. So, get started today, and watch your garden thrive! Now is the perfect time to set up a worm composting system before the peak of the growing season to start accumulating food scraps.

What are you waiting for? Start your journey to richer soil and a thriving garden today! Share your vermicomposting triumphs (or trials!) in the comments below, and tag us in your social media posts with #BetterHomesandHarvests #WormComposting #BackyardHomestead.