Worm Power: A Beginner's Guide to Vermicomposting for a Thriving Garden
Are you tired of tossing your vegetable scraps into the trash, wishing there was a more productive way to use them? Maybe you've tried composting before, but struggled to get it just right, leaving you with lackluster soil that doesn't quite give your plants the boost they need. I've been there too! But there's a simple, yet powerful solution that has completely transformed my garden: vermicomposting.
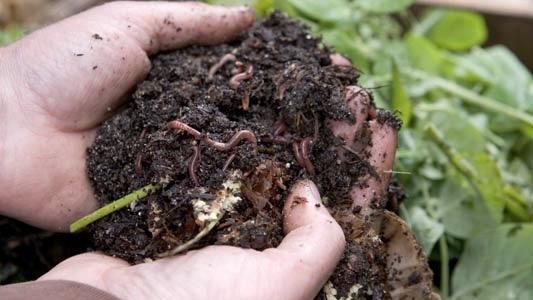
Vermicomposting, or worm composting, is an incredibly efficient and rewarding way to turn your kitchen waste into a potent soil amendment. Think of it as harnessing the power of tiny superheroes to create "black gold" for your plants. This post will reveal how to easily transform food scraps into garden gold with worms. Better yet, vermicomposting significantly boosts plant growth, reduces landfill waste, and is surprisingly manageable, even in small spaces. It’s different from hot composting because it uses worms and a cool, controlled environment to break down materials. Let's dive in and discover how you can unleash worm power in your garden! We'll cover setting up your worm bin, feeding and caring for your wriggly helpers, harvesting your nutrient-rich castings, and using them to create an incredibly thriving garden.

Setting Up Your Vermicomposting System
Creating the right environment for your worms is the first step to vermicomposting success. Think of it like setting up a cozy little home for your new garden assistants.
Choosing the Right Bin:
The good news is that vermicomposting bins can be surprisingly simple. You have several options:
- DIY: This is the most budget-friendly approach. You can repurpose a plastic storage tote (opaque is best) by drilling ventilation holes in the lid and drainage holes in the bottom. Make sure the plastic is food-grade.
- Store-Bought: There are many commercially available worm bins designed for optimal vermicomposting. These often feature multiple trays for easier harvesting.
- Size Considerations: A good rule of thumb is 1 square foot of surface area per pound of food scraps per week. If you generate a lot of kitchen waste, opt for a larger bin. For small spaces or limited waste, a smaller bin will suffice.
Creating Cozy Bedding:
Bedding is crucial because it provides a habitat for your worms, helps retain moisture, and adds carbon to the system. Think of it as their comfy blanket and source of nourishment.
- Materials: Shredded newspaper (avoid glossy paper), coconut coir, shredded cardboard, and peat moss all work well.
- Preparation: Moisten the bedding thoroughly with water, squeezing out any excess like a wrung-out sponge. The bedding should be damp but not soggy. Fluff the bedding to create air pockets.
Location, Location, Location:
Finding the right spot for your worm bin is essential for their comfort and productivity.
- Temperature: Worms thrive in temperatures between 55°F and 77°F.
- Ideal Placement: A garage, basement, shaded outdoor area, or even a closet are all suitable options. Avoid direct sunlight, which can overheat the bin. If you're keeping your bin indoors, consider placing a tray underneath to catch any drainage.
Worm Selection: Red Wigglers Reign Supreme:
Not all worms are created equal when it comes to vermicomposting.
- Best Worms: Red wigglers ( Eisenia fetida) are the composting champions. They are surface dwellers and voracious eaters.
- Where to Buy: You can purchase red wigglers online from reputable suppliers or at local garden centers.
- Quantity to Start With: A pound of worms (approximately 1,000) is a good starting point for a standard-sized bin.
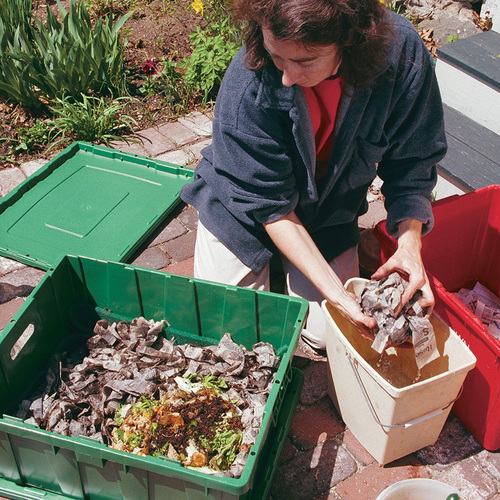
With the proper bin setup, you are well on your way! The right bedding and location create the basis for worm happiness and efficient composting.
Feeding and Caring for Your Worms: A Guide to Happy, Healthy Composters
Once your vermicomposting system is set up, it's time to nourish your wriggly friends and keep them happy. Understanding their dietary preferences and creating a balanced environment is key to successful vermicomposting.
What to Feed Your Worms:
Worms aren't picky eaters, but they do have their preferences.
- Acceptable Food Scraps: Fruit and vegetable scraps (avoid citrus in large quantities), coffee grounds (a favorite!), tea bags (remove the staples), and crushed eggshells (great for grit and calcium). I've found my worms particularly enjoy melon rinds and coffee grounds.
- What to Avoid: Meat, dairy, oily foods, and large amounts of citrus are best avoided. These items can create unpleasant odors, attract pests, and disrupt the balance of your bin.
Feeding Frequency:
Start small and observe how quickly the worms process the food.
- Gradual Introduction: Begin by burying a small amount of food scraps (a handful or two) under the bedding.
- Monitor Consumption: Check the bin every few days to see how quickly the worms are eating. Adjust the amount of food accordingly. It's always better to underfeed than overfeed.
Maintaining Proper Moisture Levels:
Moisture is crucial for worm health and decomposition.
- The Sponge Test: The bedding should feel like a wrung-out sponge – damp but not dripping.
- Adjusting Moisture: If the bin is too dry, mist it with water. If it's too wet, add dry bedding materials.
Troubleshooting Common Issues:
Even with the best intentions, you may encounter some common vermicomposting challenges.
- Fruit Flies: Prevent fruit flies by burying food scraps completely under the bedding. You can also use fruit fly traps.
- Unpleasant Odors: Foul smells usually indicate that the bin is too wet or that you're feeding your worms the wrong types of food. Adjust the moisture level and remove any offending items.
- Slow Decomposition: If the worms aren't processing food quickly enough, try adding more bedding or increasing the temperature slightly (within the acceptable range).
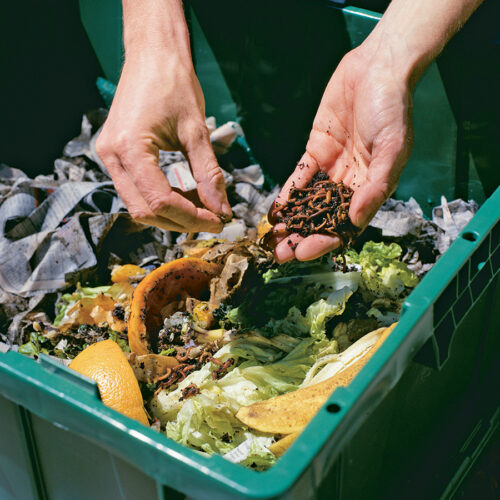
By understanding what to feed your worms and maintaining the right environment, you are setting yourself up for vermicomposting success! Don’t overfeed and pay attention to moisture levels.
Harvesting Your Vermicompost ("Black Gold"): Separating Treasure from Trash
After several months of diligent feeding and care, your worm bin will be brimming with nutrient-rich vermicompost, often referred to as "black gold." Harvesting this precious resource is the rewarding culmination of the vermicomposting process.
Harvesting Methods: Choosing the Right Approach:
There are several methods for separating the vermicompost from the worms. I'll focus on a simple one ideal for beginners.
- Dumping and Sorting (Beginner-Friendly): This method involves dumping the contents of the bin onto a tarp or large sheet of plastic. Create small cone-shaped piles of the compost. The worms will burrow to the bottom of each cone. Gently scrape off the top layer of vermicompost from each cone, and repeat until you have mostly worms left. Return the worms to the bin with fresh bedding. This is a more time-consuming method but is ideal for those just starting out because you don't need any extra tools.
- Timing is Everything: Your vermicompost is ready to harvest when it has a dark, crumbly texture and a rich, earthy smell. It should resemble coffee grounds.
Collecting Worm Tea: Liquid Gold for Your Plants:
Don't overlook the valuable liquid that drains from your worm bin, known as "worm tea" or "leachate."
- What it is: Worm tea is a nutrient-rich liquid fertilizer that contains beneficial microbes.
- How to Collect it: Elevate your worm bin slightly and place a container underneath to collect the draining liquid.
- Benefits: Worm tea can be used to fertilize plants, improve soil health, and suppress plant diseases.
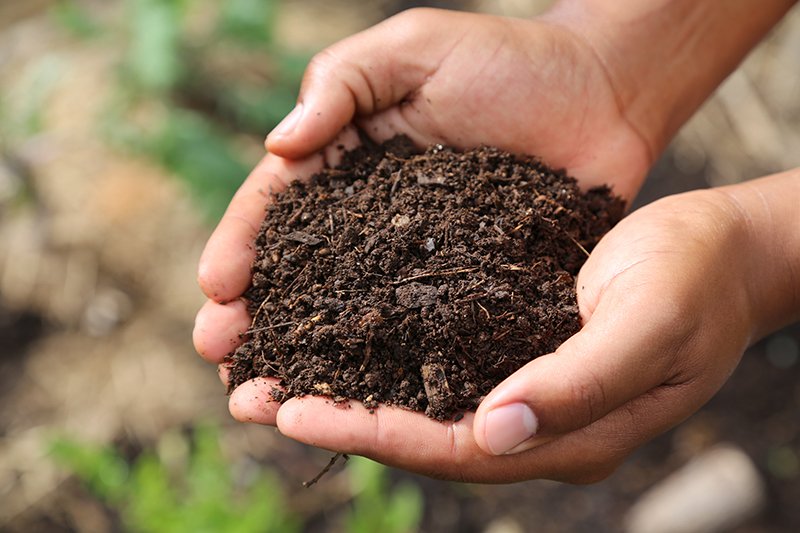
Harvesting vermicompost is the rewarding culmination of the process! Understanding the different methods allows you to choose the best one for your setup. And don't forget the worm tea!
Using Vermicompost in Your Garden: Unleashing the Power of Worm Castings
Now that you have your own supply of vermicompost, it's time to put it to work in your garden! Worm castings are a versatile soil amendment that can significantly improve plant health and growth.
As a Soil Amendment:
- Mixing into Garden Beds: Incorporate vermicompost into your garden beds before planting. This will improve soil structure, water retention, and nutrient availability.
- Potting Mixes: Add vermicompost to your potting mixes when planting seedlings or repotting plants. A general ratio is 1 part vermicompost to 3 parts potting mix.
- Planting Seedlings: Place a handful of vermicompost in the planting hole when transplanting seedlings.
As a Top Dressing:
- Applying Around Existing Plants: Sprinkle a layer of vermicompost around the base of existing plants. This will provide a slow-release source of nutrients.
Vermicompost Tea: A Liquid Elixir for Your Plants:
- Diluting Worm Tea: Dilute worm tea with water before using it. A general ratio is 1 part worm tea to 10 parts water.
- Foliar Spray: Use a spray bottle to apply diluted worm tea to plant leaves. This can help to prevent diseases and provide a boost of nutrients.
- Root Drench: Pour diluted worm tea around the base of plants to deliver nutrients directly to the roots.
Benefits for Plant Growth:
- Improved Soil Structure: Vermicompost helps to create a crumbly soil structure, which improves aeration and drainage.
- Increased Water Retention: Vermicompost acts like a sponge, holding water in the soil and making it available to plants.
- Natural Fertilization: Vermicompost is rich in essential nutrients that plants need to thrive.
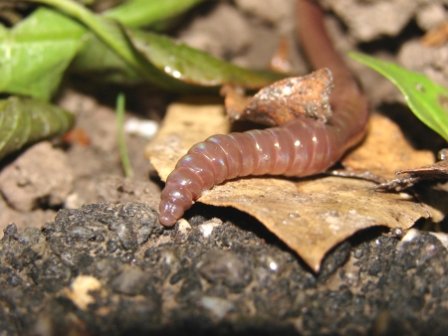
Vermicompost is a versatile soil amendment that can significantly improve plant health and growth. Use it in a variety of ways to maximize its benefits.
From Waste to Wonderful: Transforming Your Garden with Worms
Vermicomposting is more than just a way to get rid of food scraps; it's a sustainable and rewarding practice that connects you to the cycle of life. By harnessing the power of worms, you can create a thriving garden, reduce your environmental impact, and enjoy the satisfaction of transforming waste into a valuable resource. Don't feel overwhelmed by the details. Starting small is perfectly okay! Begin with a simple bin and a handful of worms, and watch as your garden transforms with the magic of "black gold".
And as summer draws closer, consider how you can start prepping your vermicompost now for a future bountiful harvest of healthy, thriving plants. Experiment with different methods and food scraps to see what works best for you and your wriggly helpers.

Now, it's your turn!
Share your own vermicomposting experiences in the comments below! What tips and tricks have you learned along the way? What challenges are you currently facing in your gardens? Share your photos of your gardens using vermicompost with the hashtag #BHHWormPowerMagic.
If you found this post helpful, please share it with your friends and family who might be interested in vermicomposting! And be sure to check out our other articles on composting, gardening, and sustainable living on Better Homes and Harvests! Let's grow together!