Winter's Bounty: Build an Affordable Root Cellar for Beginner Homesteaders
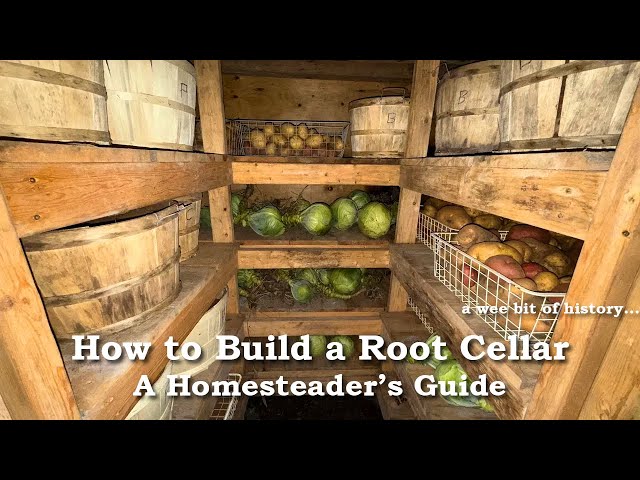
Imagine biting into a crisp, sweet carrot in the middle of winter, harvested not from a grocery store shelf, but from your own backyard. That's the magic of a root cellar. For beginner homesteaders focused on food security and self-sufficiency, a root cellar is an invaluable asset. It's a simple, time-tested method for preserving the bounty of your garden, allowing you to enjoy fresh, nutritious vegetables throughout the cold months without relying on expensive and often less flavorful store-bought produce. This guide will walk you through building your own small, insulated, and affordable root cellar, perfect for storing potatoes, carrots, beets, and other root vegetables. Even if you're new to construction, we'll break down each step into manageable tasks, ensuring a successful and rewarding project.
Why a Root Cellar? The Homesteading Advantage
In a world increasingly focused on sustainability and local food systems, the root cellar offers a powerful connection to the seasons and your own food supply. Why is it so valuable?
- Food Security: A root cellar provides a buffer against food shortages and price fluctuations. You’re in control of your food supply, regardless of external factors.
- Cost Savings: Reducing your reliance on grocery store produce, especially during the winter months, can significantly lower your food bill.
- Improved Nutrition: Home-grown vegetables, stored properly, retain more nutrients than those shipped long distances and stored for extended periods in supermarkets.
- Sustainability: Root cellars are a low-energy, environmentally friendly way to preserve food, minimizing your carbon footprint.
- Enhanced Flavor: Many vegetables actually improve in flavor during storage, developing a sweeter, richer taste.
Planning Your Root Cellar: Site Selection and Design
Before you grab a shovel, careful planning is essential. Here's what to consider:
- Location: The ideal location is a cool, shaded area with good drainage. A north-facing slope is often best, as it receives less direct sunlight. Avoid areas prone to flooding or with high water tables. If you don't have a slope, a buried structure in a well-drained area will work.
- Size: Start small! A 4x6 foot root cellar is often sufficient for a beginner homesteader. You can always expand later.
- Design: We'll focus on a simple, partially buried design with insulated walls and a well-ventilated roof. This provides a stable environment for your vegetables.
Building Your Root Cellar: A Step-by-Step Guide
This project assumes a partially buried structure. Adjust the steps accordingly if you're building a completely underground or above-ground root cellar.
Step 1: Excavation
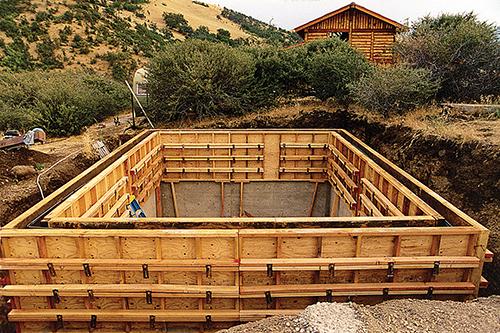
Mark out your chosen area and begin digging. Aim for a depth of about 3-4 feet. The goal is to have the majority of the cellar below ground level for natural cooling. Make sure the sides are relatively straight.
Step 2: Foundation
A simple gravel bed provides a stable foundation and promotes drainage. Pour a 4-6 inch layer of gravel into the excavated area and compact it well. This will prevent water from pooling under your root cellar.
Step 3: Framing the Walls
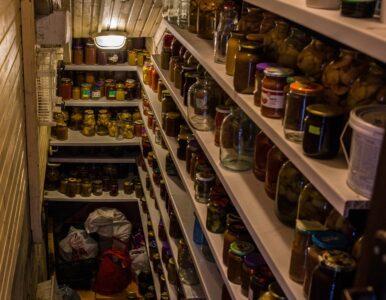
Use pressure-treated lumber for the base of the walls to resist rot. Frame the walls using standard 2x4 lumber, spacing the studs 16 inches apart. Ensure the frame is square and level. Consider adding a small, elevated shelf area in the back for smaller veggies or canned goods!

Step 4: Insulating the Walls
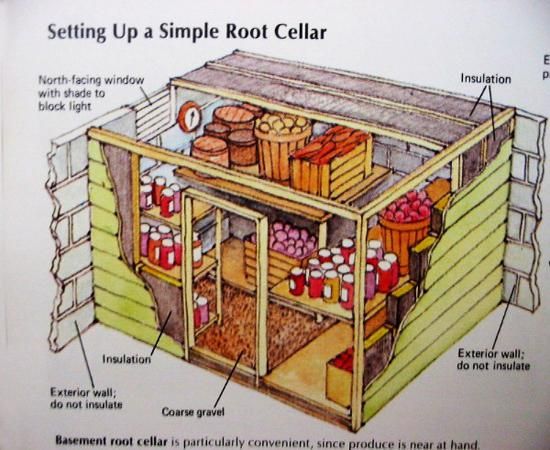
Insulation is crucial for maintaining a stable temperature. Rigid foam insulation boards are a good choice. Cut the boards to fit between the studs and secure them with construction adhesive. Ensure there are no gaps. Aim for an R-value of at least R-13 for optimal insulation.
Step 5: Sheathing the Walls
Cover the insulation with plywood or OSB sheathing. This provides structural support and protects the insulation. Secure the sheathing to the studs with screws or nails.
Step 6: Roofing
Construct a simple roof frame using 2x4 lumber. Angle the roof slightly to allow for water runoff. Cover the roof frame with plywood or OSB sheathing.
Step 7: Waterproofing
This is a critical step to prevent water damage. Apply a layer of waterproof membrane or roofing felt to the exterior of the walls and roof. Overlap the seams to ensure a watertight seal.
Step 8: Backfilling
Backfill around the walls of the root cellar with the excavated soil. Compact the soil well to prevent settling. Slope the soil away from the walls to direct water away from the structure.
Step 9: Door Construction
Build a sturdy door using lumber and hinges. Insulate the door and weatherstrip it to prevent drafts. A tight-fitting door is essential for maintaining a consistent temperature.
Step 10: Ventilation
Ventilation is essential for preventing moisture buildup and maintaining air quality. Install two ventilation pipes: one near the floor and one near the ceiling. This allows for natural air circulation. You can use PVC pipe or metal ductwork. Cover the ends of the pipes with screens to prevent rodents from entering.
Materials List (Approximate Costs)
- Pressure-treated lumber (for base): $50 - $100
- 2x4 Lumber (for framing): $100 - $200
- Rigid Foam Insulation: $50 - $100
- Plywood/OSB Sheathing: $50 - $100
- Waterproof Membrane/Roofing Felt: $30 - $50
- Gravel: $20 - $40
- Door Hardware (hinges, latch): $20 - $30
- Ventilation Pipes: $20 - $40
- Screws/Nails/Construction Adhesive: $20 - $30
Total Estimated Cost: $360 - $690
Sourcing: Local hardware stores, lumber yards, and online suppliers. Consider checking with local construction companies for leftover materials at reduced prices.
Addressing Common Challenges
- Drainage Issues: If your soil is poorly drained, install a French drain around the perimeter of the root cellar to divert water away from the structure.
- Rodent Prevention: Seal all cracks and openings to prevent rodents from entering. Use hardware cloth to cover ventilation openings. Store vegetables in rodent-proof containers.
- Temperature Control: Monitor the temperature inside the root cellar. In warmer climates, consider incorporating passive cooling techniques, such as burying the structure deeper or adding a ventilation fan.
- Humidity Control: Proper ventilation is key to controlling humidity. If humidity is too high, increase ventilation. If it's too low, add a container of water to the root cellar.

Adapting the Design to Your Needs
- Space Limitations: If you have limited space, consider building a smaller, more compact root cellar. You can also adapt an existing structure, such as a shed or garage, into a root cellar.
- Climate: In warmer climates, focus on maximizing shade and ventilation to keep the root cellar cool. Consider using thicker insulation and burying the structure deeper. In colder climates, ensure adequate insulation to prevent freezing.
Preparing Vegetables for Storage
Proper preparation is key to successful root cellar storage:
- Harvesting: Harvest vegetables on a dry day, after the morning dew has evaporated. Handle them carefully to avoid bruising.
- Cleaning: Gently brush off excess soil, but do not wash the vegetables unless absolutely necessary. Washing can promote rot.
- Curing: Cure potatoes and onions in a warm, dry place for 1-2 weeks before storing them in the root cellar. This allows the skins to harden and prevents rot.
- Storage Containers: Store vegetables in well-ventilated containers, such as wooden crates, plastic bins, or burlap sacks. Avoid storing different types of vegetables together, as some can affect the flavor and storage life of others.
Optimal Temperature and Humidity
Maintaining the right environment is crucial for long-term storage.
- Temperature: Aim for a temperature between 32°F and 40°F (0°C and 4°C).
- Humidity: Maintain a humidity level of 80-90%.
Use a thermometer and hygrometer to monitor the temperature and humidity inside your root cellar. Adjust ventilation as needed to maintain optimal conditions.
Enjoying Your Winter Harvest
With a little planning and effort, you can enjoy fresh, delicious vegetables from your own garden throughout the winter months. A root cellar is a valuable asset for any beginner homesteader looking to increase their food security, save money, and live more sustainably. Don't be afraid to start small and experiment. The rewards of a bountiful winter harvest are well worth the effort.
For more information on vegetable gardening, canning, or cold-climate homesteading, check out other articles on Better Homes and Harvests.
Ready to Build Your Own Root Cellar?
Building a root cellar is a rewarding project that can provide you with fresh, homegrown vegetables all winter long. Don't hesitate to start small, learn as you go, and adapt the design to fit your specific needs and climate.
Now, we want to hear from you! Share your own experiences with root cellars in the comments below. Do you have any tips or tricks to share? What challenges have you faced, and how did you overcome them? Or, if you're just getting started, ask your questions – we're here to help! Let's build a community of homesteaders who are passionate about food security and sustainable living.
Better Homes and Harvests
