Winter Solstice Pantry Reset: Simple Steps to an Organized and Nourishing Homestead
As the days shorten and the winter solstice approaches, our focus shifts inward. The garden slumbers, and the bounty of the harvest season is tucked away, awaiting its turn to nourish us through the colder months. But for many homesteaders, the reality of a well-stocked pantry can sometimes feel more like a chaotic jumble of forgotten jars and half-empty bags. A winter pantry reset is the perfect opportunity to reclaim your space, minimize waste, and ensure a nourishing homestead throughout the winter.

This isn't just about aesthetics; it's about embracing the slow-living ethos and connecting with the fruits (and vegetables!) of your labor. It's about knowing exactly what you have, preventing food waste, and having easy access to wholesome, homegrown ingredients when you need them most. Let’s dive into the simple steps you can take to achieve a winter pantry that’s both organized and nourishing.
Inventory & Purge: Taking Stock of Your Homestead's Bounty
The first step in any successful pantry reset is a thorough inventory. This can feel daunting, but breaking it down into smaller tasks makes it much more manageable.
Take everything out: Yes, everything. Empty your shelves and drawers completely. This allows you to see exactly what you have and gives you a clean slate to work with.
Categorize your goods: Group similar items together – canned goods, dried beans, grains, flours, spices, oils, vinegars, etc.
Assess expiration dates: This is where the rubber meets the road. Check the “best by” or “use by” dates on all items. While these dates aren't always strict indicators of spoilage, they are a good guideline for prioritizing what to use first.
Be realistic: It's time to be honest with yourself. Are you really going to use that jar of pickled beets that’s been sitting in the back of the pantry for three years? If not, it’s time to compost it (if appropriate) or find another use for it.
Compost appropriately: Food scraps that are no longer edible can be added to your compost pile to enrich your garden soil.
Donate excess: If you have unopened, non-expired items that you know you won’t use, consider donating them to a local food bank or shelter. Sharing your abundance is a wonderful way to give back to your community.
Preservation Check-Up: Ensuring Safety and Freshness
Home-preserved goods are a cornerstone of the homestead pantry, but it's crucial to ensure they are safe to consume. Improperly preserved food can harbor harmful bacteria that cause botulism, a serious and potentially fatal illness.

- Visual Inspection: Carefully examine each jar. Look for any of the following signs of spoilage:
- Bulging lids: This indicates the presence of gas, which could be a sign of bacterial growth.
- Leaking seals: A broken seal means the food is no longer properly preserved and may be contaminated.
- Discoloration or unusual texture: Any changes in the food's appearance, such as cloudiness, mold, or slime, are red flags.
- Unpleasant odor: An off-putting or sour smell is a clear sign that the food is spoiled.
- Listen for the Pop: When you open a properly canned jar, you should hear a distinct "pop" as the vacuum seal is broken. If you don't hear this pop, the seal may be compromised.
- When in Doubt, Throw it Out: It's a difficult decision, especially after all the time and effort you put into preserving, but it's always better to be safe than sorry. If you have any doubts about the safety of a jar of preserved food, discard it properly.
Strategic Organization: Maximizing Space and Accessibility
Now that you've purged and inspected, it's time to organize your pantry for maximum efficiency.
- First In, First Out (FIFO): Arrange your shelves so that the items with the earliest expiration dates are in the front and the newer items are in the back. This ensures that you use up older items before they expire, minimizing waste.
- Frequency of Use: Place frequently used items within easy reach. Less frequently used items can be stored on higher or lower shelves.
- Group Like Items: Keep similar items together – all your spices in one area, all your grains in another, etc. This makes it easier to find what you need and prevents you from buying duplicates.
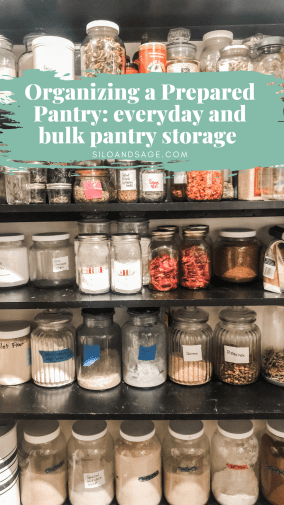
- Repurposed Containers: Get creative with storage solutions! Repurpose glass jars, tin cans, and plastic containers to store dried goods, spices, and other pantry staples. Label everything clearly to avoid confusion.
- Vertical Space: Utilize vertical space by adding shelves or stackable containers. This is especially helpful in small pantries.
- Clear Containers: Using clear containers makes it easy to see what you have on hand. This not only helps with organization but also prevents food from being forgotten and wasted.
- Label Everything! This is critical. Include date, contents, and any other important information.
Meal Planning for Winter: Embracing Pantry Staples
With your organized pantry, you're now ready to tackle winter meal planning. Focus on creating meals that utilize your pantry staples – dried beans, grains, preserved vegetables, and homemade broths.
- Dried Beans & Grains: These are the workhorses of the winter pantry. They're inexpensive, versatile, and packed with nutrients. Use them in soups, stews, chili, and side dishes.
- Preserved Vegetables: Canned tomatoes, pickled vegetables, and dehydrated greens add flavor and nutrients to winter meals.
- Homemade Broths: Stock up on homemade chicken or vegetable broth. They’re a flavorful base for soups and stews.
Recipe: Hearty Homestead Bean & Vegetable Stew
This simple stew utilizes pantry staples and provides warmth and nourishment on a cold winter day.
Ingredients:
- 1 cup dried beans (such as kidney, pinto, or black beans), soaked overnight and drained
- 1 tablespoon olive oil
- 1 onion, chopped
- 2 cloves garlic, minced
- 1 teaspoon dried thyme
- 1 teaspoon dried rosemary
- 1 (28-ounce) can crushed tomatoes
- 4 cups vegetable broth
- 1 cup preserved vegetables (such as carrots, potatoes, or green beans), chopped
- Salt and pepper to taste
Instructions:
- In a large pot or Dutch oven, heat the olive oil over medium heat. Add the onion and garlic and cook until softened, about 5 minutes.
- Stir in the thyme and rosemary and cook for 1 minute more.
- Add the soaked and drained beans, crushed tomatoes, and vegetable broth. Bring to a boil, then reduce heat and simmer for 1-1.5 hours, or until the beans are tender.
- Stir in the preserved vegetables and cook for 15-20 minutes more, or until heated through.
- Season with salt and pepper to taste.
- Serve hot with a crusty bread or homemade biscuits.

Embracing the Solstice: A Time for Reflection and Gratitude
The winter solstice marks the shortest day of the year and the beginning of the return of the light. It's a time for reflection, gratitude, and preparing for the season ahead. By taking the time to reset your winter pantry, you're not only organizing your food supply but also embracing the slow-living values of self-sufficiency, sustainability, and connection to the seasons. A well-stocked and organized pantry offers a sense of security and allows you to nourish yourself and your family with wholesome, homegrown ingredients throughout the winter months.
So, as the snow falls and the wind howls, take comfort in knowing that you have a pantry full of delicious and nutritious food, ready to nourish you through the winter. Embrace the slow, quiet moments of the season and savor the simple pleasures of a home-cooked meal made with love and intention. Happy homesteading!
