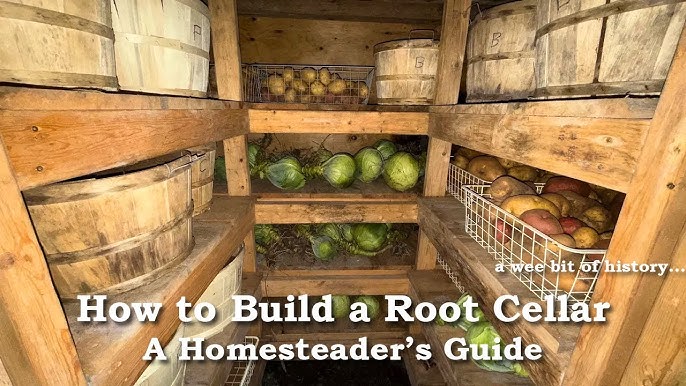
Winter Bounty: Build Your Own 8x10 Root Cellar for Long-Term Food Storage
There's a special kind of satisfaction that comes from pulling a crisp carrot from the earth in the dead of winter, a carrot you nurtured from seed, harvested, and stored yourself. It's a feeling of self-sufficiency, of connection to the land, that's at the heart of homesteading. For years, I relied on canning and freezing to preserve my harvest. While those methods are invaluable, I longed for a more natural, energy-efficient way to extend the bounty of my garden. That's when I decided to build a root cellar.
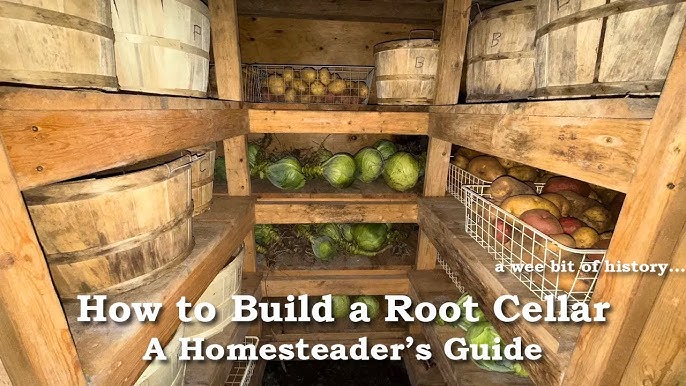
This wasn't just about having more food on hand. It was about reducing our reliance on the grocery store, minimizing our environmental impact, and embracing a simpler, more sustainable way of life. After a lot of research, a few mistakes (which I'll share so you can avoid them!), and a whole lot of hard work, I built an 8x10 root cellar that's been a game-changer for our family. Today, I'm excited to share my experience and guide you through the process of building your own!
Why Build a Root Cellar? The Benefits of Natural Food Preservation
Before we dive into the construction, let's talk about why you should consider building a root cellar. Beyond the romantic notion of a pantry stocked with fresh produce all winter long, there are practical benefits:
- Extended Freshness: Root cellars provide the ideal environment for storing fruits and vegetables, keeping them fresh for months longer than refrigeration alone.
- Cost Savings: Reduce your grocery bill and reliance on commercially produced food, especially during the off-season.
- Energy Efficiency: A naturally cooled root cellar eliminates the need for electricity, making it a sustainable food storage solution.
- Preservation of Nutrients: Unlike some preservation methods, root cellaring helps retain the natural vitamins and minerals in your produce.
- Increased Self-Sufficiency: Gain greater control over your food supply and reduce your dependence on external systems.
Planning Your 8x10 Root Cellar: Location, Design, and Materials
The success of your root cellar hinges on careful planning. Here's what to consider:
1. Location, Location, Location:
The ideal location is a cool, dark, and consistently moist spot. A north-facing slope is often recommended, as it receives less direct sunlight. Avoid areas with poor drainage or high water tables. Accessibility is also important – you'll be hauling produce in and out, so choose a location that's relatively easy to reach, even in winter. I chose a spot on the back of my property, nestled into a slight rise, ensuring good drainage.
2. Design Considerations:
My 8x10 design is a good size for a family of four, providing ample storage space without being overly ambitious for a DIY project. The design is simple: cinder block walls, a sturdy wooden roof covered with earth, and a well-insulated door. You can find various root cellar plans online, including some specifically designed for 8x10 structures, which can provide helpful blueprints and structural guidance. Take into consideration local building codes. You might want to include a small ventilation pipe for optimal climate.
3. Material Sourcing: Cost-Effective and Sustainable
This is where you can really save money and embrace the homesteading spirit.
- Cinder Blocks: I used cinder blocks for the walls, as they're durable and relatively inexpensive. Check local classifieds or building supply stores for discounted or slightly damaged blocks.
- Lumber: Salvaged lumber is a great option for the roof and door. Demolition sites, lumber yards, and even online marketplaces can be goldmines for reclaimed wood. Just be sure to inspect it carefully for rot or pests.
- Insulation: Rigid foam insulation is crucial for maintaining a consistent temperature. Look for recycled or reclaimed options. You can also use natural materials like straw bales, though they require more space and protection from moisture.
- Roofing: Heavy-duty plastic sheeting or a waterproof membrane is essential to prevent leaks. Check with roofing companies for leftover materials or remnants. Consider using old billboard vinyl.
- Gravel: For drainage around the base of the walls.
- Door: A solid, insulated door is vital. Salvaged doors can be repurposed, or you can build one yourself using reclaimed lumber.
- Ventilation Pipe: PVC pipe works well for ventilation.
- Earth: For covering the roof, use the excavated soil from the site.
- Other: Cement, sand, rebar, nails, screws
My personal tip: Don’t be afraid to barter! I traded some of my garden produce for salvaged lumber with a neighbor.
Step-by-Step Guide to Building Your 8x10 Root Cellar
Alright, let's get down to the nitty-gritty! This is how I built my root cellar, step by step. Always follow local building codes when you build.
Step 1: Excavation and Foundation
- Mark the Area: Clearly mark out an 8x10 foot rectangle for your root cellar. Add extra space (about 2 feet on each side) for working room.
- Dig it Out: Excavate the area to a depth of about 4 feet. This depth can vary depending on your climate and desired temperature. Ensure the bottom is level.
- Prepare the Foundation: Pour a gravel base about 6 inches deep for drainage. Compact it well. You can also pour a concrete slab, but gravel is a more cost-effective option.
Step 2: Building the Walls
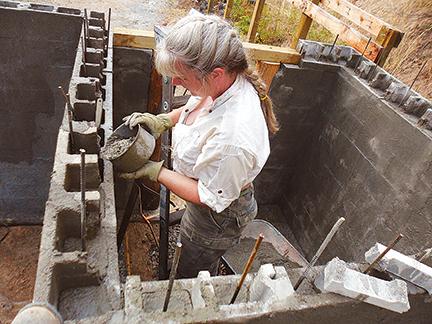
- Lay the First Course: Start laying the cinder blocks, ensuring they are level and square. Use a mortar mix to bind them together.
- Stagger the Joints: Stagger the joints between each course of blocks for added strength.
- Reinforce with Rebar: Insert rebar vertically into the cores of the blocks, filling the cores with concrete for added stability.
- Build to Desired Height: Continue laying blocks until you reach the desired wall height (typically around 6-7 feet).
Step 3: Constructing the Roof
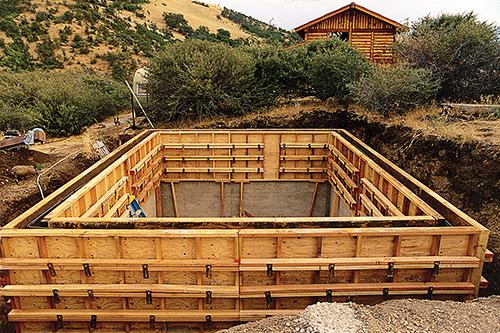
- Build the Frame: Construct a sturdy wooden frame for the roof using your salvaged lumber. The frame should be slightly larger than the cinder block walls to allow for an overhang.
- Add Rafters: Install rafters to support the roof, spacing them according to your local snow load requirements. Consult local building codes.
- Sheathe the Roof: Cover the rafters with plywood or OSB sheathing.
- Waterproof the Roof: Cover the sheathing with a waterproof membrane or heavy-duty plastic sheeting, ensuring it's properly sealed.
- Insulate the Roof: Add a layer of rigid foam insulation to the top of the roof.
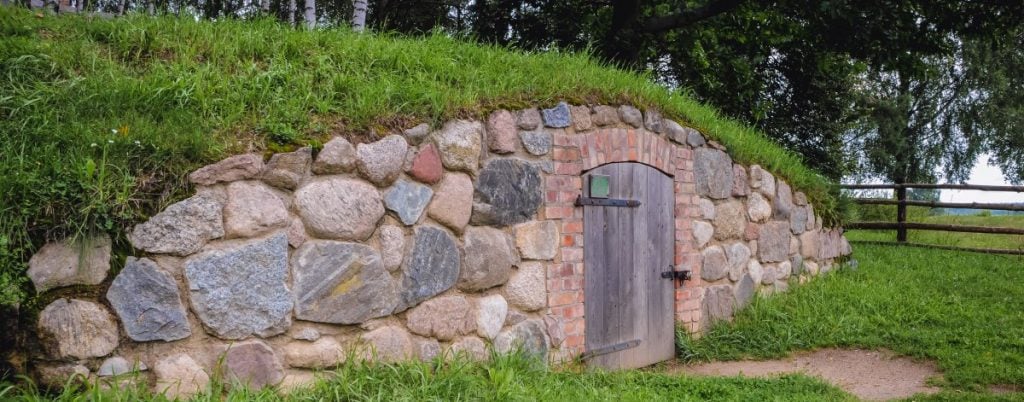
- Add an Earth Layer: Cover the insulation with a layer of soil, at least 12 inches thick. This provides additional insulation and helps regulate temperature. Grass or plants can be grown on top for additional insulation and to blend the root cellar into the landscape.
Step 4: Installing the Door
- Build or Salvage a Door: Construct a solid, insulated door or repurpose a salvaged door.
- Frame the Doorway: Build a sturdy frame around the doorway.
- Install the Door: Hang the door, ensuring it seals tightly to prevent drafts. Weatherstripping is your friend here.
Step 5: Ventilation
- Install a Ventilation Pipe: Install a PVC ventilation pipe extending from the ceiling of the root cellar to the outside. This helps circulate air and prevent moisture buildup.
- Add a Damper: Install a damper in the ventilation pipe to control airflow and regulate temperature.
Step 6: Interior Finishing (Optional)
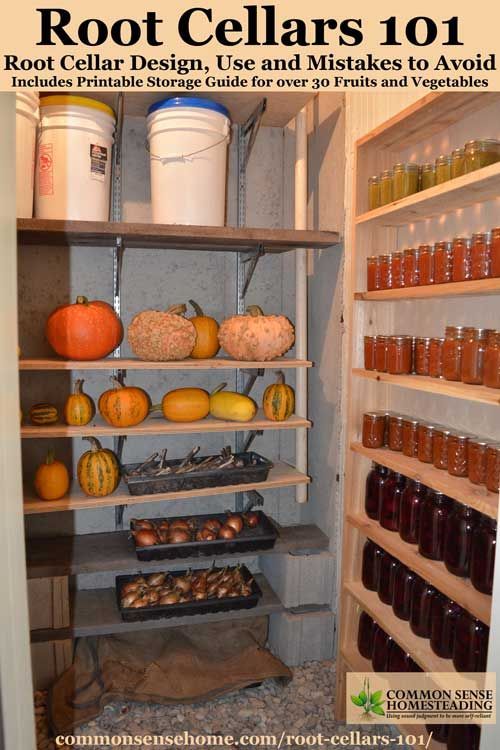
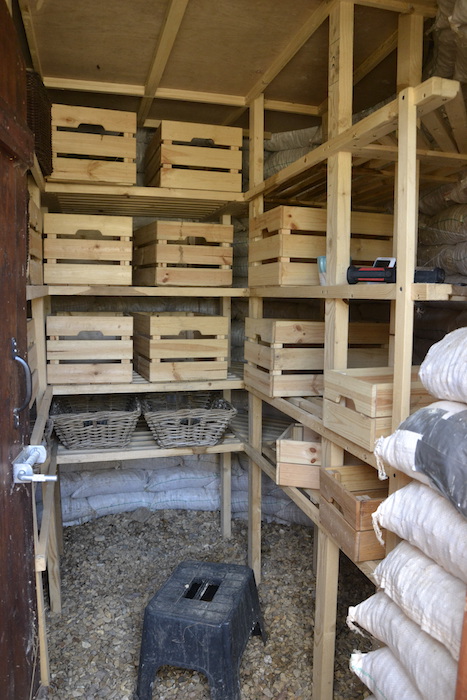
- Shelving: Build shelving to store your produce. Use untreated wood to avoid contaminating your food.
- Gravel Floor: Install a gravel floor to help with drainage and humidity control.
Maintaining Optimal Temperature and Humidity
The ideal temperature for a root cellar is between 32°F and 40°F, with humidity levels between 85% and 95%. Here's how to maintain those conditions:
- Ventilation: Adjust the damper on your ventilation pipe to regulate airflow and control temperature and humidity. Open the damper during cooler periods to lower the temperature and humidity, and close it during warmer periods to retain coolness.
- Moisture Control: If the humidity is too low, sprinkle water on the floor or add a container of water. If it's too high, increase ventilation.
- Insulation: Ensure your root cellar is well-insulated to maintain a consistent temperature.
- Monitoring: Use a thermometer and hygrometer to monitor temperature and humidity levels.
Troubleshooting Common Root Cellar Problems
Even with careful planning, you might encounter some challenges. Here are a few common problems and how to solve them:
- Problem: Temperature Too High
- Solution: Increase ventilation, add more insulation, or shade the root cellar.
- Problem: Humidity Too Low
- Solution: Sprinkle water on the floor, add a container of water, or reduce ventilation.
- Problem: Mold Growth
- Solution: Increase ventilation and remove any affected produce.
- Problem: Rodents
- Solution: Seal any cracks or openings, use rodent-proof containers, or set traps. I learned the hard way that mice LOVE potatoes!
My biggest mistake: I didn't properly seal the door, which led to drafts and temperature fluctuations. Take the time to ensure a tight seal!
Best Vegetables for Long-Term Storage
Not all fruits and vegetables are suitable for root cellar storage. Here are some of the best options:
- Root Vegetables: Potatoes, carrots, beets, turnips, parsnips, rutabagas
- Alliums: Onions, garlic
- Cabbage Family: Cabbage, Brussels sprouts
- Fruits: Apples, pears
Store different types of produce in separate containers or areas, as some release gases that can affect others. For example, apples should be stored away from potatoes.
Embrace the Winter Bounty!
Building a root cellar is a challenging but incredibly rewarding project. It's an investment in your self-sufficiency, your health, and your connection to the land. It's a tangible way to embrace the values of Better Homes and Harvests: sustainability, community, and a simpler way of life.
Now it’s your turn! Are you ready to build your own 8x10 root cellar and experience the joy of pulling fresh produce from your own personal "winter pantry"? Share your questions and experiences in the comments below.
Downloadable Checklist:
Click here to download a handy checklist of materials and tools for building your 8x10 root cellar: [Download Link - Replace with actual link].
Let’s create a community of homesteaders sharing their knowledge and experiences. Together, we can build a more sustainable and resilient future, one root cellar at a time. Happy building!