Whispers Under the Stars: Building Your Homestead's Cost-Effective Composting Toilet
Here on the homestead, under the watchful eyes of a million stars, we learn to listen. We listen to the land, to the seasons, and to the quiet urgings towards a more sustainable way of life. Tonight, I want to share a secret with you, a secret that can transform your relationship with your land and dramatically reduce your water consumption: building your own composting toilet. This is a guide to crafting a cost-effective and aesthetically pleasing solution, designed specifically for the small homestead. This off grid toilet solution can change your life for the better!
Why a Composting Toilet? A Homesteader's Perspective
Before we dive into the how-to, let's talk about the why. For us homesteaders, it's about more than just saving water (though that's a huge benefit!). It's about closing the loop, returning nutrients to the soil, and reducing our reliance on complex, often unsustainable, infrastructure. A DIY composting toilet for homestead living lets you take control of your waste management, turning what was once a problem into a valuable resource for your sustainable gardening.
I remember the first time I considered a composting toilet. I was intimidated! Hygiene, odor... it all seemed a little daunting. But the desire to conserve water and create a truly self-sufficient system outweighed my fears. Now, years later, I can tell you it's one of the best decisions we've made. The rich, earthy compost we create feeds our vegetable garden, and the water savings are substantial. Plus, there's a profound sense of satisfaction that comes from managing our resources responsibly. This is truly an off grid toilet solution for any homestead.
Step 1: Location, Location, Location
Choosing the right spot is crucial. You'll want:
- Sunlight: A sunny location helps to keep the composting process active and reduces moisture buildup, which can contribute to odor.
- Accessibility: Think about winter access. You'll need to be able to reach the toilet year-round.
- Proximity to the Garden: Ideally, the toilet should be located within a reasonable distance of your garden, as this will simplify the process of transporting the finished compost. However, ensure it's a respectful distance to avoid any potential contamination concerns.
- Privacy: Consider natural screening or incorporate the toilet into a larger garden structure for added privacy.
- Regulations: Check local building codes and regulations regarding composting toilets before you begin.

Step 2: Designing Your Composting Throne: Aesthetic Composting Toilet Plans
This is where your creativity comes in! The design should be functional and aesthetically pleasing. Keep it simple for cost-effectiveness:
- The Base: This will house the composting container. A simple wooden box frame is sturdy and easy to build. Consider using reclaimed lumber for a truly sustainable build and an aesthetic composting toilet. Aim for a size that will accommodate a standard 55-gallon plastic drum or a similar-sized container.
- The Seat: Choose a comfortable toilet seat. You can purchase a standard toilet seat or build one from wood.
- The Enclosure: This provides privacy and protects the base from the elements. Use wood, bamboo, or even woven branches to create a visually appealing structure. A simple lean-to design is both functional and inexpensive. A cheap composting toilet doesn't have to look cheap!
Step 3: Building the Structure: A Step-by-Step Guide
Assuming you have basic carpentry skills, here's a simplified guide:
- Build the Base: Cut lumber to the desired dimensions for your base. Assemble the frame using screws or nails. Ensure the base is level and stable.
- Construct the Enclosure: Design and build the enclosure using your chosen materials. A simple frame with siding works well. Include a door for easy access to the composting container.
- Install the Seat: Attach the toilet seat to the base. Ensure it's securely fastened.
- Add a Roof (Optional): A roof will protect the toilet from rain and snow. A simple slanted roof made from corrugated metal or wood is effective.
Materials List (for a basic design):
- Lumber (reclaimed is ideal!)
- Screws or nails
- Toilet seat
- Composting container (55-gallon drum or similar)
- Roofing material (optional)
- Sawdust or other bulking agent
- Drill
- Saw
- Measuring tape
Step 4: The Composting System: Humanure Composting
The heart of your composting toilet is the composting system itself. Here's how it works:
- The Container: Place your composting container inside the base.
- The Bulking Agent: After each use, add a scoop of sawdust, wood shavings, shredded leaves, or other carbon-rich material to the container. This helps to absorb moisture, control odor, and provide the necessary carbon for the composting process. Sawdust toilet systems are very effective at reducing odors.
- The Composting Process: Over time, the organic waste will decompose, creating nutrient-rich compost.
Step 5: Maintenance and Odor Control: Composting Toilet Maintenance Tips
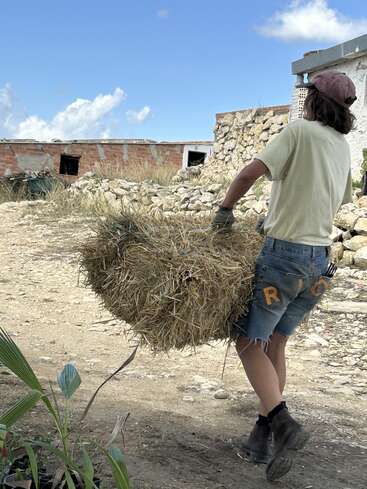
- Regular Addition of Bulking Agent: This is the single most important factor in odor control. Don't skimp on the sawdust!
- Turning the Compost (Optional): Occasionally turning the compost can speed up the decomposition process.
- Emptying the Container: Depending on usage, you'll need to empty the container every few months to a year. The compost should be dark, crumbly, and earthy-smelling. This is an easy composting toilet that is simple to maintain.
- Using the Compost: Once the compost is fully decomposed, it can be used to enrich your garden soil. Important: Only use compost from a composting toilet on ornamental plants, trees, or shrubs. Do not use it on edible plants, especially root vegetables, unless you are certain the composting process was hot enough to kill all pathogens. It is recommended to further compost your "humanure" compost in a separate pile for an additional year to be safe.
- Ventilation: Consider adding a vent pipe to your composting toilet to improve airflow and reduce odor.
Addressing Common Concerns:
- Hygiene: A well-maintained composting toilet is just as hygienic as a conventional toilet. The key is to use plenty of bulking agent and follow proper composting procedures.
- Odor: Odor is typically caused by inadequate ventilation or a lack of bulking agent. With proper management, a composting toilet should not smell.
- Pests: Pests are generally not a problem if the toilet is properly maintained.
Myths and Realities:
Let’s debunk some common myths:
- Myth: Composting toilets are smelly. Reality: A properly managed composting toilet has very little odor.
- Myth: Composting toilets are unsanitary. Reality: When used correctly, composting toilets are just as sanitary as flush toilets.
- Myth: Composting toilets are difficult to maintain. Reality: Once you understand the basics, maintenance is simple and straightforward.

Embrace the Journey: Composting Toilet Empowerment
Building a DIY composting toilet is more than just a construction project; it's an act of empowerment. It's about taking control of your resources, reducing your environmental impact, and connecting with your land in a deeper way. It's a step towards self-sufficiency and a more sustainable future. A composting toilet DIY project empowers you to connect with your land.
The first time I used our composting toilet, I felt a sense of accomplishment I hadn't anticipated. It wasn't just about saving water; it was about participating in a natural cycle, turning waste into a valuable resource. And that, my friends, is a truly empowering feeling.

So, take a deep breath, gather your materials, and embark on this journey. As you build your composting toilet under the star-filled sky, remember that you're not just building a structure; you're building a more sustainable and self-sufficient future for yourself and your homestead. It is a valuable addition to any beginner homestead toilet plan. Now go forth and create!
