Wash Away the Day: Building a Sustainable Cedar Pallet Outdoor Shower
For homesteaders, life is often lived outdoors. From tending gardens and caring for animals to building and repairing structures, the days are filled with rewarding, albeit messy, work. Wouldn't it be wonderful to rinse off the day's grime before tracking it all into your home? Enter the cedar pallet outdoor shower – a rustic, sustainable, and incredibly convenient addition to any homestead. This project utilizes reclaimed materials, minimizes water waste, and provides a refreshing way to connect with nature. Let's dive into building your very own!

Materials You'll Need
Before we start hammering and sawing, let’s gather the necessary materials. Here's a detailed list to ensure you have everything on hand:
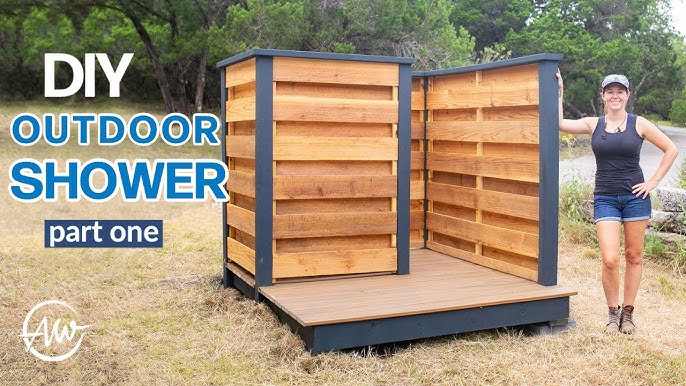
- Cedar Pallets: 8-10 cedar pallets in good condition. Aim for pallets approximately 48" x 40". The distinctive red-brown hue and tight grain of cedar make it naturally resistant to rot and insects. Important: Avoid treated wood! Look for the natural beauty of cedar.

- 4x4 Pressure-Treated Posts: Two 8-foot long posts for the main shower frame.
- 2x4 Lumber: Approximately 20 feet, for reinforcing the pallet structure.
- Rain Barrel: A 55-gallon food-grade rain barrel with a spigot and connecting hardware.
- Garden Hose: 25-foot garden hose suitable for outdoor use.
- PVC Piping: 1/2-inch PVC pipe, fittings (elbows, connectors), and PVC cement for creating the showerhead and connecting to the garden hose.
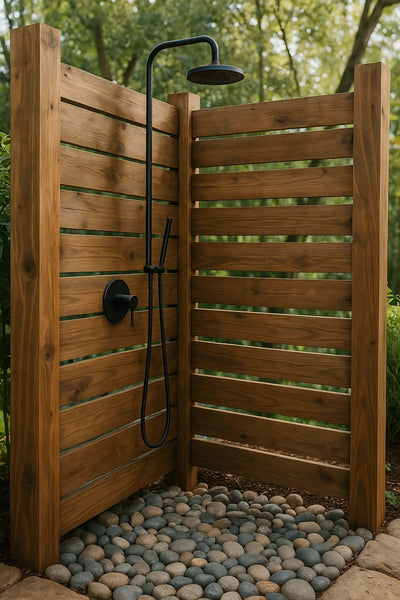
- Showerhead: Low-flow showerhead to conserve water. A bronze or brushed nickel finish adds a touch of elegance.
- Wattle Fence Materials: Flexible branches (willow or hazel preferred, approximately 1-inch diameter) for weaving the fence. Approximately 50, 6-foot-long branches, plus sturdy vertical stakes (10, 4-foot long, 2-inch diameter).
- Fasteners: Deck screws (various lengths), galvanized nails.
- Landscape Fabric: To prevent weeds around the shower base.
- River Rock or Gravel: For drainage under the shower area.
- Banana Plant: One small banana plant in a pot (optional, for greywater system).
Tools of the Trade
Having the right tools makes the job much smoother. Here's what you'll need:
- Circular Saw
- Drill/Driver
- Measuring Tape
- Level
- Staple Gun
- Hammer
- Safety Glasses
- Gloves
Step-by-Step Instructions: From Pallets to Paradise
Site Preparation: Selecting the Shower Location
Choosing the right location is crucial. Look for a level, sunny spot near your garden, ensuring good drainage. A minimum area of 6ft x 6ft is ideal. Consider proximity to your water source.

Building the Frame: Constructing the Sturdy Support
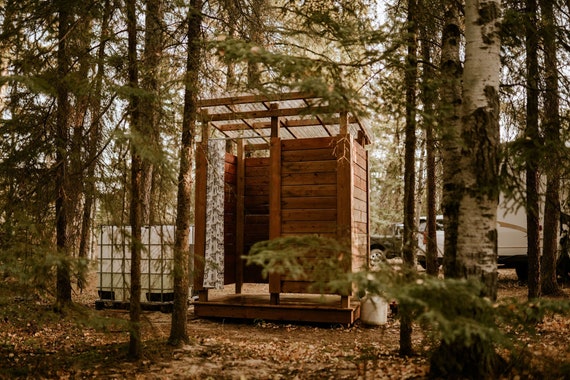
This is where the 4x4 posts come into play. Dig holes 2 feet deep, setting the posts in concrete for stability. Use a level to ensure vertical alignment. Now, attach the pallets to the posts using deck screws, creating the shower enclosure walls. Frame height should be approximately 7 feet. Reinforce the pallet structure with 2x4 lumber where needed for added stability.
Water Source Connection: Harnessing the Rain
Position the rain barrel above the shower for gravity-fed water pressure. Connect the garden hose to the spigot. Attach the other end of the hose to the PVC piping, creating the showerhead arm. Securely mount the low-flow showerhead. Use PVC cement to ensure watertight connections.
Privacy Screen Construction: Weaving the Wattle Fence
Create a wattle fence screen around the shower area, leaving an opening for entry. Drive the vertical stakes into the ground. Weave flexible branches between the stakes, using an over-under technique. Wattle fence height should be approximately 6 feet. This adds a beautiful, natural privacy screen.
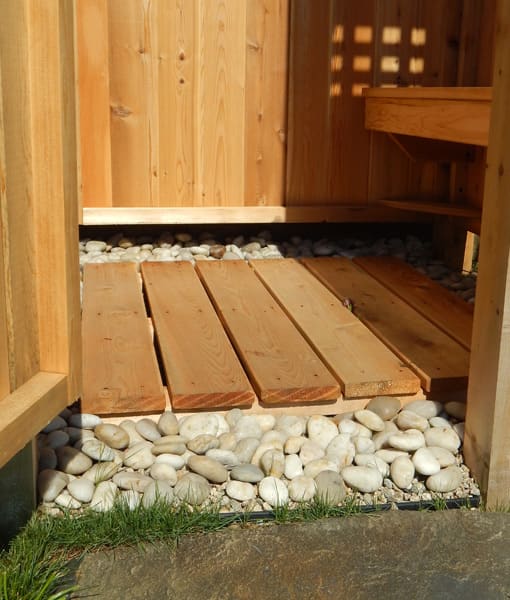
Drainage and Base: Creating a Natural Drain
Lay landscape fabric, followed by a thick layer of river rock or gravel (approximately 4 inches) for drainage. This prevents mud and water pooling, keeping your shower area clean and comfortable.

Plant Based Greywater System: "Sustainable Greywater System."
Consider directing the shower's drain water towards a banana plant. The banana plant will benefit from the gentle nutrients in the greywater, closing the loop on water usage and promoting sustainable practices.
Safety First!
- Always wear safety glasses and gloves when working with power tools.
- Ensure the shower frame is stable before use.
- Use caution when working with water.
- Check local building codes regarding gray water systems.
Maintenance Tips
- Regularly inspect the cedar pallets for rot or damage. Replace as needed.
- Clean the rain barrel to prevent algae growth.
- Trim the wattle fence as needed to maintain its shape and appearance.
Conclusion: A Rustic Retreat
Building a sustainable cedar pallet outdoor shower is a rewarding project that combines practicality with environmental consciousness. Using reclaimed materials and harnessing rainwater allows you to create a functional and beautiful space that aligns with the homesteading lifestyle. Imagine washing away the day's পরিশ্রম under the open sky, feeling refreshed and connected to nature. Share your own homesteading projects and inspire others to embrace sustainable living!