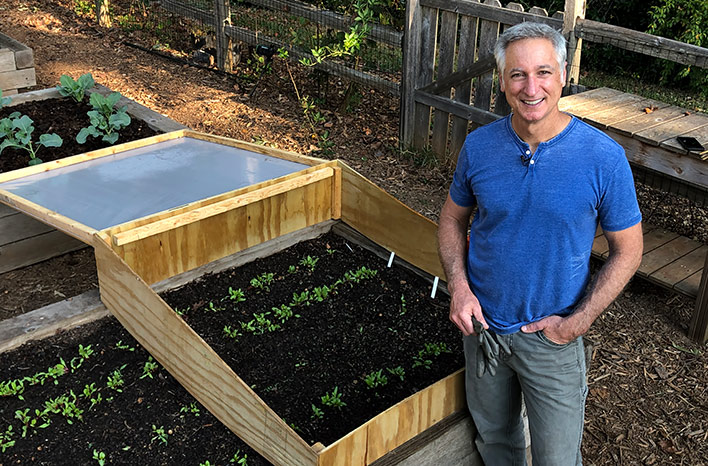
Unlock Spring (and Fall!) with a DIY Reclaimed Cold Frame
Dreaming of fresh, homegrown salads weeks before your neighbors even think about planting? Want to extend your harvest deep into the fall, long after the first frost? Building a cold frame is the answer! And the best part? You can do it on a budget using reclaimed materials. This guide will walk you through creating your own beginner-friendly cold frame, transforming salvaged items into a thriving micro-climate for your precious seedlings. Get ready to embrace the joy of year-round gardening and the satisfying independence of nurturing your own food!
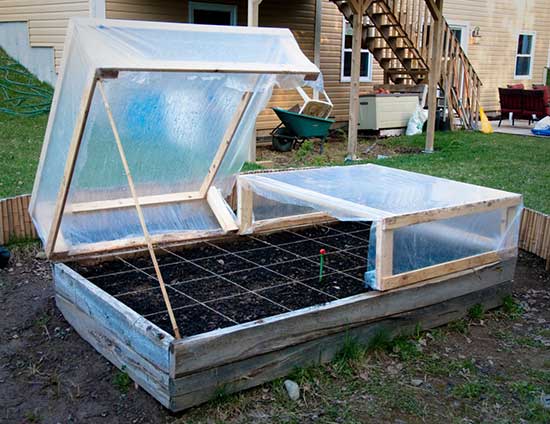
Why Build a Cold Frame?
Before we dive into the how, let's explore the why. A cold frame is essentially a miniature greenhouse, a sheltered structure that protects plants from harsh weather, extends the growing season, and provides a warmer environment for seedlings to flourish.
Here's why every aspiring homesteader and beginner gardener should consider building one:
- Extend Your Growing Season: Start seeds earlier in the spring and harvest later into the fall, enjoying fresh produce for a longer period.
- Protect Against Frost: Shield tender plants from unexpected frosts and freezes, ensuring they survive even when temperatures dip.
- Harden Off Seedlings: Gradually acclimate indoor-grown seedlings to outdoor conditions before transplanting them to the garden.
- Cost-Effective Gardening: Build your own cold frame using reclaimed materials, saving money and reducing waste.
- Self-Sufficiency and Connection to Nature: Experience the pride of growing your own food and connecting with the natural world.
Gathering Your Reclaimed Treasures
The beauty of this project lies in its sustainability. Instead of buying new materials, we'll repurpose items that would otherwise end up in a landfill. Here's where to look for supplies:
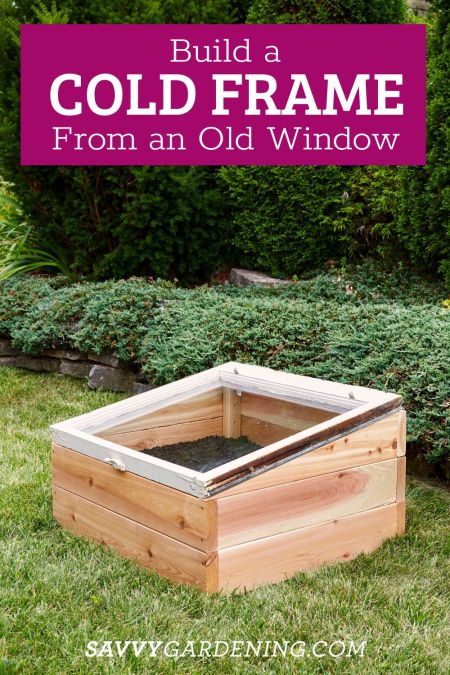
- Old Windows: The heart of your cold frame. Look for discarded windows at construction sites, renovation projects, or online marketplaces. Single-pane windows work fine, but double-pane offer better insulation.
- Salvaged Lumber: Use reclaimed wood for the frame. Check with local lumber yards, demolition sites (with permission!), or online classifieds. Pallet wood can also be used, but be sure to only use heat-treated (HT) pallets and avoid chemically treated ones.
- Scrap Hardware: Screws, hinges, and latches can often be found in your own garage or at salvage yards.
- Tools: You'll need basic woodworking tools: saw, drill, screwdriver, measuring tape, level, and safety glasses.
Pro Tip: Don't be afraid to get creative! Think outside the box. An old storm door could also make a great top for your cold frame!
Step-by-Step Guide to Building Your Cold Frame
Now, let's get building! This is a simplified design that's perfect for beginners. Adapt the dimensions to fit your reclaimed window and available space.
Step 1: Design and Planning
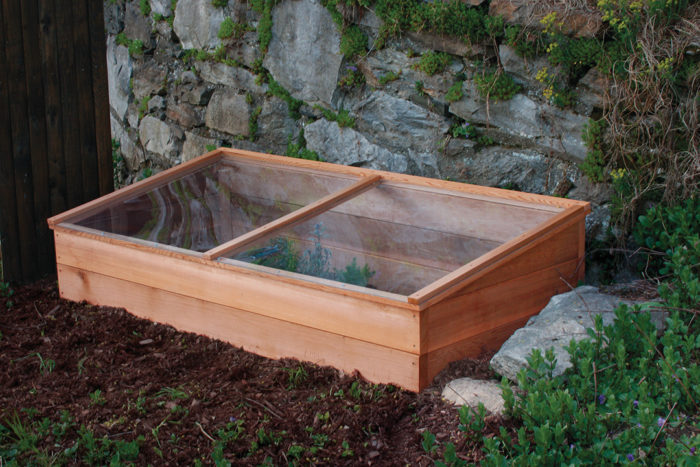
Before you start cutting wood, sketch out your cold frame design. A simple slanted roof (using the window as the glazing) is easiest.
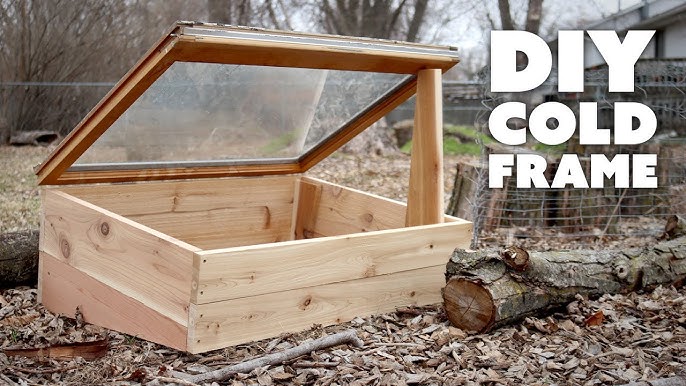
- Dimensions: Measure your window. The frame should be slightly larger than the window to allow for easy opening and closing. A common size is 4 feet wide, 3 feet deep, with the back wall 18 inches high and the front wall 12 inches high. This slant allows for maximum sunlight.
Step 2: Cutting the Lumber
Cut the lumber according to your design. You'll need:
- Two side pieces (trapezoid shape)
- One back piece (18 inches high)
- One front piece (12 inches high)
- Top support pieces (to fit under the window)
Step 3: Assembling the Frame
- Attach the side pieces to the front and back pieces using screws. Ensure the frame is square and level.
- Add the top support pieces, creating a ledge for the window to rest on.
Step 4: Adding the Glazing (Window)
- Position the window on top of the frame.
- Attach hinges to the back of the frame and the window, allowing it to open and close.
- Install a latch or hook to secure the window when closed.
Step 5: Ventilation
Ventilation is crucial to prevent overheating. You can achieve this in several ways:
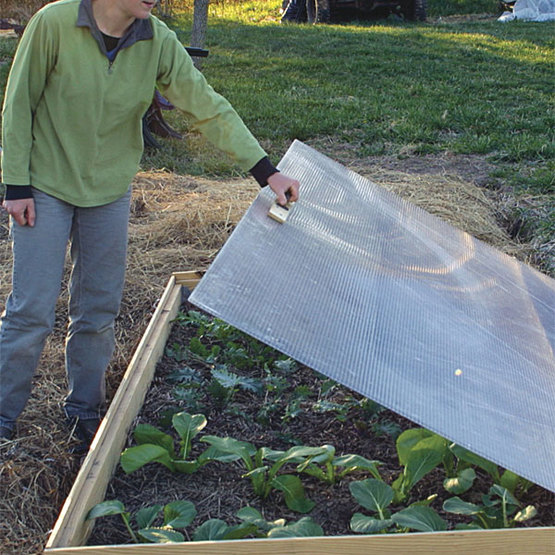
- Prop the Window Open: The simplest method. Use a stick or brick to prop the window open at different heights.
- Install a Vent: Cut a small opening in the side of the frame and cover it with a screen to prevent pests from entering. Add a hinged cover to adjust the airflow.
Step 6: Finishing Touches
- Paint or Stain: Protect the wood from the elements and enhance the appearance of your cold frame with paint or stain.
- Insulation (Optional): For extra protection in colder climates, line the inside of the frame with bubble wrap or rigid foam insulation.
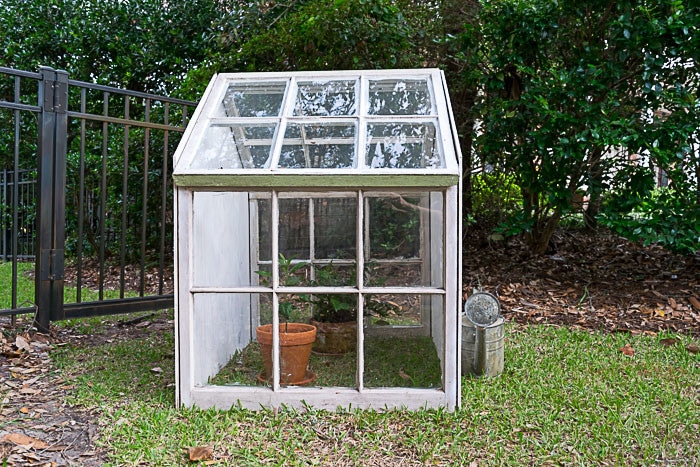
- Location, Location, Location: Place your cold frame in a sunny spot with good drainage. A south-facing location is ideal for maximum sunlight exposure.
What to Grow in Your Cold Frame
Cold frames are perfect for starting seeds, hardening off seedlings, and growing cool-season crops. Here are a few ideas:
- Vegetables: Lettuce, spinach, kale, arugula, radishes, carrots, and onions.
- Herbs: Parsley, cilantro, thyme, and oregano.
- Flowers: Pansies, violas, and other cool-season blooms.
For in-depth growing tips, check out these Better Homes and Harvests articles:
- [Link to BH&H article on starting seeds]
- [Link to BH&H article on cool-season gardening]
- [Link to BH&H article on growing herbs]
The Joy of Self-Reliance
Building a cold frame is more than just a DIY project; it's an investment in self-sufficiency and a connection to the earth. The satisfaction of nurturing your own food, extending your growing season, and using reclaimed materials is truly rewarding. Plus, you're contributing to a more sustainable lifestyle by reducing waste and growing your own food locally.
Share Your Cold Frame Adventures!
Ready to build your own reclaimed cold frame? We'd love to see your creations! Share your experiences, tips, and photos in the comments section below. Don't forget to post your cold frame pictures on social media using the hashtag #BHHColdFrame. Happy gardening!