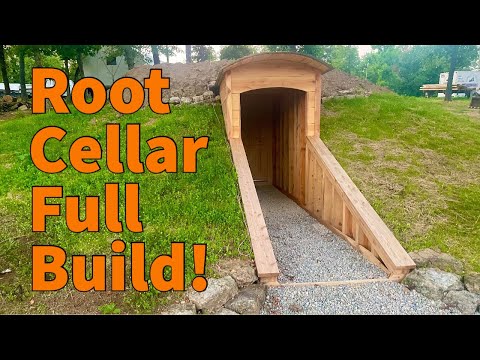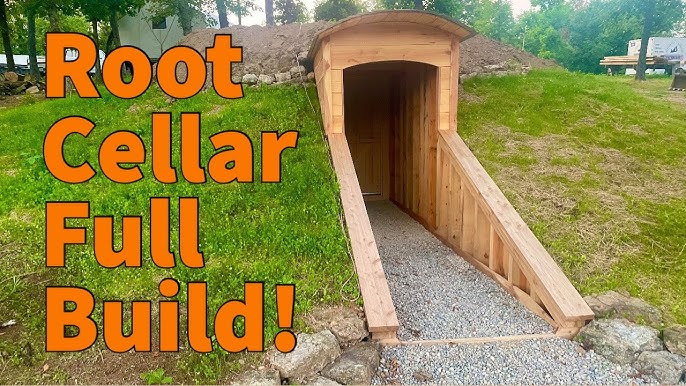
Unlock Self-Sufficiency: Build a Budget-Friendly Backyard Root Cellar
Are you dreaming of a more self-sufficient life, filled with homegrown goodness that lasts through the winter months? Maybe you’re a seasoned gardener tired of watching your precious harvest wilt away before you can enjoy it. Or perhaps you’re simply looking for a way to reduce your grocery bills and eat healthier. Whatever your reason, building a DIY root cellar is a fantastic step towards greater self-reliance. And the best part? It doesn't have to break the bank!
Many people are intimidated by the idea of building a root cellar, imagining complex construction and hefty expenses. But I’m here to tell you it’s entirely achievable, even on a tight budget. This guide will walk you through building a small, backyard root cellar using readily available, affordable, and even repurposed materials. We'll focus on simple techniques that anyone can master, turning your dream of homegrown winter bounty into a reality. Let's dive in!
Why Build a Root Cellar? The Benefits of Natural Food Storage
Before we get our hands dirty, let's talk about why a root cellar is such a valuable asset for any homesteader or gardener. In a nutshell, a root cellar provides the ideal environment for long-term food storage, using natural temperature and humidity control to keep your fruits and vegetables fresh for months.
Here are just a few benefits of building a DIY root cellar:
- Save Money: Significantly reduce your grocery bills by storing your own harvest or buying produce in bulk during peak season. "Save $$$ on winter food storage!"
- Eat Healthier: Enjoy fresh, nutritious, and homegrown food throughout the winter, instead of relying on processed or out-of-season produce.
- Reduce Food Waste: Preserve your harvest and prevent food from spoiling, minimizing waste and maximizing your investment.
- Become More Self-Sufficient: Gain greater control over your food supply and reduce your dependence on commercial agriculture.
- Sustainable Living: Lower your carbon footprint by reducing the need for refrigerated storage and transportation of food.
Planning Your Budget Root Cellar: Location, Size, and Design
The first step in any DIY project is planning. Consider these factors:
- Location: Choose a location that is cool, shady, and well-drained. A north-facing slope is ideal, as it receives less direct sunlight. Avoid areas prone to flooding or standing water. Think about proximity to your garden and ease of access during winter months.
- Size: Determine the size of your root cellar based on your storage needs. For a small family, a 4x6 foot cellar is often sufficient. You can always expand later if needed. Don't feel pressured to build huge! Start small and learn.
- Design: We'll focus on a simple, partially buried design that’s easy to build with repurposed materials. This design minimizes excavation and provides good insulation. A simple pit with a well-insulated roof and door can be incredibly effective.
Gathering Affordable Materials: Repurposing is Key
Building a cheap root cellar is all about resourceful sourcing. Here are some budget-friendly material options:
- Repurposed Pallets: Pallets can be used for framing the walls and roof. Look for heat-treated pallets (marked with "HT") that haven't been chemically treated. Check with local businesses, warehouses, and construction sites – often they are giving them away!
- Reclaimed Bricks or Stones: Use these for the floor and lower walls. Check online marketplaces like Craigslist or Facebook Marketplace for free or low-cost options. Demolition sites can also be a good source.
- Old Doors and Windows: A salvaged door and window can provide access and ventilation. Habitat for Humanity ReStores are excellent places to find these.
- Plastic Sheeting: Use heavy-duty plastic sheeting to create a moisture barrier and prevent water from seeping into your root cellar.
- Insulation: Straw bales, old blankets, or recycled denim insulation can be used to insulate the roof and walls.
- Gravel or Crushed Stone: Use this for drainage around the base of the root cellar.
Step-by-Step Construction Guide: Building Your DIY Root Cellar
Here's a step-by-step guide to building your backyard root cellar. Remember to adapt these instructions to your specific materials and location.
Step 1: Excavation:
- Dig a pit to the desired size and depth. For a partially buried root cellar, you'll want to dig down about 3-4 feet.
- Make sure the walls of the pit are stable and won't collapse.
Step 2: Drainage:
- Line the bottom of the pit with a layer of gravel or crushed stone for drainage.
- This will help prevent water from accumulating in your root cellar.
Step 3: Foundation:
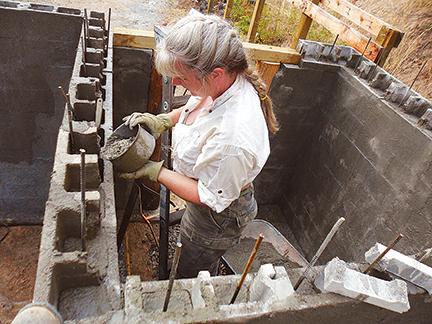
- If using bricks or stones, build a foundation around the perimeter of the pit.
- This will provide a stable base for the walls.
Step 4: Wall Construction:
- If using pallets, construct the walls by attaching them together securely.
- Reinforce the corners with additional bracing.
- Line the inside of the walls with plastic sheeting to create a moisture barrier.
Step 5: Roof Construction:
- Build a roof frame using pallets or lumber.
- The roof should be sloped to allow rainwater to run off.
- Cover the roof frame with plastic sheeting and then insulate it with straw bales, old blankets, or recycled denim.
- Cover the insulation with a layer of soil to provide additional insulation and protection.
Step 6: Door Installation:
- Install the salvaged door at the entrance of the root cellar.
- Make sure the door is well-insulated and seals tightly to prevent drafts.
Step 7: Ventilation:
- Install a ventilation pipe to allow for air circulation.
- The ventilation pipe should extend above the roof of the root cellar.
Step 8: Interior Finishing:
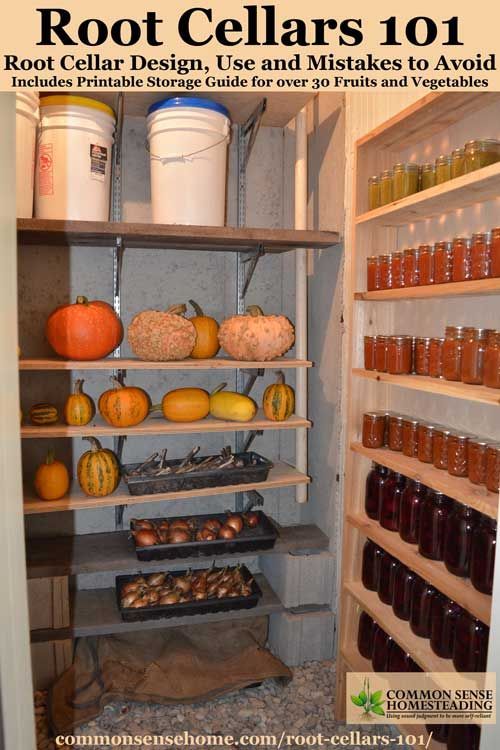
- Add shelves or bins to store your fruits and vegetables.
- Use wooden pallets or repurposed materials to create storage solutions.
My Root Cellar Adventure (and Mishaps!)
I remember the first time I attempted a project like this. It wasn't a root cellar, but a raised garden bed built from reclaimed wood. I vastly underestimated the time it would take and the importance of proper leveling. Let's just say my first attempt was… "rustic." I learned the hard way that a little planning and careful execution go a long way! The root cellar build was much smoother thanks to those early lessons. Don't be afraid to make mistakes, but learn from them!
Proper Use and Maintenance: Keeping Your Harvest Fresh
Once your root cellar is built, proper use and maintenance are essential to keep your harvest fresh. Here are some tips:
- Temperature Control: The ideal temperature for a root cellar is between 32°F and 40°F. Use a thermometer to monitor the temperature and adjust ventilation as needed.
- Humidity Control: The ideal humidity level is between 85% and 95%. Maintain humidity by sprinkling water on the floor or walls.
- Proper Ventilation: Ensure adequate air circulation to prevent mold and rot.
- Regular Inspection: Check your produce regularly and remove any spoiled items.
- Storage Techniques: Store different types of produce in separate containers or areas, as some fruits and vegetables release ethylene gas, which can cause others to ripen prematurely.
Addressing Common Challenges
- Water Intrusion: Proper drainage is key. Ensure your site isn't prone to flooding and that you have a good moisture barrier.
- Pest Control: Seal any cracks or openings to prevent rodents and insects from entering. Consider using natural pest repellents.
- Maintaining Temperature: Insulation is your best friend! Focus on a well-insulated roof and door.
- Condensation: Good ventilation is crucial to prevent condensation build-up, which can lead to mold.
Community Connection: Share Your Experiences!
Building a DIY root cellar is a rewarding experience. I encourage you to share your own experiences, challenges, and triumphs in the comments section below. What are your biggest challenges with food preservation? Have you built a root cellar before? What tips can you share with fellow homesteaders? Let's learn from each other!
Take Action: Start Building Your Self-Sufficient Future
Building a DIY backyard root cellar on a budget is a tangible step towards a more self-sufficient and sustainable lifestyle. Don't let the prospect of a big project overwhelm you. Start small, be resourceful, and enjoy the process. You'll be amazed at how much you can achieve with a little planning and effort.
We can't wait to see your amazing root cellars! Share photos of your own root cellars on social media using the hashtag #BetterHomesHarvestsRootCellar. Let's inspire others to embrace the joys of homegrown food and self-reliance!
