Unlock Homesteading Freedom: Build an Earth-Sheltered Root Cellar for Year-Round Food Storage!
Are you dreaming of a more self-sufficient homestead, less reliant on grocery stores and more connected to the rhythms of the seasons? Do you envision a pantry overflowing with homegrown goodness, even in the dead of winter? If so, then building an earth-sheltered root cellar might be the perfect DIY project to unlock a new level of homesteading freedom.
For years, I wrestled with the challenge of storing our harvest. Our refrigerator was constantly overflowing, and we were losing precious produce to spoilage. We knew we needed a better solution, one that honored our commitment to environmental responsibility and financial independence. The idea of a root cellar seemed daunting at first. The thought of digging into the earth and creating a stable, temperature-controlled environment felt like a project for experienced builders, not beginner homesteaders like us. But the potential rewards—fresh, homegrown food all winter long—were too enticing to ignore. So, we took the plunge, and now I'm excited to share our experience, step-by-step, so you can do it too!

This blog post will guide you through the process of designing and building your own earth-sheltered root cellar. We’ll cover everything from site selection and excavation to ventilation and insulation. Whether you’re a seasoned DIYer or just starting your homesteading journey, you’ll find practical tips and inspiration to create your own haven for homegrown goodness. Get ready to enhance your homestead efficiency and embrace a more sustainable living with this fulfilling DIY homesteading project!
Why Build an Earth-Sheltered Root Cellar?
Before diving into the how-to, let’s explore the "why" behind this project. A root cellar offers a multitude of benefits:
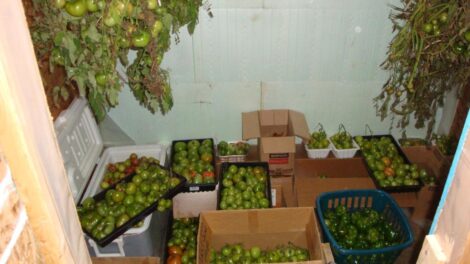
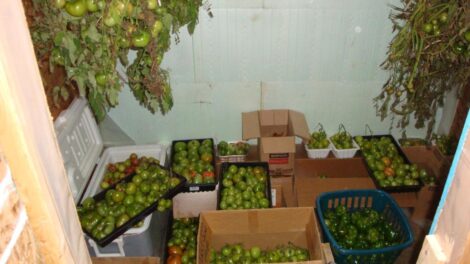
- Preserves Your Harvest: Root cellars provide a cool, dark, and humid environment ideal for storing fruits, vegetables, and even some canned goods. This extends the shelf life of your produce, allowing you to enjoy the fruits (and vegetables!) of your labor for months.
- Reduces Food Waste: By properly storing your harvest, you’ll significantly reduce food waste, saving you money and minimizing your environmental impact.
- Promotes Self-Sufficiency: A well-stocked root cellar reduces your reliance on grocery stores, especially during the winter months, increasing your homestead self-reliance.
- Saves Money: By storing your own produce, you'll avoid the high cost of buying out-of-season fruits and vegetables.
- Environmentally Friendly: Root cellars use natural cooling principles, eliminating the need for energy-guzzling refrigeration. This aligns perfectly with a sustainable living philosophy.
Step-by-Step Guide to Building Your Earth-Sheltered Root Cellar
Here's a detailed walkthrough of our experience, broken down into manageable steps:
1. Planning and Design:
- Site Selection: Choose a location that is well-drained, has a stable slope (if building into a hillside), and is easily accessible from your garden and home. A north-facing slope is ideal to minimize sun exposure. Consider the soil type; well-draining soil is crucial to prevent moisture problems.
- Size and Layout: Determine the size of your root cellar based on your storage needs. We opted for an 8ft x 12ft structure, which provides ample space for our family's harvest. Consider the internal layout, including shelving, bins, and walkways.
- Design Considerations: Research different root cellar designs. We chose a simple, partially underground design using concrete blocks for the walls and a wooden frame for the roof. Explore options like earthbag construction or using reclaimed materials for a more sustainable build.
2. Excavation:
- Digging In: This is where the hard work begins! We rented a small excavator to speed up the process, but you can certainly do it by hand. Ensure the excavation is slightly larger than your planned structure to allow for proper insulation and drainage.
- Foundation Preparation: Level the base of the excavation and compact the soil. We laid a gravel base for drainage, followed by a layer of sand to create a smooth surface for the concrete blocks.
3. Wall Construction:
- Concrete Blocks (or Alternative): We used concrete blocks for the walls, as they are durable and relatively easy to work with. Ensure the blocks are level and properly mortared together. Consider alternative materials like rammed earth, straw bales, or reclaimed stone.
- Waterproofing: This is critical to prevent moisture from entering your root cellar. We applied a waterproof membrane to the exterior of the walls, followed by a layer of drainage matting.
4. Roof Construction:
- Wooden Frame: We built a simple wooden frame for the roof, using pressure-treated lumber. Ensure the frame is strong enough to support the weight of the soil covering.
- Waterproof Membrane: Cover the wooden frame with a waterproof membrane to prevent water from seeping into the root cellar. We used a heavy-duty polyethylene sheeting.
- Soil Covering: Cover the roof with a thick layer of soil (at least 12 inches) to provide insulation and thermal mass. The soil helps to regulate the temperature inside the root cellar.
5. Ventilation:
- Airflow is Key: Proper ventilation is crucial to prevent mold and mildew. We installed two ventilation pipes: one near the floor to draw in cool air and one near the ceiling to exhaust warm, moist air. We also added dampers to control airflow.
6. Insulation:
- Natural Insulation: We used a combination of straw bales and reclaimed denim for insulation. Straw bales provide excellent thermal insulation and are a sustainable option. Reclaimed denim is a great way to recycle old clothing and provide additional insulation.
- Insulating the Walls: We placed straw bales against the exterior walls, covering them with a layer of plastic sheeting to protect them from moisture. We filled the gaps between the straw bales with reclaimed denim.
- Door Insulation: Pay close attention to insulating the door, as it can be a major source of heat loss. We used a solid-core door and added weather stripping to seal any gaps.
7. Interior Finishing:
- Shelving and Storage: Build sturdy shelving to store your harvest. We used reclaimed lumber to build our shelves, creating different levels to accommodate various sizes of produce.
- Flooring: We opted for a simple gravel floor, which allows for good drainage. Consider using brick or stone for a more aesthetically pleasing floor.
Materials List (Approximate Costs)
- Concrete Blocks: $500
- Lumber: $300
- Waterproof Membrane: $200
- Straw Bales: $100
- Reclaimed Denim: Free (collected from friends and family)
- Ventilation Pipes: $50
- Gravel: $100
- Mortar: $50
- Total Estimated Cost: $1300
Note: Costs can vary depending on your location and the materials you choose.
Time Required
- Planning and Design: 2 weeks
- Excavation: 3 days
- Wall Construction: 1 week
- Roof Construction: 1 week
- Ventilation: 1 day
- Insulation: 2 days
- Interior Finishing: 3 days
- Total Estimated Time: 5-6 weeks
Lessons Learned
- Waterproofing is Essential: Don't skimp on waterproofing! Proper waterproofing will prevent moisture problems and extend the life of your root cellar.
- Ventilation is Key: Ensure adequate ventilation to prevent mold and mildew.
- Natural Insulation Works: Straw bales and reclaimed denim provide excellent insulation and are a sustainable alternative to conventional insulation materials.
- Planning is Crucial: Take the time to plan your root cellar carefully. A well-planned root cellar will be more efficient and easier to build.
- Don't Be Afraid to Ask for Help: Enlist the help of friends and family to speed up the construction process. Building a root cellar is a big project, and it's always easier with an extra pair of hands.
Quantifying the Impact: From Garden to Table, All Winter Long!
Since completing our earth-sheltered root cellar, we've noticed a significant improvement in our food storage capabilities. We estimate that we're saving at least $50 per month on groceries during the winter months. More importantly, we're enjoying fresh, homegrown produce all year round, enhancing our homestead resilience and reducing our carbon footprint. Plus, the peace of mind knowing we have food security is invaluable.

Your Turn to Embrace Homesteading Freedom!
Building an earth-sheltered root cellar is a challenging but incredibly rewarding project. It’s a tangible step towards a more self-sufficient, sustainable, and resilient lifestyle. We encourage you to take the plunge and build your own haven for homegrown goodness.

We'd love to hear about your experiences! Share your own DIY projects, ask questions in the comments, or adapt our project to your own homestead. For more inspiration, check out our other articles on composting, seed saving, and rainwater harvesting. Let's empower our community to build a more sustainable and fulfilling life, one project at a time! To read more about natural building techniques, consider looking at Mother Earth News. https://www.motherearthnews.com/