Unlock Hidden Colors: Naturally Dyeing Fabric with Garden "Weeds"
The late summer garden is a bittersweet sight. While we revel in the abundance of tomatoes, zucchini, and herbs, we also know the growing season is winding down. But before you consign those spent plants and persistent "weeds" to the compost bin, consider this: you might be overlooking a treasure trove of natural dyes, ready to transform ordinary fabrics into vibrant works of art. Tired of synthetic dyes and their environmental impact? Discover easy ways to unlock hidden colors from common garden plants, breathing new life into old linens and adding a unique, handcrafted touch to your home. In this guide, we’ll explore how to identify dye plants, prepare your fabrics, and master the simple yet rewarding process of natural dyeing.

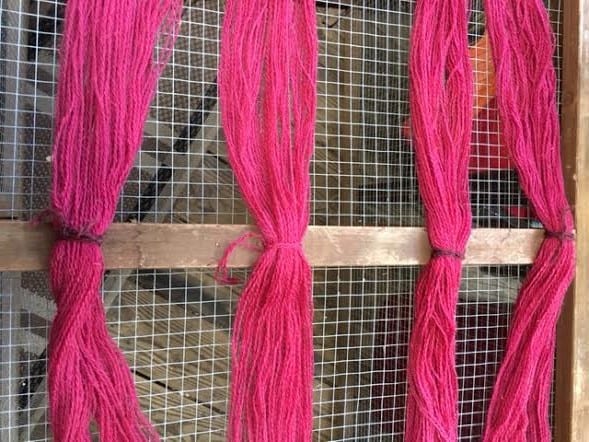
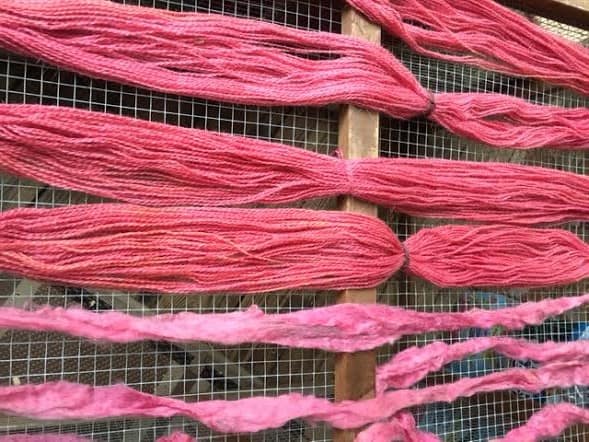
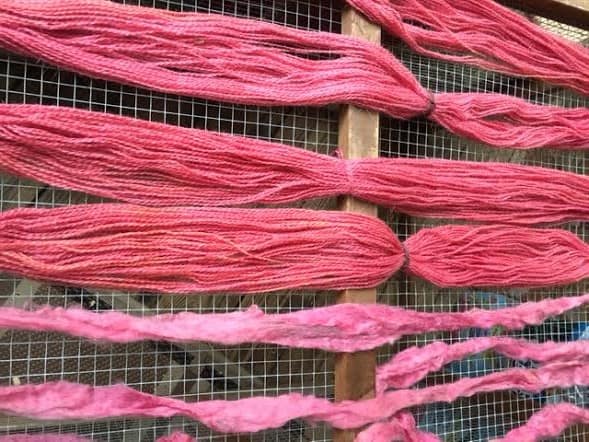
A basket of naturally dyed yarns showcasing the beautiful results possible with foraged colors.
Identifying Your Dye "Weeds"
Let's reframe our thinking: those weeds aren't pests, they're potential dye sources! Many common garden "weeds" contain surprisingly potent pigments that can create stunning colors on natural fibers. Here are a few to get you started:
- Dandelion: Both the roots and flowers can be used to create yellows and browns. The flowers offer a more vibrant yellow, while the roots tend towards earthy browns.
- Nettle: This often-avoided plant yields beautiful greens and yellows. Be sure to wear gloves when harvesting nettles to avoid stings!
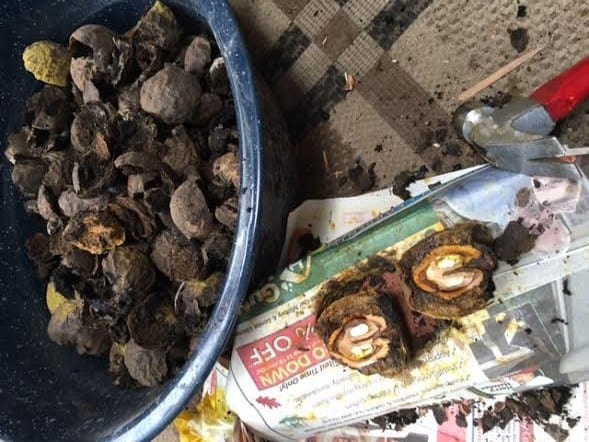
- Black Walnut: The hulls of black walnuts are a powerhouse of rich browns and tans. Gather them after they've fallen from the tree.
- Marigolds: These cheerful flowers produce vibrant yellows and oranges, especially when harvested at their peak bloom.
- Goldenrod: A classic autumn wildflower that gives sunny yellows.
Before you start harvesting, it’s absolutely crucial to positively identify each plant. Misidentification can be dangerous, so always double-check with a trusted online resource like the USDA Plants Database (plants.usda.gov) or a reputable field guide. Remember, "when in doubt, throw it out!"
Harvesting should also be done responsibly. Wear gloves when handling plants like nettles or black walnut hulls, which can stain skin. Avoid harvesting from areas that may have been sprayed with pesticides or herbicides. And most importantly, be mindful of the ecosystem. Don't take everything! Leave plenty of plants for pollinators and other wildlife. Sustainable harvesting ensures we can continue to enjoy these natural resources for years to come.
Key Takeaway: Weeds are abundant and renewable dye sources. Learning to identify them opens up a world of natural color.
Gathering Your Supplies & Preparing Your Fabric
Now that you've identified your dye plants, let's gather the necessary supplies:
Mordant: A mordant is essential for helping the dye bond to the fabric and preventing the color from fading. Common mordants include alum (potassium aluminum sulfate), iron (ferrous sulfate), and copper (copper sulfate). Alum is a good general-purpose mordant. Always handle mordants with care, wearing gloves and avoiding inhalation.
Stainless Steel Pot: Use a pot dedicated solely to dyeing. Do not use it for cooking afterward.
Wooden Spoon or Tongs: For stirring and handling fabric.
Gloves: To protect your hands from dye and mordants.
Scale: For accurately measuring mordant.
Natural Fibers: Cotton, linen, and wool are the most common natural fibers used for dyeing. Plant-based fibers like cotton and linen are more accessible and affordable for many homesteaders, while wool offers unparalleled color absorption.

A collection of essential supplies for natural dyeing, including undyed fabric, a stainless steel pot, and alum mordant.
Proper fabric preparation is crucial for achieving the best and most lasting color. This involves two key steps:
- Scouring: Scouring removes any oils, waxes, or sizing from the fabric that can prevent the dye from penetrating evenly. To scour, boil the fabric in a solution of water and soda ash (sodium carbonate) for about an hour. Use approximately 1 tablespoon of soda ash per gallon of water. Rinse thoroughly.
- Mordanting: Mordanting is the process of treating the fabric with a mordant to create a bond between the fiber and the dye molecule. For an alum mordant, dissolve 15-20% of the fabric's weight in alum in hot water. For example, if you have 100 grams of fabric, use 15-20 grams of alum. Simmer the fabric in the alum solution for about an hour, then let it cool in the bath before rinsing.
Key Takeaway: Proper preparation ensures the best and most lasting color results. Mordanting is not optional!
The Dyeing Process – Step-by-Step
Now for the fun part! Here's a step-by-step guide to the dyeing process:
- Harvesting: The best time to harvest dye plants is typically when they are at their peak color. For flowers, this is when they are in full bloom. For roots, it's often in the fall after the plant has died back.
- Preparing the Dye Bath: The ratio of plant material to water will vary depending on the plant and the desired color intensity. A good starting point is to use approximately equal weights of plant material and water (e.g., 100 grams of plant material per liter of water). Chop the plant material into smaller pieces and place it in the stainless steel pot with water. Gently simmer the mixture for about an hour to extract the color. Avoid boiling, as this can damage the dye molecules.
- Straining: Strain the dye bath through a fine-mesh sieve or cheesecloth to remove any plant matter. This will prevent unwanted specks from adhering to the fabric.
- Adding Fabric: Add the mordanted fabric to the dye bath, ensuring it is fully submerged. Gently simmer the fabric in the dye bath for 1-2 hours, stirring occasionally to ensure even dyeing.
- Cooling: Turn off the heat and allow the fabric to cool completely in the dye bath. This allows the dye to fully penetrate the fibers.
- Rinsing: Remove the fabric from the dye bath and rinse it thoroughly with cool water until the water runs clear.
- Drying: Hang the fabric to dry in a shady spot. Avoid direct sunlight, which can fade the color.

The magic of natural dyeing unfolds as fabric simmers in a pot of vibrant, plant-based dye.
Key Takeaway: The dyeing process is a slow, mindful craft. Patience and careful observation are key.
Modifying and Layering Color
Once you've mastered the basic dyeing process, you can start experimenting with modifiers and layering techniques to create unique and complex colors.
- pH Modifiers: You can shift the color of some dyes by altering the pH of the dye bath. Adding vinegar (an acid) can brighten some yellows, while adding washing soda (an alkali) can deepen blues and greens.
- Iron Modifiers: Iron can be used to create deeper, muted shades. To make an iron bath, dissolve a small amount of ferrous sulfate (iron sulfate) in water. Use caution when working with iron, as it can weaken fabrics. Dip the dyed fabric in the iron bath for a few minutes, then rinse thoroughly.
- Overdyeing: Layering colors by dyeing the fabric in multiple dye baths can create rich and complex hues. Try dyeing a fabric yellow with dandelion flowers, then overdyeing it with nettle for a unique green.
- Sun Dyeing/Bundle Dyeing: For unique patterns, consider sun dyeing or bundle dyeing. This involves arranging dye plants directly on the fabric, wrapping it tightly, and then steaming or leaving it in the sun to extract the color.
Key Takeaway: Experimentation is encouraged! Don't be afraid to play with modifiers and layering techniques to create your own unique palette.
Embrace the Imperfect Art of Natural Dyeing
Natural dyeing is a journey of discovery. Colors will vary depending on the specific plants you use, the soil they grow in, and the water you use for dyeing. Embrace these variations as part of the unique beauty of the process. As the garden winds down for the season, consider harvesting those last marigolds and goldenrod blooms to create a vibrant palette for winter projects. Enjoy the slow, mindful process of transforming simple plants into beautiful, naturally dyed textiles that tell a story of your garden and your home.

Dye stained hands as a symbol of a successful natural dyeing process.
Share Your Creations!
Have you tried natural dyeing with garden weeds? Share your experiences and photos on social media using #BetterHomesNaturalDyes. We'd love to see what you're creating! What plant are you most likely to try dyeing with? Leave a comment below with your favorite dye plants or tips, and sign up for the Better Homes and Harvests newsletter for more homesteading tips and DIY projects.