Unlock Free Water: Build a Rainwater Harvesting System for Your Homestead
Do you remember the last time you paid your water bill and felt a pang of frustration? I certainly do. For years, watering our ever-expanding garden and providing water for our chickens felt like a constant drain on our finances. Living rurally, our well water is precious, and lately, pumping it has become increasingly expensive. That's when I started looking at the sky and realized I was overlooking a free and abundant resource: rainwater.
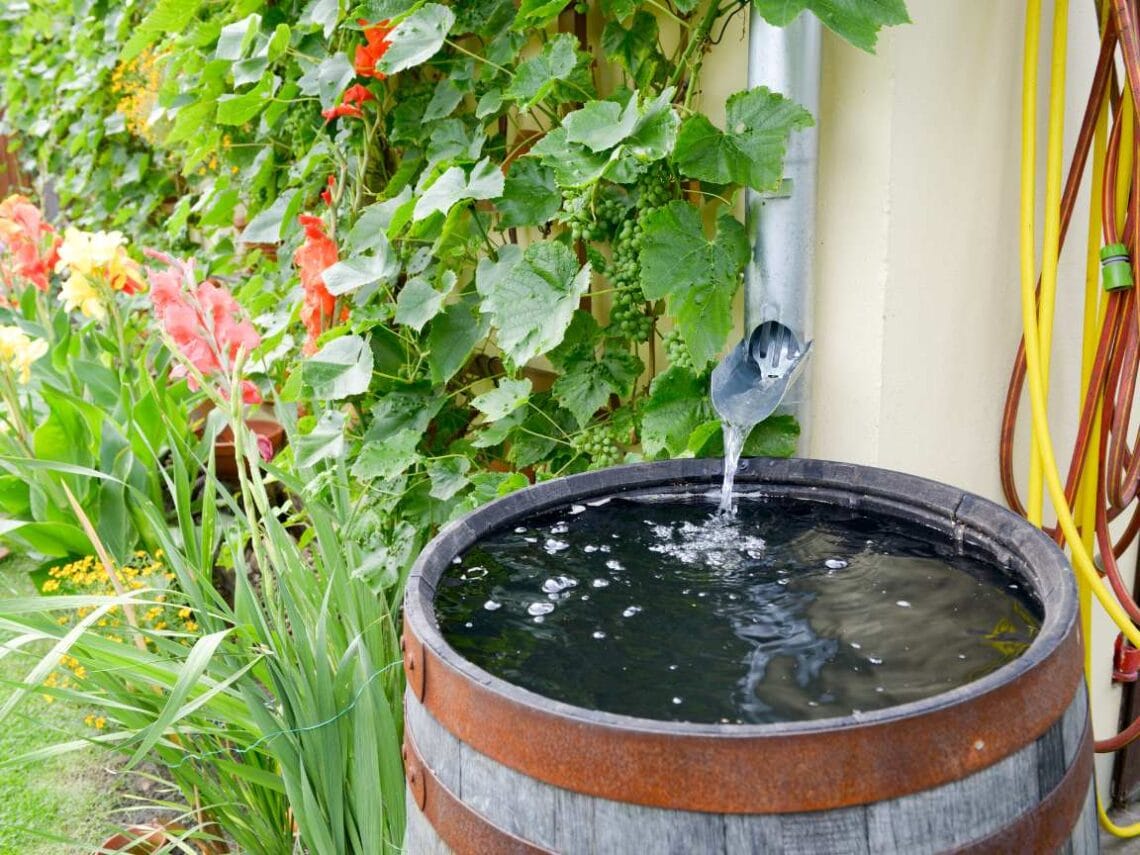
Rainwater harvesting is the practice of collecting and storing rainwater for later use. It's a simple, sustainable, and surprisingly effective way to supplement your water supply, reduce your water bill, and lessen your impact on the environment. Today, I'll walk you through building your own DIY rainwater harvesting system, customized for your homestead's needs. This project is easily adaptable, whether you have a small urban plot or a sprawling rural farm. Plus, you'll be amazed at how much money and stress you can save. Just remember to check any local regulations regarding rainwater harvesting before you begin!

Ready to ditch the water bill blues? Let's get started.
Section 1: Planning & Design
Before you start hauling barrels and attaching downspouts, it's crucial to take some time to plan. A well-designed system will be more efficient, more reliable, and ultimately more rewarding.
First, determine your water needs. How much water do you use for your garden each week? How many chickens or other livestock do you have, and how much water do they require? Are you considering using rainwater for washing clothes or even flushing toilets (where permitted by local regulations)? Be realistic with your estimates; it's always better to overestimate slightly than to run dry in the middle of summer.
Next, calculate your average rainfall. You can find this information easily online using local weather data. Look for average monthly or annual rainfall figures for your specific area. This will help you determine how much water you can realistically expect to collect.
Now, calculate your roof catchment area. This is the area of your roof that will be collecting rainwater. Measure the length and width of the section of roof that drains into the gutters you plan to use. Multiply these two numbers to get the area in square feet. This, combined with your rainfall data, will tell you how much water you can collect over time. For example, 1 inch of rain on 100 square feet of roof will yield approximately 60 gallons of water.
Based on your water needs and the amount of rainfall you can collect, choose the right tank size. Consider factors like storage space, budget, and how frequently you expect to use the water. It's often better to have multiple smaller tanks than one massive tank, as this can make maintenance easier and provide redundancy in case of leaks.
Finally, select a suitable site for your tank(s). Choose a location that is level, stable, and easily accessible for cleaning and maintenance. Ideally, the tank should be close to where you plan to use the water (e.g., your garden) to minimize the need for long hoses or pumps. Keep in mind that a full tank can be incredibly heavy, so ensure the ground can support the weight. Consider aesthetics as well; you might want to screen the tank with plants or a fence to make it less obtrusive.
Keep in mind potential challenges like algae growth and debris contamination. Dark-colored tanks help prevent algae growth, and proper filtration is essential for removing leaves and other debris.
The key takeaway here is that thorough planning is the foundation of a successful rainwater harvesting system. Take the time to do your homework upfront, and you'll be much happier with the results.

Section 2: Gathering Materials & Tools
Now that you have a solid plan, it's time to gather your supplies. Here’s a list of essential materials you'll need:
- Rain barrel/storage tank: Look for food-grade plastic or metal barrels, especially if you plan on using the water for your vegetable garden. 55-gallon drums are a popular and affordable option, but larger tanks are available if you need more storage.
- Gutters and downspouts: You might already have these in place. If not, you'll need to install them along the edge of your roof.
- Downspout diverter/first flush diverter: This device redirects the initial dirty runoff from your roof, preventing contaminants from entering your tank. This is an important feature for water quality.
- Screen/filter: Place a screen or filter at the inlet of your tank to catch leaves, twigs, and other debris. Window screening works well for this.
- Fittings, connectors, and sealant: You'll need various fittings and connectors to connect the downspout to the tank and attach the spigot. Use a food-grade sealant to ensure watertight connections.
- Spigot/tap: Install a spigot near the bottom of the tank for easy access to the water.
- Optional: pump, hose, water level indicator: A pump can be useful for irrigating a large garden, and a water level indicator will help you keep track of how much water you have stored.
As for tools, you'll likely need:
- Saw
- Drill with various drill bits
- Measuring tape
- Level
- Ladder
- Safety glasses
To save money, consider sourcing materials affordably. Check local hardware stores for sales and discounts. Look for recycled barrels online or through local community groups. Sometimes, you can even find free barrels from businesses that no longer need them. Always prioritize quality materials for a durable and safe system. While it might be tempting to cut corners, investing in good-quality components will save you headaches in the long run. Remember that food-grade containers are essential if you plan to use the water on edible plants.

Section 3: Installing the System: Step-by-Step Guide
Now for the fun part: putting everything together! Here's a detailed step-by-step guide to installing your rainwater harvesting system:
Step 1: Clean Gutters and Downspouts: Start by thoroughly cleaning your gutters and downspouts. Remove all leaves, twigs, and other debris to ensure efficient water flow.

Step 2: Install Downspout Diverter/First Flush Diverter: Cut the downspout a few inches above ground level. Install the downspout diverter according to the manufacturer's instructions. This will divert the initial dirty runoff, keeping your stored water cleaner.

Step 3: Prepare the Tank: Drill inlet and outlet holes in the tank using the appropriate size drill bits. Install the necessary fittings, connectors, and sealant to ensure watertight connections.

Step 4: Place the Tank: Choose a level and stable location for the tank. Use concrete blocks, gravel, or a purpose-built stand to provide a solid base. Make sure the base is strong enough to support the weight of a full tank.

Step 5: Connect Gutters to Tank: Connect the downspout to the tank inlet using a flexible hose or pipe. Secure the connections with hose clamps to prevent leaks.

Step 6: Install Spigot/Tap: Install the spigot near the bottom of the tank for easy access to the water. Again, use sealant to ensure a watertight connection.
:max_bytes(150000):strip_icc()/rain-barrel-spigot-4896312-4e4e5635c72f4e22a064574524d1133e.jpg)
Step 7 (Optional): Install Pump & Filtration: If desired, install a small water pump to help irrigate your garden. You can also add a filter to the outlet to remove any remaining sediment or debris.

Follow each step carefully, ensuring all connections are secure and watertight. Always prioritize safety when working at heights or using power tools. Wear safety glasses and use a sturdy ladder.
Section 4: Maintenance & Management
Once your rainwater harvesting system is up and running, it's important to maintain it properly to ensure its longevity and water quality.
Regularly inspect and clean your gutters and downspouts. This will prevent debris from clogging the system and reducing its efficiency. Periodically clean the tank to remove any sediment or algae that may have accumulated. You can do this by draining the tank completely and scrubbing the inside walls with a brush. Check for leaks regularly and repair any damage promptly. Small leaks can quickly become big problems, so it's important to address them as soon as you notice them.
In cold climates, take precautions to prevent freezing. Drain the tank completely before the first freeze, or insulate the pipes and tank to prevent them from bursting.
If you plan to use the rainwater for potable purposes (drinking, cooking), you'll need to treat it properly. This typically involves filtration to remove sediment and bacteria, followed by UV sterilization to kill any remaining pathogens. Note that depending on where you live, using collected rainwater as a potable source may be illegal. Be sure to check your local and state laws before doing so.
Finally, address the risk of mosquitoes breeding in your tank. You can prevent this by installing a fine-mesh screen over the inlet and outlet, or by using mosquito dunks (Bacillus thuringiensis israelensis, or Bti) in the tank. Bti is a safe and effective larvicide that kills mosquito larvae without harming beneficial insects or animals.

Conclusion
Building a rainwater harvesting system is a rewarding and empowering project that can significantly enhance your homestead's self-sufficiency and sustainability. Not only will you save money on your water bill, but you'll also reduce your reliance on municipal water sources and contribute to a more environmentally friendly lifestyle.
Remember, every homestead is unique, so don't be afraid to adapt this project to your specific needs and circumstances. Experiment with different tank sizes, filtration methods, and irrigation techniques to find what works best for you.
With a little planning, effort, and creativity, you can transform your roof into a valuable source of free water, helping you create a more resilient and sustainable homestead.

Call to Action
Have you built a rainwater harvesting system on your homestead? Share your experiences and tips in the comments below! What challenges did you face, and what solutions did you find?
Subscribe to the Better Homes and Harvests newsletter for more homesteading tips and DIY projects.
Share this blog post on social media and inspire others to embrace sustainable living! Use the hashtag #BetterHomesHarvestsDIY.
What other homesteading projects are you interested in learning about? Let us know in the comments!