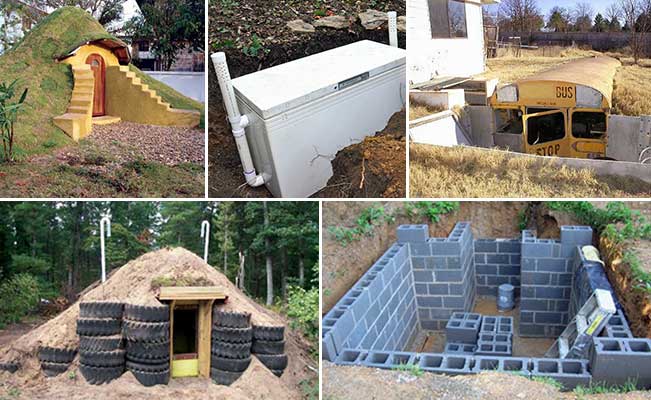
Unleash Your Homestead's Potential: Build Your Own DIY Root Cellar for Year-Round Bounty!
Imagine biting into a crisp, juicy apple in the dead of winter, the taste of summer sunshine bursting in your mouth. Or picture yourself ladling a hearty stew, packed with sweet carrots and earthy potatoes, on a cold January evening. This isn't a fantasy – it's the reality you can create with your own DIY root cellar.
At Better Homes and Harvests, we're all about empowering you to achieve greater food security and self-sufficiency. That's why we're thrilled to guide you through building your own small-scale, in-ground root cellar. Say goodbye to expensive grocery store produce and hello to a year-round supply of fresh, homegrown goodness! This guide will cover every step, from planning and site selection to construction and ventilation, making even a complex project like this approachable.
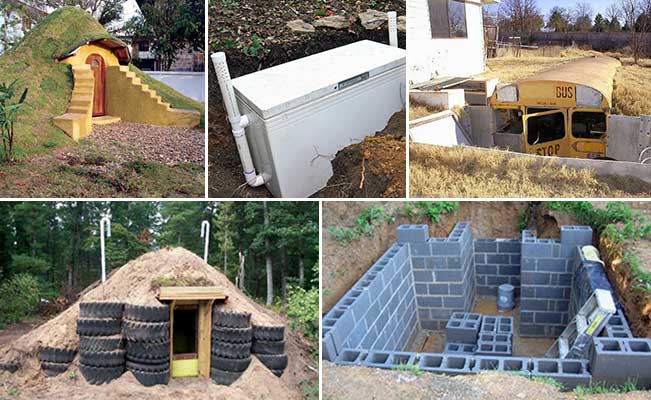
Why Build a Root Cellar? The Benefits of Winter Food Storage
Before we dive into the how-to, let's talk about the "why." Building a DIY root cellar offers a multitude of benefits:
- Food Security: Enjoy fresh, healthy produce throughout the winter months, reducing your reliance on store-bought options. This is especially crucial in times of uncertainty.
- Cost Savings: Cut down your grocery bills by storing your garden's bounty and preserving it for later use.
- Reduced Food Waste: Prevent spoilage by creating the ideal storage conditions for your produce. A root cellar is the perfect food preservation solution.
- Healthier Eating: Access nutritious, homegrown vegetables and fruits even when your garden is dormant.
- Homesteading Independence: Take a giant leap towards a more self-sufficient and sustainable lifestyle.
- Preserve root vegetables, apples and other seasonal produce
Planning Your Root Cellar: Size, Location, and Design
The first step in building your DIY root cellar is careful planning. Consider these factors:
- Size: How much produce do you want to store? A small family might need a root cellar of approximately 6ft x 8ft, while larger families will want to plan for bigger.
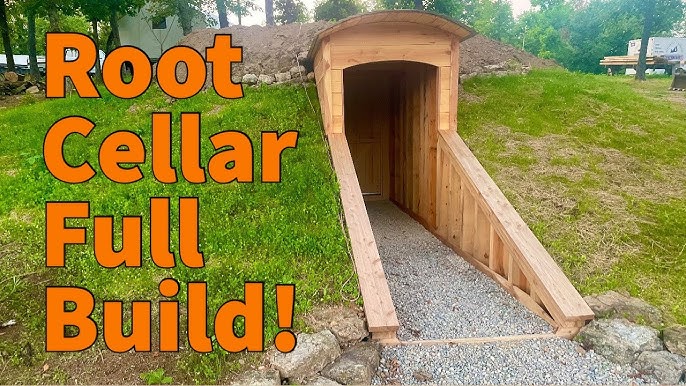
- Location: Choose a cool, shady spot with good drainage. A north-facing slope is ideal. Avoid areas prone to flooding. Accessibility is important too – you don't want to trudge through snowdrifts to get to your potatoes! A good location for an underground root cellar will be crucial.
- Design: There are many root cellar design options, from simple earthen structures to more elaborate concrete or block constructions. We'll focus on a straightforward, in-ground design using readily available materials.
Make sure your spot is in a good location.
Materials List and Approximate Costs
Here's a list of materials you'll need for our small-scale, in-ground DIY root cellar. Prices are approximate and may vary depending on your location.
- Lumber (for framing and door): $100-$200
- Concrete Blocks or Pressure-Treated Lumber (for walls): $200-$400
- Gravel (for drainage): $50-$100
- Insulation (rigid foam or straw bales): $50-$150
- Plastic Sheeting (moisture barrier): $30-$50
- Ventilation Pipes: $20-$40
- Door Hardware (hinges, latch): $20-$30
- Fasteners (screws, nails): $20-$30
- Tools (shovel, level, saw, drill): (Assuming you have these)
- TOTAL ESTIMATED COST: $490-$1030
Step-by-Step Construction Guide: Building Your Root Cellar
Now for the fun part! Follow these detailed instructions to build your DIY root cellar.
Step 1: Excavation. Dig a hole to the desired dimensions of your root cellar. Remember to account for the thickness of the walls and the depth of the gravel base. Ensure the walls are straight and the bottom is level. This is the most labor-intensive part, so enlist some help if needed.
Start with digging a hole for the base.
Step 2: Laying the Gravel Base. Add a layer of gravel (4-6 inches) to the bottom of the excavation. This will provide drainage and prevent moisture from seeping into your root cellar. Tamp the gravel down firmly.
Step 3: Building the Walls. Construct the walls using your chosen material. Concrete blocks are durable and provide good insulation, or pressure treated lumber is another great option. Stagger the joints for added strength. Ensure the walls are plumb and level. If using concrete blocks, mortar them together securely.
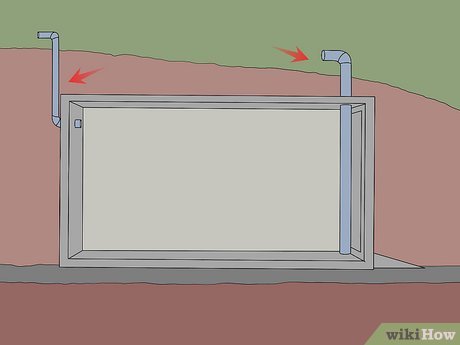
Constructing the walls.
Step 4: Framing the Entrance. Build a sturdy frame around the entrance to support the door. Use pressure-treated lumber for any wood that will be in contact with the ground.
Step 5: Installing Insulation. Insulate the walls to maintain a consistent temperature inside the root cellar. Rigid foam insulation or even straw bales can be used for this purpose. Cover the insulation with plastic sheeting to create a moisture barrier.
Step 6: Building the Roof (Optional). Depending on your design, you may need to build a roof for your root cellar. A simple shed roof made of lumber and covered with plastic sheeting and soil works well. Ensure the roof is strong enough to support the weight of the soil.
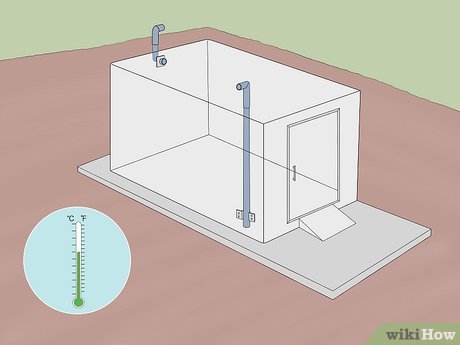
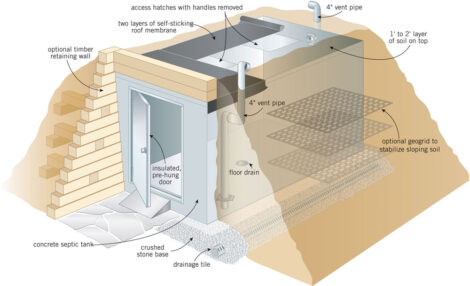
Step 7: Installing Ventilation. Proper root cellar ventilation is crucial to prevent mold and mildew. Install two ventilation pipes: one near the floor and one near the ceiling. This allows for natural convection, drawing cool air in and exhausting warm, moist air.
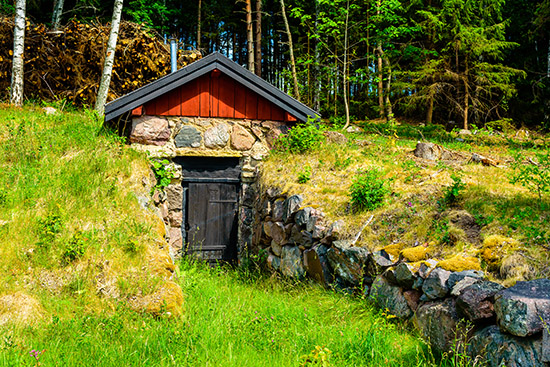
Ventilation is key.
Step 8: Building the Door. Construct a sturdy door that fits snugly in the entrance frame. Insulate the door to prevent heat loss. Install hinges and a latch to secure the door.
Step 9: Backfilling. Carefully backfill around the walls of the root cellar with soil. Tamp the soil down firmly to prevent settling.
Step 10: Interior Finishing. Add shelves or bins inside the root cellar to organize your produce. Use untreated wood or food-grade plastic for storage containers.
The Importance of Ventilation and Humidity Control
Maintaining the right temperature and humidity is crucial for successful winter food storage. Aim for a temperature between 32°F and 40°F and a humidity level of 85-95%. The key to controlling the humidity in your root cellar is good ventilation. This helps to remove excess moisture and prevent condensation. You can adjust the airflow by opening or closing the ventilation pipes as needed.
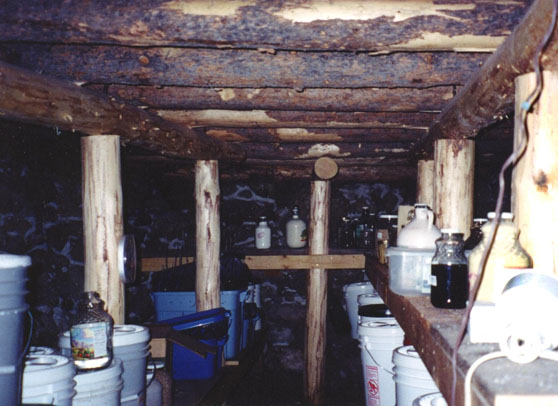
Common Mistakes to Avoid and Troubleshooting Tips
- Poor Drainage: Ensure your site has good drainage to prevent flooding.
- Inadequate Ventilation: Insufficient ventilation can lead to mold and spoilage. Monitor humidity levels and adjust ventilation as needed.
- Improper Insulation: Inadequate insulation can cause temperature fluctuations, reducing the shelf life of your produce.
- Storing Damaged Produce: Only store healthy, undamaged fruits and vegetables.
- Pest Control: Take steps to prevent rodents and insects from entering your root cellar.
Storing Your Harvest: Tips for Success
- Root Vegetables: Store root vegetables like potatoes, carrots, and beets in bins or crates filled with slightly damp sand or sawdust.
- Apples: Wrap each apple individually in newspaper to prevent them from touching and spreading rot.
- Onions and Garlic: Hang onions and garlic in mesh bags to allow for good air circulation.
- Check Regularly: Inspect your produce regularly and remove any spoiled items to prevent them from affecting the rest of your harvest.
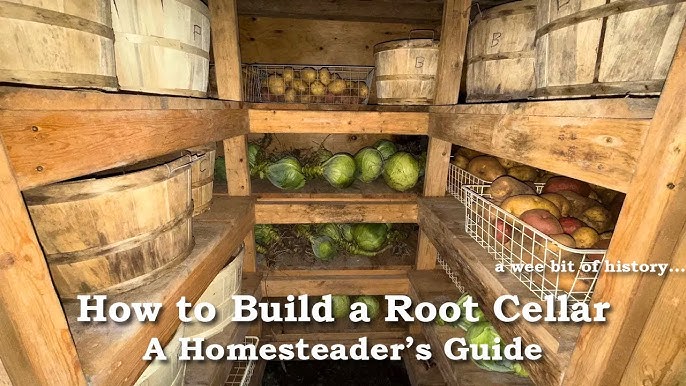
An organized root cellar is a happy root cellar.
Before and After: The Transformation
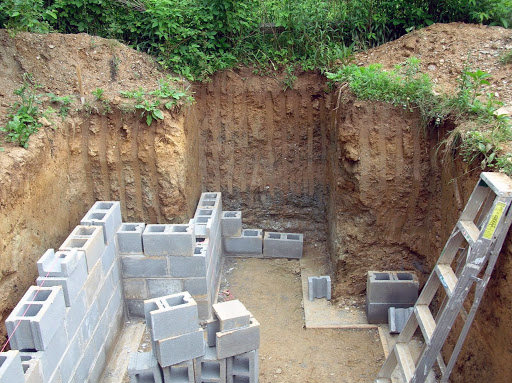
During construction.
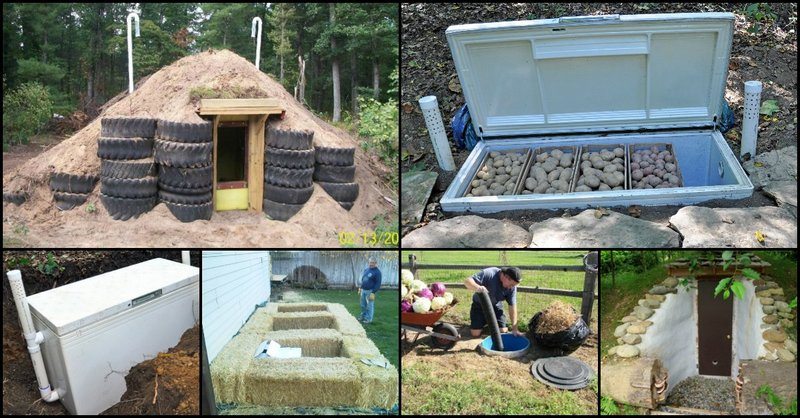
The Finished Product!
The Emotional Reward: Providing for Your Family
Building a DIY root cellar is more than just a construction project. It's an investment in your family's health and well-being. It's about connecting with the land, embracing self-sufficiency, and enjoying the satisfaction of providing for your loved ones year-round, even when the garden is covered in snow. Imagine the sense of accomplishment as you share your preserved bounty with family and friends, knowing that you created it with your own hands. That’s a great benefit of building a root cellar on a homestead.
Take the Plunge: Start Building Your Root Cellar Today!
Ready to unleash your homestead's potential and enjoy a year-round harvest? We hope this guide has inspired you to take the plunge and build your own DIY root cellar. It may seem like a daunting project, but with careful planning and a little elbow grease, you can create a valuable asset for your homestead.
We can't wait to see your progress! Share your root cellar building journey in the comments section below or tag us in your social media posts using #BetterHomesAndHarvestsRootCellar.
What other homesteading projects would you like to see covered in future posts? Let us know! Your feedback helps us create content that empowers you to live a more self-sufficient and fulfilling life. Happy homesteading!