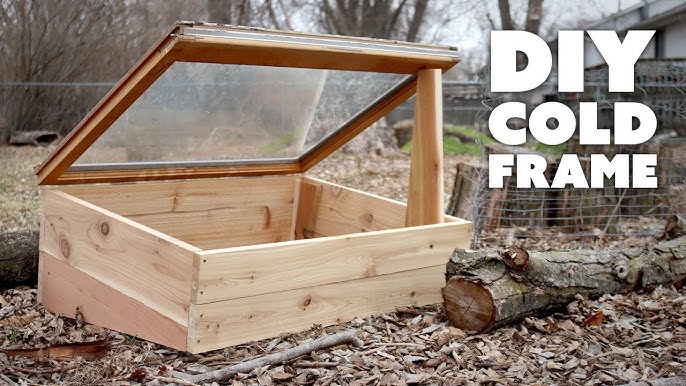
Unleash Your Homestead's Potential: A Step-by-Step Guide to Building a DIY Cold Frame for Year-Round Gardening
Better Homes and Harvests readers, picture this: It's late January, a blanket of snow covers your garden, and the grocery store's winter vegetable selection is looking… well, bleak. But you stroll out to your backyard, brush the snow off a simple wooden structure, and harvest a vibrant salad of spinach, arugula, and kale. This isn't a fantasy; it's the reality of year-round gardening with a cold frame!
For years, I resigned myself to a short growing season, packing up my gardening tools in October and not touching them again until April. The yearning for fresh, homegrown greens during those long winter months was almost painful. Then I discovered the magic of the cold frame. Not only did it extend my harvest, but the satisfaction of nurturing life through the harshest weather was incredibly rewarding. I remember the first winter salad I harvested – the flavors were intensified by the cold, and it felt like a triumph over nature itself.
If you're dreaming of fresh, homegrown vegetables even when the snow is flying, you're in the right place. Join us for a beginner-friendly project that will extend your growing season and boost your self-sufficiency: building a simple yet effective DIY cold frame! This guide provides a complete, step-by-step walkthrough, perfect for homesteaders with basic carpentry skills. Get ready to harvest greens long after your neighbors have packed up their gardens!
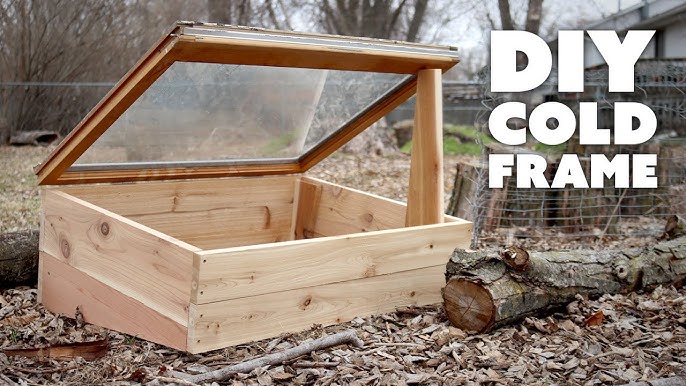
This guide will walk you through building a small (4ft x 6ft) cold frame from reclaimed lumber and an old window. The goal is to provide a simple, cost-effective solution for extending the growing season in colder climates. We'll focus on a design that is easy to build, durable, and efficient at trapping solar heat. Let's get started!
Materials List:
- Reclaimed Lumber:
- Two 6ft long 2x6 boards (for the back)
- Two 4ft long 2x6 boards (for the sides)
- Two 6ft long 2x4 boards (for the top frame)
- Two 4ft long 2x4 boards (for the top frame)
- Additional 2x4 scraps for corner bracing
- Old Window: Approximately 4ft x 6ft. Check local salvage yards, architectural reclaim stores, or online marketplaces like Craigslist or Facebook Marketplace.
- Hinges: Two heavy-duty hinges (3-4 inches).
- Screws: 2-inch exterior wood screws.
- Caulk: Exterior-grade caulk.
- Optional: Paint or wood sealant (exterior grade).
Estimated Cost: $50 - $100 (depending on the cost of reclaimed lumber and the window). Reusing materials can significantly reduce the cost.
Tools List:
- Safety Glasses: Essential for protecting your eyes.
- Work Gloves: To protect your hands.
- Measuring Tape: For accurate measurements.
- Pencil: For marking cuts.
- Circular Saw or Hand Saw: For cutting lumber to size. A circular saw will make the job faster and easier, but a hand saw will work just fine.
- Drill: With drill bits for pilot holes and driving screws.
- Screwdriver: (If not using a drill for screws).
- Level: To ensure the frame is square and level.
- Caulk Gun: For applying caulk (if using).
- Clamps: To hold pieces together while screwing.
- Square: To ensure corners are 90 degrees.
Step-by-Step Instructions:
Safety First: Always wear safety glasses and work gloves when using power tools or handling lumber. Work in a well-ventilated area.
Step 1: Prepare the Lumber
- Inspect your reclaimed lumber for any nails, screws, or other debris. Remove them carefully.
- Clean the lumber with a brush to remove dirt and grime.
- Measure and cut the lumber according to the dimensions listed in the materials list. Double-check your measurements before cutting!
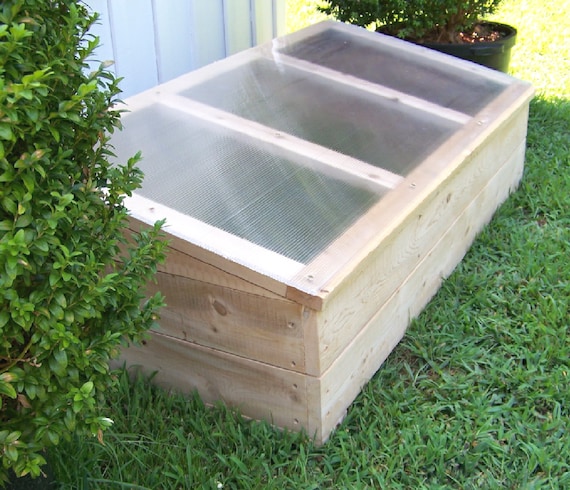
Tip: If your reclaimed lumber is rough, you can sand it down for a smoother finish. However, this is not necessary for functionality.
Step 2: Assemble the Frame
- Lay out the 2x6 boards on a flat surface to form a rectangle. The 6ft boards are the back, and the 4ft boards are the sides.
- Use a square to ensure the corners are 90 degrees.
- Pre-drill pilot holes at the corners to prevent the wood from splitting.
- Screw the boards together using 2-inch exterior wood screws. Use at least two screws per corner for a strong connection.

Tip: Clamping the corners together before screwing will help keep them square.
Step 3: Add Corner Bracing (Optional but Recommended)
- Cut small pieces of 2x4 lumber to fit diagonally in each corner of the frame.
- Pre-drill pilot holes and screw the corner braces in place. This will significantly strengthen the frame and prevent it from racking.
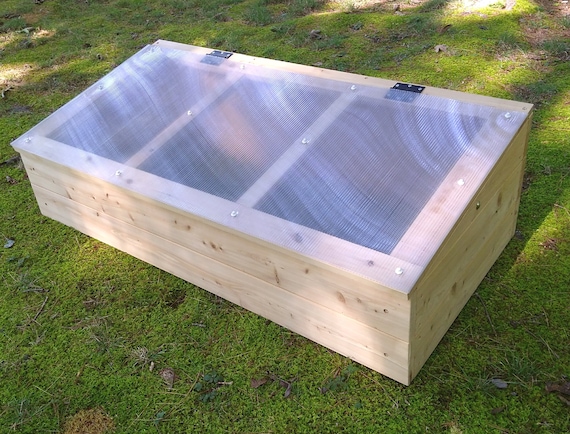
Step 4: Build the Top Frame
- Lay out the 2x4 boards (6ft and 4ft) to form a rectangle on top of the base frame, matching the outer dimensions.
- Pre-drill pilot holes and screw the boards together using 2-inch exterior wood screws, forming the lid frame.

Step 5: Attach the Window
- Carefully place the old window on top of the 2x4 frame.
- Position the hinges along one of the long sides of the frame (the back side of the cold frame).
- Pre-drill pilot holes and screw the hinges to both the window frame and the 2x4 frame.
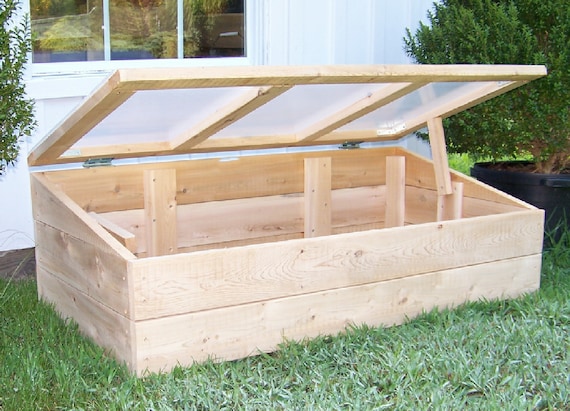
Tip: Have a helper hold the window in place while you attach the hinges.
Step 6: Caulk the Seams (Optional)
- If desired, apply a bead of exterior-grade caulk along all seams of the frame to create a more airtight seal. This will help retain heat inside the cold frame.

Step 7: Paint or Seal (Optional)
- To protect the wood from the elements, you can paint or seal the cold frame with an exterior-grade paint or sealant. This will extend the life of your cold frame.
Step 8: Position Your Cold Frame
- Choose a sunny location for your cold frame that receives at least 6 hours of sunlight per day. Ideally, the cold frame should face south to maximize solar gain.
- Ensure the ground is level before placing the cold frame.
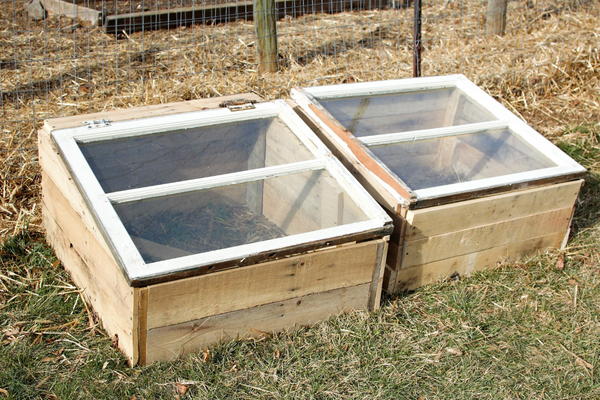
Customization Options:
- Height: You can adjust the height of the cold frame by using different sizes of lumber. A taller cold frame will provide more headroom for taller plants.
- Materials: While we used reclaimed lumber, you can also use new lumber or other materials like cinder blocks or straw bales.
- Ventilation: Consider adding a small vent to the side of the cold frame to prevent overheating on sunny days. You can create a simple vent by cutting a hole in the side and covering it with a piece of screen or adjustable flap.
- Insulation: In very cold climates, you can insulate the cold frame by lining the inside with bubble wrap or foam insulation.
Maintenance Tips:
- Ventilation: Monitor the temperature inside the cold frame and vent it on warm days to prevent overheating.
- Watering: Water your plants regularly, but be careful not to overwater. The cold frame will help retain moisture, so you may need to water less frequently than you would in an open garden.
- Cleaning: Clean the window regularly to maximize sunlight penetration.
- Winter Protection: In extremely cold weather, you can cover the cold frame with blankets or tarps for extra insulation.
Troubleshooting:
- Cold frame is overheating: Open the window or vent to allow excess heat to escape.
- Plants are not growing: Ensure the cold frame is receiving enough sunlight and that the soil is well-drained. You may also need to fertilize your plants.
- Condensation is building up inside the cold frame: Increase ventilation to reduce humidity.
Get Growing!
Congratulations! You've built your own DIY cold frame. Now it's time to start planting! Some great vegetables to grow in a cold frame include spinach, kale, lettuce, arugula, and other leafy greens. You can also use your cold frame to start seeds for your spring garden.
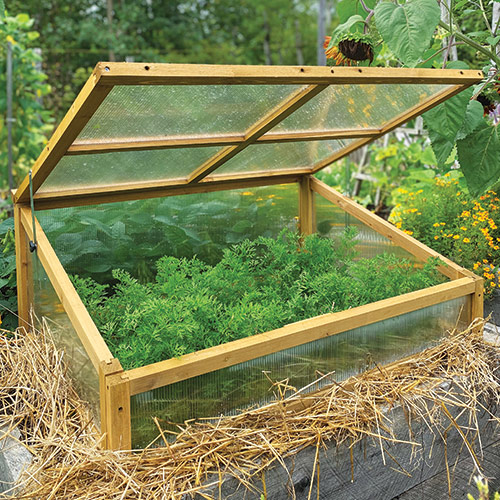
Don't forget to share your own cold frame builds in the comments section and on social media using the hashtag #BetterHomesHarvestsColdFrame. We'd love to see what you're growing! What are you planning to grow in your new cold frame? Let us know in the comments below! Happy gardening!