
Unleash Your Homesteading Potential: Show Us Your Water Conservation Skills with a DIY Guide!
Are you ready to take control of your water usage and boost your homestead's self-sufficiency? Water conservation is a cornerstone of sustainable living, and implementing smart strategies can significantly reduce your water bills and lessen your environmental impact. In this guide, we'll walk you through building a simple yet effective rainwater harvesting system – a project perfect for a weekend endeavor that yields long-term benefits.
This project is designed for beginner to intermediate homesteaders, focusing on cost-effective solutions and readily available materials. Let's dive in and transform your homestead into a water-wise haven!

Why Rainwater Harvesting? The Benefits are Clear
Before we get started, let’s discuss why rainwater harvesting is such a valuable addition to any homestead. Beyond the obvious benefits of reducing your reliance on municipal water and lowering your water bills, rainwater harvesting offers several other advantages:
- Free Water Source: Rain is a renewable resource, and harvesting it provides a free source of water for your garden, livestock, and even some household uses (with proper filtration).
- Reduced Runoff: Collecting rainwater helps reduce stormwater runoff, which can contribute to erosion and pollution.
- Better for Plants: Rainwater is naturally soft and free of chlorine and other chemicals found in treated water, making it ideal for irrigating your garden.
- Increased Self-Sufficiency: By relying less on external water sources, you become more resilient and independent. This is a core tenet of the homesteading lifestyle.
Designing Your DIY Rainwater Harvesting System
The key to a successful rainwater harvesting system is proper planning. Before you start buying materials, take the time to assess your needs and determine the best system for your property. Here's what you need to consider:
1. Calculate Your Water Needs
Estimate how much water you use for your garden, livestock, or other intended purposes. Consider factors like the size of your garden, the number of animals you have, and the climate in your area. This will help you determine the appropriate size of your storage container. Remember to err on the side of caution; it's better to have too much capacity than not enough.
2. Assess Your Roof Size and Rainfall
Your roof acts as the collection surface for your rainwater. Measure the square footage of your roof area that will be draining into your gutters. Then, research the average rainfall in your area. A quick online search for "[Your City/Region] average rainfall" will provide the data you need.
3. Calculate Potential Rainwater Collection
Use this formula to estimate how much rainwater you can collect:
Collection Potential (gallons) = Roof Area (sq ft) x Rainfall (inches) x 0.623 x Runoff Coefficient
- 0. 623 is a conversion factor (1 inch of rain on 1 square foot equals 0.623 gallons).
- Runoff Coefficient: This accounts for losses due to evaporation and other factors. Use 0.8 for metal roofs, 0.9 for asphalt shingles, and 0.7 for tile roofs.
For example, if you have a 1,000 sq ft roof, receive 30 inches of rain per year, and have asphalt shingles, your collection potential is:
1,000 sq ft x 30 inches x 0.623 x 0.9 = 16,821 gallons per year
4. Choose Your Storage Container
The size of your storage container (rain barrel or tank) will depend on your water needs and collection potential. Common options include:
- Rain Barrels (50-100 gallons): Ideal for small gardens and limited space.
- Intermediate Bulk Containers (IBCs) (275 gallons): A good mid-size option.
- Large Storage Tanks (500+ gallons): Suitable for larger properties and significant water needs.
Consider using multiple rain barrels to increase your storage capacity without investing in a massive tank.
Step-by-Step Guide to Building Your Rainwater Harvesting System
Now that you have a plan, let's get to building! This guide focuses on a simple rain barrel system, perfect for beginner homesteaders.
Materials List:
- Rain Barrel (50-100 gallons)
- Downspout Diverter
- Spigot (for the rain barrel)
- Hose Connector (for the rain barrel)
- Screen Mesh (to cover openings and prevent debris)
- PVC Pipe (to extend downspout, if needed)
- Gravel or Concrete Blocks (to elevate the rain barrel)
- Basic Tools: Drill, Screwdriver, Measuring Tape, Saw (if cutting PVC)
Step 1: Prepare the Rain Barrel
- Clean the Barrel: Thoroughly clean the rain barrel with soap and water. Rinse it well to remove any residue.
- Install the Spigot and Hose Connector: Drill holes near the bottom of the barrel for the spigot and hose connector. Attach them securely, using sealant if necessary to prevent leaks.
- Install a Screen: Cut a piece of screen mesh slightly larger than the opening at the top of the barrel. Secure it with a rubber band or zip ties to prevent debris and insects from entering.
Step 2: Prepare the Downspout
- Choose a Location: Select a downspout near your garden or where you need the water.
- Install the Downspout Diverter: Cut the downspout at the appropriate height and install the downspout diverter according to the manufacturer's instructions. This will redirect the rainwater into the rain barrel.
Step 3: Set Up the Rain Barrel
- Create a Level Base: Place gravel or concrete blocks on a level surface to create a stable base for the rain barrel. Elevating the barrel will make it easier to access the water with a watering can or hose, utilizing gravity.
- Position the Rain Barrel: Place the rain barrel under the downspout diverter. Ensure the diverter is properly aligned to direct water into the barrel.
- Connect Overflow: Most downspout diverters have an overflow outlet. Connect a hose to this outlet to direct excess water away from your foundation.
Step 4: First Flush Diverter (Optional but Recommended)
A first flush diverter helps improve the water quality by discarding the first amount of rainwater that washes off your roof, which typically contains the most debris and contaminants. It's a simple DIY addition to your system. You can build one using PVC pipe and a valve. Instructions for building a first flush diverter can be easily found online with a quick search: "DIY first flush diverter."
Maintaining Your Rainwater Harvesting System
Regular maintenance is essential to keep your rainwater harvesting system functioning properly. Here are some tips:
- Clean Gutters Regularly: Clear leaves and debris from your gutters to ensure efficient water flow.
- Inspect the Screen: Check the screen on the rain barrel regularly and clean it as needed.
- Check for Leaks: Inspect the rain barrel, spigot, and hose connections for leaks. Repair any leaks promptly.
- Winterize Your System: In cold climates, disconnect the downspout diverter and drain the rain barrel to prevent freezing and damage.
Beyond Rain Barrels: Expanding Your Water Conservation Efforts
Once you’ve mastered the basic rain barrel system, you can explore other water conservation strategies to further enhance your homestead's self-sufficiency. Consider these options:
- Greywater Systems: Recycle water from showers, sinks, and washing machines (excluding toilet water) for irrigation. Be sure to research local regulations regarding greywater use.

- Drought-Resistant Landscaping: Choose plants that require less water, such as native species and succulents.
- Mulching: Apply mulch around plants to retain moisture in the soil.
- Composting: Amend your soil with compost to improve its water-holding capacity.
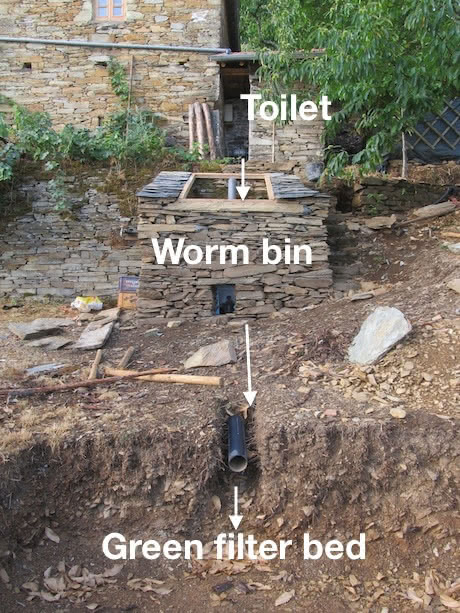
- Swales and Rain Gardens: Create swales (shallow trenches) and rain gardens to capture and infiltrate rainwater into the soil.
Important Considerations
- Legality: Check your local regulations regarding rainwater harvesting. Some areas have restrictions on the amount of water you can collect or the uses for which you can use it.
- Water Quality: Rainwater is generally safe for irrigation and livestock watering. However, it's not potable (safe for drinking) without proper filtration and disinfection. If you plan to use rainwater for drinking, consult with a water quality expert to determine the appropriate treatment system.
Conclusion: Embrace Water Conservation and Grow Your Homesteading Skills
Building a rainwater harvesting system is a rewarding project that can significantly benefit your homestead. By following this guide, you can reduce your water bills, increase your self-sufficiency, and contribute to a more sustainable future. Remember to start small, plan carefully, and maintain your system regularly. Embrace the power of water conservation, and watch your homestead thrive! This DIY water conservation project is a great step to homestead self-sufficiency.