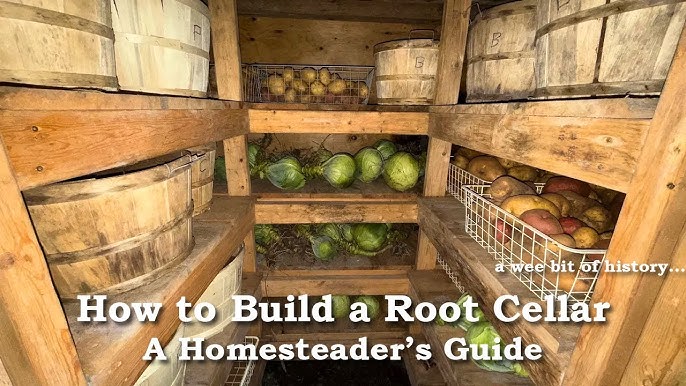
Unleash the Homesteader Within: Transform Your Fall Harvest with a DIY Root Cellar Upgrade!
Tired of watching your precious fall harvest wither away before you can enjoy it? At Better Homes and Harvests, we believe in harnessing the power of self-sufficiency to preserve nature's bounty. This month, we're diving deep into practical projects that will transform your homesteading experience. Building or improving a root cellar is a game-changer for any homesteader looking to extend the shelf life of their hard-earned produce, drastically reduce food waste, and save money on grocery bills. Let's empower you to take control of your food supply and embrace the fulfilling lifestyle of self-sufficient homesteading!
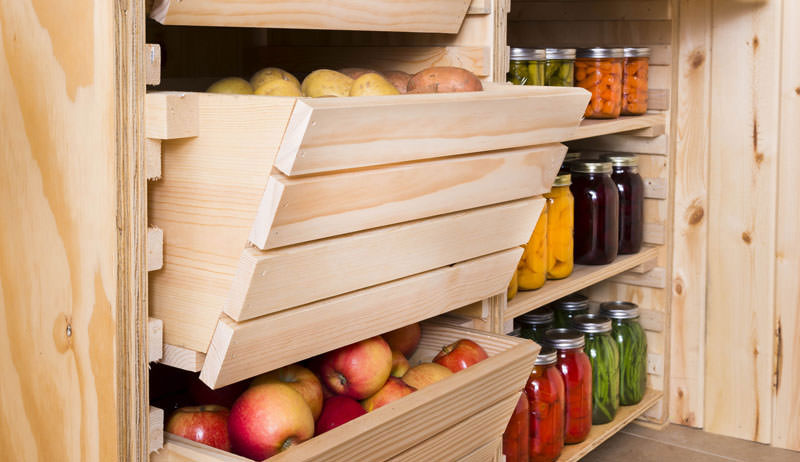
The Challenge: Extend Your Fall Harvest This Winter!
This season, we’re tackling a crucial project: building or significantly improving a root cellar. We're focusing on cost-effective and beginner-friendly methods so any homesteader, regardless of experience, can implement these strategies to extend the life of their fruits and vegetables. Let's ensure your abundant fall harvest stays fresh and delicious all winter long! This guide will cover planning, construction (or improvement), troubleshooting, and optimal storage techniques.
1. Planning & Design: Laying the Foundation for Success (20%)
The key to a successful root cellar lies in thoughtful planning and design. Let's explore some essential considerations:
Choosing Your Root Cellar Design: The Repurposed Route
For this guide, we'll focus on upgrading an existing space, like an uninsulated section of a basement or even a large, sturdy shed. This approach is often the most cost-effective and accessible for beginner homesteaders. Outdoor pit cellars are excellent, but require more extensive excavation. Building a new structure from scratch can be a bigger undertaking.
Location, Location, Location
Even within a basement, location matters. An area with a north-facing wall is ideal, as it receives less direct sunlight and maintains a cooler temperature. Proper drainage is crucial to prevent moisture problems. Ensure the area isn't prone to flooding or excessive dampness.
Size Matters: Dimensions for a Small-to-Medium Homestead
For a small-to-medium homestead, a root cellar area of approximately 6ft x 8ft is a great starting point. This provides ample space for storing a variety of crops without being overwhelming to manage. Adjust the size based on the expected volume of your harvest.
Material Selection: Embrace Resourcefulness and Affordability
Cost is a major factor. Prioritize reclaimed or readily available materials to keep expenses down. Some ideas:
- Reclaimed Lumber: Scour local sources for used lumber, such as old barns or construction sites (with permission, of course!).
- Concrete Blocks: Affordable and durable for creating walls or shelving.
- Insulation: Rigid foam insulation boards are effective for temperature control.
- Gravel: Essential for drainage.
- Pallets: Can be repurposed for shelving (ensure they are food-safe).
Budget Considerations: Keeping Costs in Check
Set a realistic budget and stick to it. The beauty of this project is that it can be done incrementally, so you don't have to do it all at once. Focus on the most critical aspects first, like insulation and ventilation, and then add shelving and other features as your budget allows.
2. Step-by-Step Construction/Improvement: Turning Vision into Reality (50%)
Here’s a step-by-step guide to transforming your chosen space into a functional root cellar. We'll assume we're working with a section of an existing basement that needs upgrading.
Step 1: Cleaning and Preparation
Thoroughly clean the area. Remove any debris, cobwebs, or anything that could harbor pests. Sweep and wash the floor to create a clean working environment.
Step 2: Addressing Moisture
This is CRITICAL. Apply a waterproof sealant to the walls and floor to prevent moisture from seeping in. If you notice any existing water damage, address the source of the problem before proceeding. Consider installing a dehumidifier if moisture is a persistent issue.
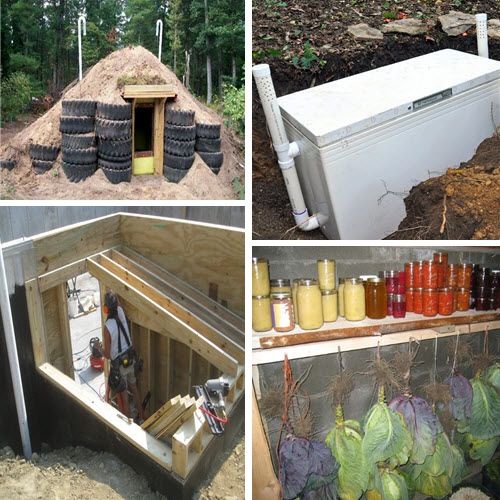
Step 3: Insulating the Walls
Insulation is key to maintaining a stable temperature. Attach rigid foam insulation boards to the walls using construction adhesive. Ensure there are no gaps between the boards. The goal is to create a thermal barrier that prevents outside temperatures from affecting the inside of the root cellar. We're adding this layer of insulation to prevent frost penetration and maintain a consistently cool environment.
Step 4: Building Shelving
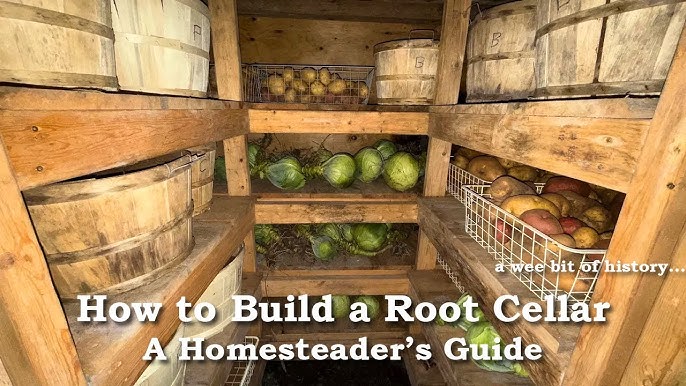
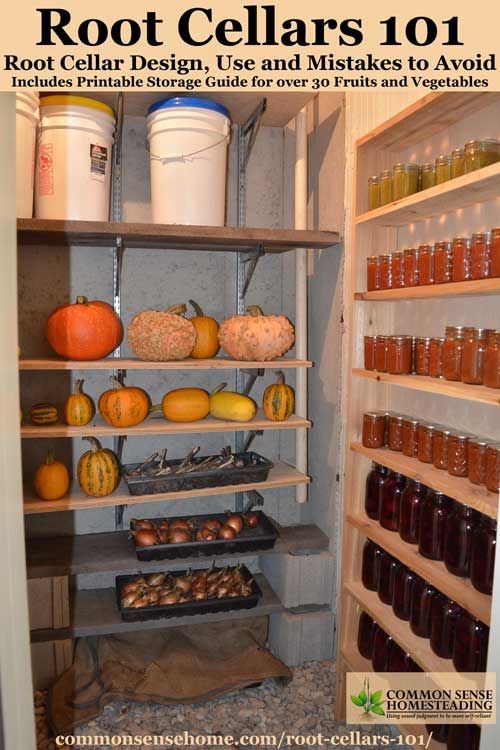
Construct sturdy shelving to maximize storage space. Use reclaimed lumber or concrete blocks and lumber for a cost-effective solution. Pallets can be used as a base for shelving, providing good air circulation. Ensure shelves are strong enough to hold the weight of your stored produce.
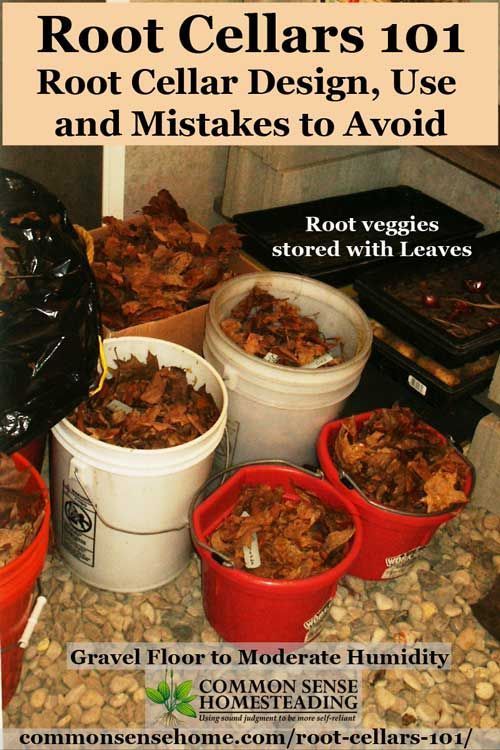
Step 5: Ventilation is Vital
Proper ventilation is crucial for preventing mold and maintaining optimal humidity levels. Install a ventilation pipe that draws in cool air from outside. A simple pipe with a screen to keep out pests will suffice. You can also create a vent near the ceiling to allow warm air to escape. The goal is to create a natural airflow that regulates temperature and humidity.
Step 6: Temperature and Humidity Monitoring
Install a thermometer and hygrometer to monitor temperature and humidity levels. Aim for a temperature between 32-40°F (0-4°C) and a humidity level of 85-95%. Regularly check these levels and adjust ventilation as needed to maintain optimal conditions.
3. Troubleshooting & Maintenance: Keeping Your Root Cellar in Tip-Top Shape (15%)
Even with careful planning, you might encounter challenges. Here's how to tackle some common issues:
- Drainage Issues: If you notice water pooling in the root cellar, improve drainage by adding gravel around the perimeter or installing a French drain.
- Pest Control: Seal any cracks or openings to prevent rodents and insects from entering. Use traps or natural repellents to control pests.
- Condensation Problems: Increase ventilation to reduce condensation. Ensure proper airflow to prevent moisture buildup.
- Mold Growth: Mold indicates excessive humidity. Improve ventilation and consider using a dehumidifier. Clean affected areas with a bleach solution.
Ongoing Maintenance:
- Regularly inspect the root cellar for signs of pests, mold, or moisture.
- Clean shelves and floors as needed.
- Monitor temperature and humidity levels.
- Adjust ventilation as required to maintain optimal conditions.
4. Harvesting & Storage: Maximizing Freshness (10%)
How you harvest and store your crops significantly impacts their longevity.
Harvesting Techniques:
- Carrots: Harvest carrots on a cool, dry day. Gently lift them from the soil and trim the greens, leaving about an inch.
- Potatoes: Harvest potatoes after the foliage has died back. Allow them to cure in a dark, well-ventilated area for a week before storing.
- Apples: Harvest apples when they are fully ripe but not overripe. Handle them carefully to avoid bruising.
Optimal Storage:
- Carrots: Store carrots in boxes or bins filled with damp sand or sawdust. This helps maintain humidity and prevent them from drying out.
- Potatoes: Store potatoes in dark, well-ventilated containers. Avoid storing them near apples, as the ethylene gas produced by apples can cause potatoes to sprout.
- Apples: Store apples in single layers in boxes or trays. Wrap each apple individually in newspaper to prevent rot from spreading.
Storage Chart:
| Crop | Temperature (°F) | Humidity (%) | Storage Method |
|---|---|---|---|
| Carrots | 32-40 | 90-95 | Damp sand or sawdust |
| Potatoes | 35-40 | 85-90 | Dark, well-ventilated containers |
| Apples | 32-40 | 85-90 | Single layers, wrapped individually in newspaper |
| Onions | 32-36 | 65-70 | Well-ventilated mesh bags |
| Winter Squash | 50-60 | 50-70 | Dry, well-ventilated area |
5. The Heart of Homesteading: Connecting to the Land (5%)
My root cellar project is more than just a practical endeavor; it's a connection to the rhythms of nature. It allows me to savor the fruits (and vegetables!) of my labor long after the growing season has ended. Knowing that I can provide nutritious, homegrown food for my family throughout the winter months brings a deep sense of satisfaction and self-reliance. It's about reducing our dependence on the industrial food system and embracing a more sustainable way of life. It provides a deeper connection to the land and the satisfaction of eating food you've grown and preserved yourself.
Embrace the rewarding journey of food preservation! Building or improving a root cellar is an investment in your homestead's future and a step towards a more resilient and fulfilling lifestyle. Start small, be resourceful, and enjoy the process of transforming your fall harvest into a winter feast! Happy homesteading!