Unearth Your Inner Homesteader: Build a Budget-Friendly Root Cellar in a Weekend! (Better Homes and Harvests)
Imagine biting into a crisp, juicy apple in the middle of January, its flavor a vibrant reminder of summer's bounty. Or perhaps you envision a hearty stew bubbling on the stove, packed with carrots and potatoes pulled straight from your own cool storage, even as the snow falls outside. This isn't just a pipe dream – it's the reality of having a root cellar, and you don't need a sprawling farm or a winning lottery ticket to make it happen.
This week, Better Homes and Harvests is thrilled to guide you through building a simple, affordable, and effective DIY root cellar that even a complete beginner can tackle in a weekend. We’re talking budget root cellar bliss for under $200! Say goodbye to limp, store-bought veggies and hello to fresh, homegrown goodness all winter long. So, ditch the doom and gloom of dwindling daylight and let's get building!

Why Build a Root Cellar?
Before we dive into the nitty-gritty, let's quickly recap why a homesteading root cellar is a game-changer:
- Extended Harvest: Keep your hard-earned harvest fresh for months longer. Think potatoes until spring!
- Save Money: Reduce your grocery bills by relying on your own stored produce.
- Reduce Food Waste: Prevent spoilage and make the most of your garden's yield.
- Food Security: Gain greater control over your food supply.
- Delicious Flavor: Homegrown, properly stored produce simply tastes better.
Our Weekend Project: The "Half-Buried Haven"
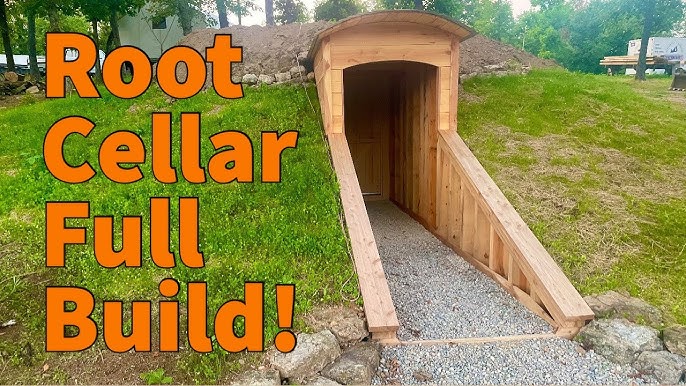
We're not building a palatial underground fortress here. Instead, we're focusing on an accessible, easy root cellar solution: a small, partially underground structure. This design strikes a sweet spot between ease of construction, cost-effectiveness, and performance. It leverages the earth's natural insulation to maintain a cool, stable environment, perfect for winter vegetable storage.
Materials You'll Need (Estimated Cost: Under $200)
- Reclaimed Pallets: 4-6 sturdy pallets (free or very low cost)
- Lumber: Untreated lumber for framing the door and roof support (check your local lumber yard for deals on shorts/remnants)
- Insulation: Straw bales, rigid foam insulation (reclaimed options work great!), or heavy-duty tarps.
- Heavy-Duty Tarps: To line the interior and provide a moisture barrier.
- Gravel or Crushed Stone: For the floor (provides drainage).
- Door: A reclaimed door or a simple frame you build yourself.
- Fasteners: Screws, nails, staples.
- Ventilation Pipe: 4-inch PVC pipe.
- Hardware Cloth: To cover the ventilation pipe and prevent critters.
- Tools: Shovel, saw, drill, hammer, measuring tape, level, staple gun.
Step-by-Step Instructions: Building Your Budget-Friendly Root Cellar
Step 1: Location, Location, Location!
Choose a spot that's shaded, well-drained, and easily accessible. A north-facing slope is ideal. Avoid areas that collect water or are prone to flooding.
Step 2: Digging the Hole (Partial Burial)
Excavate a shallow pit – about 2-3 feet deep and slightly larger than the footprint of your pallets. This is where the "partially underground" aspect comes in. The earth will help regulate the temperature. This depth qualifies this project as a small root cellar construction.
Step 3: Pallet Power!
Arrange the pallets to form the walls of your root cellar. Secure them together with screws or nails. Ensure the structure is square and level.
Step 4: Floor It!
Line the bottom of the pit with gravel or crushed stone to provide drainage. This will help prevent moisture buildup inside the root cellar.
Step 5: Insulation Time
This is where you get creative with your cheap root cellar build! Line the interior walls with insulation. Straw bales are a fantastic natural and affordable option. Rigid foam insulation (reclaimed is even better!) provides excellent thermal protection. Heavy-duty tarps act as a moisture barrier.
Step 6: Roof Support
Construct a simple frame using lumber to support the roof. Angle the roof slightly to allow for water runoff. Cover the frame with plywood or more reclaimed lumber, and then waterproof it with tarps or roofing material.
Step 7: The Doorway to Deliciousness
Install a door frame and hang your reclaimed door. Ensure it fits snugly to minimize air leaks. Insulate the door as well.
Step 8: Ventilation is Key
Install a 4-inch PVC pipe as a ventilation system. Extend the pipe from the inside of the root cellar to the outside, ensuring the outdoor opening is covered with hardware cloth to prevent critters from entering. Ventilation is critical for maintaining the right temperature control and humidity control.
Step 9: Backfilling
Backfill around the sides of the root cellar with the soil you removed earlier. This further insulates the structure and helps maintain a stable temperature.
Step 10: Finishing Touches
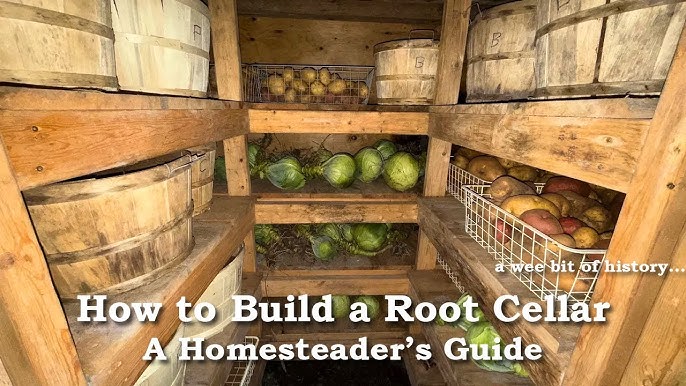
Add shelving inside the root cellar to organize your produce. Use wooden crates, repurposed shelves, or build simple shelving units from scrap lumber.

Alt text: An example of a small, DIY root cellar made from plastic pails buried in the ground, demonstrating a different approach to budget-friendly food storage.
Tips, Tricks, and Potential Pitfalls
- Moisture Control is Crucial: Proper drainage and ventilation are essential for preventing mold and rot.
- Temperature Monitoring: Use a thermometer inside the root cellar to monitor the temperature.
- Rodent Proofing: Ensure your structure is sealed to prevent rodents from entering. Hardware cloth is your friend!
- Ventilation Adjustment: Adjust the ventilation based on the outside temperature. Close it up during extreme cold, open it up during milder periods.
- Reclaimed Materials: Don't be afraid to get creative with reclaimed materials. Pallets, old doors, and scrap lumber can all be repurposed.
- Local Climate: Adjust the design and insulation based on your local climate.
The Ideal Conditions: Temperature and Humidity
Here's a quick guide to the ideal storage conditions for common root cellar crops:
- Root Vegetables (Potatoes, Carrots, Beets): 32-40°F, 90-95% humidity
- Apples: 32-40°F, 85-90% humidity
- Onions: 32-36°F, 65-70% humidity
Maintaining the right temperature and humidity is crucial for long-term storage. A simple hygrometer can help you monitor humidity levels.
Modifications for Different Skill Sets
- Beginner: Stick to a very simple pallet structure with straw bale insulation.
- Intermediate: Build a more robust frame with lumber and use rigid foam insulation.
- Advanced: Consider incorporating a geothermal cooling system for enhanced temperature control.

Alt text: A screenshot from a video demonstrating the construction of a root cellar, providing a visual aid for understanding the building process.
From Garden to Table, All Winter Long
Building a weekend root cellar is an investment in your self-sufficiency and your family's health. It's a tangible way to connect with the earth and enjoy the fruits (and vegetables!) of your labor long after the growing season has ended. This DIY food storage solution will help you on your homesteading journey. Don't be intimidated! Start small, get creative, and most importantly, have fun. Even a partially successful affordable root cellar will be a huge improvement over store-bought produce in the dead of winter!
Now it’s your turn! Have you built a DIY root cellar before? What tips and tricks can you share? What challenges did you face? Share your experiences and ask your questions in the comments below! And if you found this guide helpful, please share it with your fellow homesteaders on social media! Let's all enjoy fresh, homegrown goodness all winter long! #DIYRootCellar #Homesteading #WinterFoodStorage #BudgetRootCellar