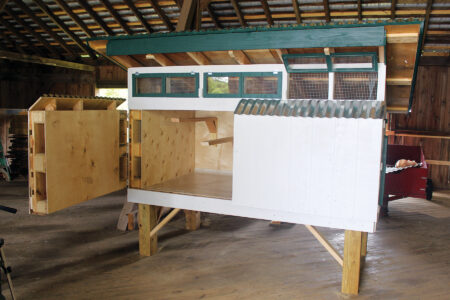
Unearth Your Homesteading Potential: DIY Chicken Tractor for a Sustainable Flock
Imagine fresh eggs every morning from chickens happily foraging on your land. This isn't just a dream; it's an achievable reality with a well-managed backyard flock. And one of the best tools for managing your chickens sustainably? A DIY chicken tractor!
Better Homes and Harvests believes in empowering you to create a more self-sufficient and fulfilling life. That's why we're excited to share this step-by-step guide to building your own chicken tractor, a portable coop that allows your chickens to graze on fresh pasture, fertilize your land, and keep your garden safe from unwanted pecking. If you're into homesteading in Pennsylvania, or anywhere with a strong growing season, this project can be a total game changer!
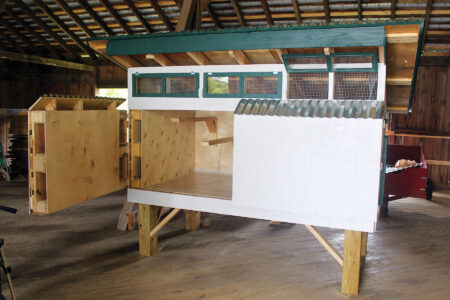
This project blends time-honored traditions with modern innovation, offering a simple and effective way to manage your flock and enhance your homesteading journey.
Why Build a Chicken Tractor?
Before we dive into the how-to, let's explore the "why." A chicken tractor offers numerous benefits for both you and your chickens:
- Fresh Pasture: Provides chickens with access to fresh grass, bugs, and other goodies, leading to healthier and happier hens.
- Natural Fertilization: Chickens naturally fertilize the soil as they roam, enriching your garden beds and pasture.
- Pest Control: Chickens eat insects and larvae, reducing pest populations in your garden and surrounding areas.
- Garden Protection: Prevents chickens from damaging your garden by confining them to a specific area.
- Easy Movement: The portability allows you to easily move the coop to different locations, preventing overgrazing and promoting even fertilization.
- Improved Egg Quality: Access to fresh forage improves the nutritional content and flavor of your eggs.
Planning Your Chicken Tractor: Size and Design
The size of your chicken tractor will depend on the number of chickens you plan to house. A good rule of thumb is to provide at least 4 square feet of space per chicken inside the tractor and at least 8 square feet of grazing space per chicken when the tractor is moved daily.
Consider these factors when designing your chicken tractor:
- Mobility: Choose lightweight materials and consider adding wheels for easier movement.
- Predator Protection: Ensure the coop is securely enclosed to protect your chickens from predators like foxes, raccoons, and hawks.
- Ventilation: Provide adequate ventilation to prevent moisture buildup and maintain a healthy environment for your chickens.
- Accessibility: Design the coop with easy access for cleaning, feeding, and egg collection.
- Weather Protection: Include a covered area to protect your chickens from sun, rain, and wind.
Step-by-Step Guide: Building Your DIY Chicken Tractor
This guide will walk you through building a simple and effective chicken tractor using readily available materials.
Materials List (Estimated Cost: $150 - $300)
- Lumber:
- (8) 2" x 4" x 8' pressure-treated lumber (for the base frame)
- (4) 2" x 2" x 8' lumber (for the coop frame and supports)
- Hardware Cloth: 1/2" or 1" mesh, 25-50 feet (depending on the size of your tractor)
- Roofing Material: Corrugated metal roofing, plywood, or heavy-duty tarp
- Wheels: (2) Heavy-duty wheels (optional, but highly recommended)
- Hardware:
- Screws: 1 1/4" and 3" exterior-grade screws
- Staples: Heavy-duty staples for attaching hardware cloth
- Hinges: (2) for the access door
- Latch: For securing the access door
- Tools:
- Saw (circular saw or hand saw)
- Drill
- Staple gun
- Measuring tape
- Pencil
- Safety glasses
- Gloves
Step 1: Building the Base Frame
- Cut the 2" x 4" lumber to create a rectangular base frame. A common size is 4' x 8', but you can adjust the dimensions to suit your needs.
- Assemble the frame using 3" screws. Ensure the corners are square and the frame is sturdy.
- If you're using wheels, attach them to one end of the frame. This will make it easier to move the tractor.
Step 2: Constructing the Coop Frame
- Cut the 2" x 2" lumber to create the coop frame. The height of the coop should be at least 3 feet to allow your chickens to stand comfortably.
- Attach the coop frame to the base frame using 3" screws.
- Add additional 2" x 2" supports to the frame to provide stability and create a secure enclosure.
Step 3: Enclosing the Coop with Hardware Cloth
- Measure and cut the hardware cloth to fit the sides, top, and bottom of the coop frame.
- Attach the hardware cloth to the frame using heavy-duty staples. Ensure the staples are securely fastened to prevent chickens from escaping and predators from entering.
- Overlap the edges of the hardware cloth to create a tight seal.
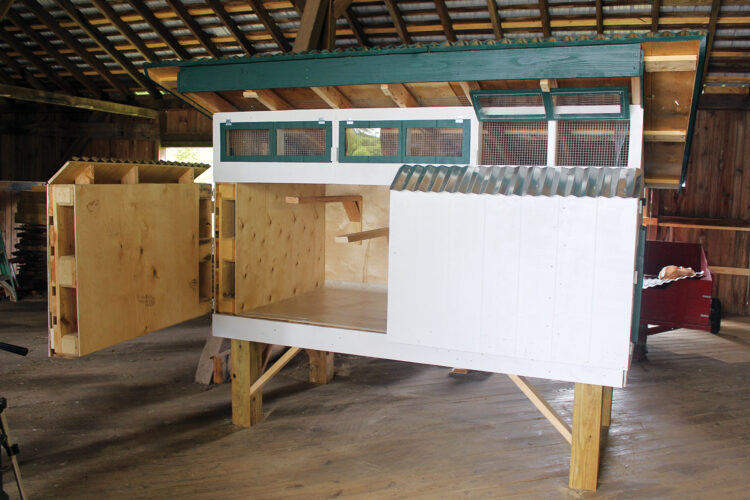
Step 4: Adding the Roofing
- Cut the roofing material (corrugated metal, plywood, or tarp) to fit the top of the coop.
- Attach the roofing material to the frame using screws or staples.
- Ensure the roofing is securely fastened and provides adequate protection from the elements.
Step 5: Creating an Access Door
- Cut an opening in one side of the coop for an access door.
- Build a door frame using 2" x 2" lumber.
- Cover the door frame with hardware cloth.
- Attach the door to the coop frame using hinges.
- Install a latch to secure the door.
Step 6: Adding Finishing Touches
- Sand any rough edges or splinters to prevent injuries to your chickens.
- Add a roosting bar inside the coop for your chickens to perch on.
- Provide a food and water container inside the coop.

Homesteading Hacks and Lessons Learned
- Repurpose Materials: Look for opportunities to repurpose materials for your chicken tractor. Old pallets, scrap lumber, and recycled metal can all be used to reduce costs and minimize waste.
- Consider a Skirt: Adding a "skirt" of hardware cloth around the base of the tractor can help prevent chickens from digging under the sides and escaping.
- Easy Movement: To make moving the tractor even easier, attach handles to one end.
- Predator Protection: Bury hardware cloth around the perimeter of the tractor to deter digging predators.
- Observe and Adjust: Monitor your chickens' behavior and adjust the design of your tractor as needed.
- Mistakes: I initially built my door too small, making it difficult to clean. Make sure your access door is large enough for easy cleaning and maintenance.
Extending Your Growing Season

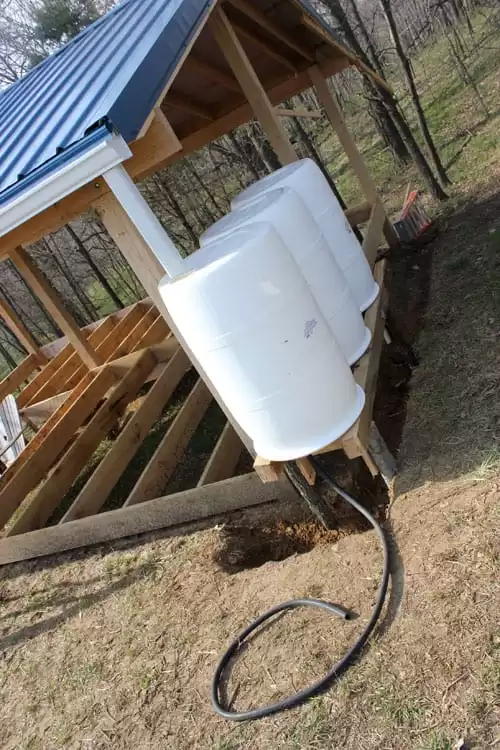
Sustainable Water Solutions
Call to Action
Now it's your turn! We hope this guide has inspired you to build your own DIY chicken tractor and take the next step toward a more self-sufficient life. Share your experiences, ask questions, and let us know how this project has helped you unearth your homesteading potential. What modifications did you make? What challenges did you face?
Ready to embrace the joys of fresh eggs, natural fertilization, and a healthier flock? Start building your chicken tractor today!
This DIY project is a rewarding investment in your homestead and a testament to the power of self-sufficiency. Happy homesteading!