Unearth Your Homesteading Hero: Craft a DIY Project Guide for Better Homes and Harvests
The path to self-sufficiency is paved with ingenuity, sweat equity, and a whole lot of DIY. Homesteading isn't just about escaping the rat race; it's about embracing resourcefulness and building a life that's deeply connected to the land. But where do you start? Overwhelmed by the sheer volume of homesteading advice online, many beginners struggle to find projects that are truly practical and achievable. That’s where your inner homesteading hero comes in.
Today, we’re diving into a project that not only addresses a common homesteading need – reliable food storage – but also provides an opportunity to learn valuable building skills. We’ll be crafting a simple, affordable, and highly effective DIY root cellar, perfect for extending your harvest and reducing your reliance on store-bought produce throughout the winter months.
Why a Root Cellar?
Before we get into the nitty-gritty, let’s talk about why a root cellar is such a valuable addition to any homestead. A root cellar provides a cool, dark, and humid environment, ideal for storing root vegetables like potatoes, carrots, beets, and onions, as well as fruits like apples and pears. Unlike refrigeration, a root cellar doesn’t require electricity, making it a sustainable and cost-effective food storage solution.
Imagine harvesting your bountiful garden in the fall and knowing that you can enjoy the fruits (and vegetables!) of your labor well into the winter. That's the power of a well-designed root cellar. This is a cost-effective DIY homestead project.
Our DIY Root Cellar: The "Buried Treasure" Design
This root cellar design is based on simplicity and accessibility. We'll be using readily available materials and focusing on a partially buried structure, which is easier to build than a fully underground cellar. This "Buried Treasure" design utilizes a repurposed shipping container, offering durability and relatively quick construction.
Disclaimer: Building any structure requires careful planning and adherence to local building codes. This guide is for informational purposes only, and you are responsible for ensuring that your project complies with all applicable regulations. Safety is paramount!
Materials List
Here's a breakdown of the materials you'll need, along with approximate costs (prices may vary depending on your location and supplier):
- Used Shipping Container (20ft): $2,000 - $4,000
- Gravel: $100 - $200 (for drainage)
- Concrete Blocks: $50 - $100 (for leveling the container)
- Insulation (Rigid Foam): $200 - $400 (for temperature control)
- Wood Framing (2x4s): $100 - $200 (for interior walls and shelves)
- Plywood: $50 - $100 (for interior walls and shelves)
- Vapor Barrier: $20 - $40 (to prevent moisture buildup)
- Door: $100 - $300 (repurposed or new)
- Ventilation Pipes: $30 - $50 (for airflow)
- Fasteners (Screws, Nails): $20 - $30
- Tools: (Assuming you have some basic tools) Circular saw, drill, level, measuring tape, hammer, safety glasses, gloves
Total Estimated Cost: $2,720 - $5,420
Note: Consider sourcing reclaimed or repurposed materials to reduce costs. Sites like Craigslist, Facebook Marketplace, and local salvage yards can be treasure troves for budget-conscious homesteaders.
Step-by-Step Construction Guide
Site Preparation: Choose a location that is well-drained and receives partial shade. Excavate a shallow pit slightly larger than the shipping container. This pit should be deep enough to bury the container approximately halfway. Ensure the base of the pit is level and compacted.

Foundation: Place concrete blocks around the perimeter of the excavated area to create a level foundation for the shipping container. This will also provide an air gap underneath the container, preventing moisture buildup.
Container Placement: Carefully position the shipping container into the prepared pit, ensuring it rests securely on the concrete blocks. Use a level to confirm that the container is perfectly level.
Insulation: Insulate the interior walls and ceiling of the shipping container with rigid foam insulation. Cut the insulation to fit snugly between the container walls and the wood framing. Seal all seams with tape to create an airtight barrier. This step is crucial for maintaining a stable temperature inside the root cellar.

Framing: Build a simple wood frame inside the container using 2x4s. This frame will support the insulation and provide a structure for attaching the interior walls and shelves.
Vapor Barrier: Install a vapor barrier over the insulation to prevent moisture from migrating into the insulation. This is essential for preventing mold and mildew growth.
Interior Walls: Cover the wood framing with plywood to create smooth interior walls. Paint the plywood with a mold-resistant paint to further protect against moisture.
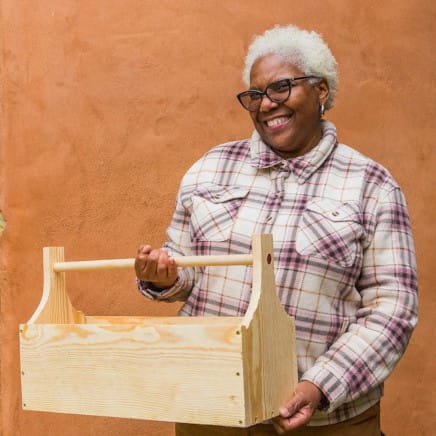
Shelving: Build shelves along the interior walls using 2x4s and plywood. Design the shelves to accommodate various sizes of produce. Ensure the shelves are sturdy enough to support the weight of your stored goods.

Door Installation: Install a door at one end of the shipping container. Choose a door that is well-insulated and weather-stripped to minimize temperature fluctuations.
Ventilation: Install two ventilation pipes – one near the floor and one near the ceiling – to allow for airflow. This is essential for preventing moisture buildup and maintaining a cool, stable temperature. You can add dampers to the pipes to control the airflow as needed.
Backfilling: Backfill around the shipping container with gravel to provide drainage. Cover the top of the container with soil to further insulate it.
Finishing Touches: Add a thermometer and hygrometer inside the root cellar to monitor temperature and humidity levels. Organize your produce on the shelves, ensuring proper airflow around each item.
Tips, Tricks, and Lessons Learned
- Ventilation is Key: Don't underestimate the importance of proper ventilation. Without adequate airflow, your root cellar will become a breeding ground for mold and mildew.
- Monitor Temperature and Humidity: Regularly check the temperature and humidity levels inside your root cellar. Aim for a temperature between 32°F and 40°F and a humidity level of 85% to 95%.
- Proper Produce Preparation: Before storing your produce, remove any damaged or diseased items. This will prevent spoilage from spreading to other items.
- Consider a Second Door: If you live in a particularly cold climate, consider adding a second door to create an airlock and further insulate the root cellar.
- Pest Control: Be vigilant about pest control. Mice and other rodents can quickly decimate your stored produce. Consider using traps or other deterrents.
Safety Considerations
- Wear Safety Glasses: Always wear safety glasses when cutting or drilling.
- Use Gloves: Protect your hands by wearing gloves when handling building materials.
- Work in a Well-Ventilated Area: When working with paints or adhesives, work in a well-ventilated area to avoid inhaling harmful fumes.
- Be Aware of Overhead Hazards: When working with heavy materials, be aware of overhead hazards and take precautions to prevent injuries.
- Electrical Safety: If you plan to install lighting or other electrical components in your root cellar, consult with a qualified electrician to ensure that the wiring is safe and up to code.
Long-Term Benefits and Impact
This DIY root cellar project offers numerous long-term benefits for the self-sufficient homesteader:
- Extended Harvest: Enjoy fresh, homegrown produce throughout the winter months.
- Reduced Grocery Bills: Save money by reducing your reliance on store-bought produce.
- Sustainable Food Storage: Eliminate the need for electricity-guzzling refrigerators.
- Increased Self-Sufficiency: Take control of your food supply and reduce your dependence on external systems.
- Resilience: Build a more resilient homestead that can withstand disruptions to the food supply chain.
Start Building Your Self-Sufficient Future Today!
Building a root cellar is an incredibly rewarding project that will enhance your homestead's sustainability and resilience for years to come. Don't be intimidated by the scope of the project. Break it down into manageable steps, and celebrate each milestone along the way.
We encourage you to share your own experiences, challenges, and triumphs in the comments below. Do you have any tips or tricks for building a root cellar? What are your favorite vegetables to store? Let's learn from each other and build a community of resourceful homesteaders!
For more homesteading tips and DIY project ideas, subscribe to the Better Homes and Harvests newsletter. Let's unearth your homesteading hero together!