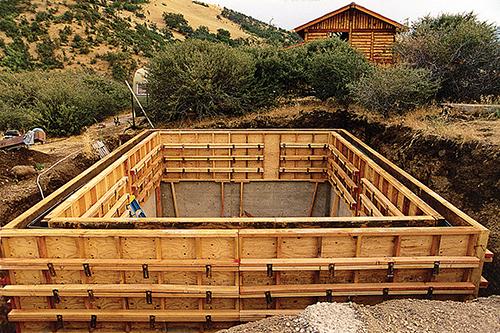
Unearth the Secrets to Year-Round Harvest: A Step-by-Step Guide to Building a Basic Cinder Block Root Cellar in Your Backyard
Imagine biting into a crisp, sweet carrot in the dead of winter, freshly pulled from your own backyard storage. As Better Homes and Harvests homesteaders, we understand the deep satisfaction of self-sufficiency. This month, we’re diving into a project that extends your garden’s bounty far beyond the growing season: building a root cellar. Forget expensive grocery store produce flown in from thousands of miles away. With a little elbow grease and some readily available materials, you can enjoy your harvest all year round. This guide will walk you through building a basic, affordable root cellar using cinder blocks, perfect for the beginner to intermediate homesteader.
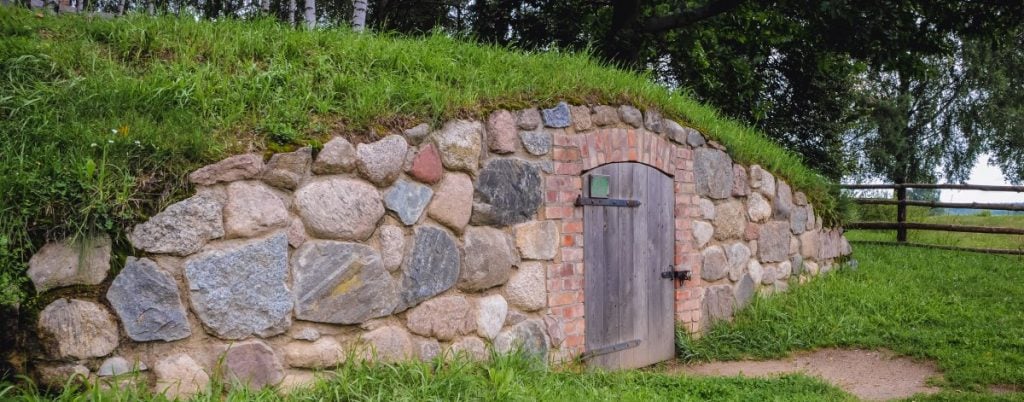
Why Build a Root Cellar? The Benefits of Traditional Food Storage
In a world increasingly reliant on complex food supply chains, a root cellar offers a tangible connection to the land and a buffer against unpredictable circumstances. Beyond the satisfaction of self-reliance, a root cellar offers numerous benefits:
- Extended Harvest: Store root vegetables, fruits, and even some canned goods for months, reducing dependence on store-bought produce.
- Cost Savings: Minimize food waste and save money by preserving your garden’s abundance.
- Improved Food Quality: Enjoy naturally preserved food without the additives and preservatives found in commercially processed options.
- Emergency Preparedness: A well-stocked root cellar provides a valuable food reserve in case of emergencies or disruptions to the food supply.
- Sustainable Living: Reduce your carbon footprint by minimizing transportation and packaging associated with store-bought produce.
Planning Your Cinder Block Root Cellar: Size, Location, and Design
Before you start digging, careful planning is crucial. Consider the following factors:
- Size: A root cellar of roughly 6ft x 8ft x 6ft (internal dimensions) is a good starting point for a small to medium-sized garden. Adjust the dimensions based on your anticipated storage needs.
- Location: Choose a location with well-drained soil and natural shade. A north-facing slope is ideal, as it stays cooler and receives less direct sunlight. The location should also be easily accessible from your garden and your house. Consider local building codes and regulations before you begin construction.
- Design: We’ll focus on a simple, partially buried design using cinder blocks. This provides structural integrity and insulation while remaining relatively affordable and easy to construct.
- Accessibility: Ensure you will be able to access the root cellar during all types of weather.
Step-by-Step Guide: Building Your Cinder Block Root Cellar
Safety First: Always wear safety glasses, gloves, and appropriate clothing when working with concrete, power tools, and heavy materials. Have a buddy assist you with lifting heavy blocks.
Materials List (Estimated Costs):
- Cinder Blocks (approximately 150-200, depending on size): $200 - $400
- Mortar Mix (approximately 10-15 bags): $50 - $75
- Gravel (for drainage): $50 - $100
- Reclaimed Lumber (for door, roof framing, and shelving): $100 - $200 (Cost varies greatly depending on availability and source)
- Roofing Material (corrugated metal, tar paper, or repurposed materials): $50 - $150
- Ventilation Pipe (4-inch PVC): $20 - $30
- Door Hinges and Latch: $20 - $30
- Concrete Mix (for footing): $30 - $50
- Rebar (for footing reinforcement): $20 - $30
- Sand (for leveling): $20 - $30
- Total Estimated Cost: $560 - $1215
Note: These are rough estimates. Prices may vary based on location and material choices. Reclaimed materials can significantly reduce costs.
Tools Needed:
- Shovels and Pickaxes
- Wheelbarrow
- Mortar Trowel
- Level
- Measuring Tape
- Circular Saw or Hand Saw
- Drill
- Hammer
- Safety Glasses
- Gloves
- Mixing Tub
- Tamper
Step 1: Excavation and Footing
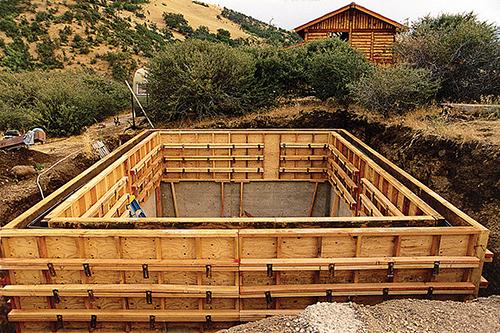
Mark the area: Using stakes and string, mark the outline of your root cellar (e.g., 6ft x 8ft). Add an extra foot or two around the perimeter for working space.
Excavate: Dig down to the desired depth. A partially buried root cellar typically requires excavating 3-4 feet. Remember to slope the surrounding earth away from the cellar to prevent water from pooling.
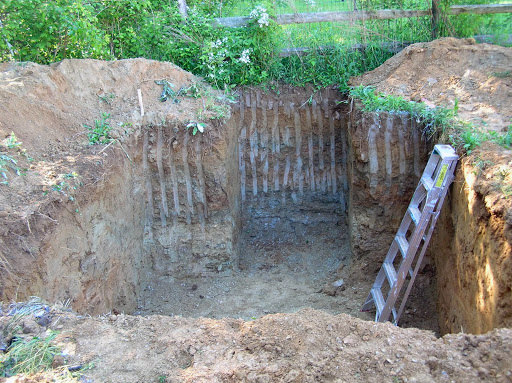
Descriptive Alt Text: Excavation process for the root cellar, showing the hole being dug.Prepare the footing: Dig a trench around the perimeter of your excavation, approximately 12 inches wide and 6 inches deep. This will serve as the foundation for your cinder block walls.
Pour the footing: Mix concrete according to the manufacturer's instructions and pour it into the trench. Insert rebar for added strength. Use a level to ensure the footing is even and allow it to cure for at least 48 hours.
Step 2: Laying the Cinder Block Walls
Mix the mortar: Combine mortar mix with water according to the manufacturer's instructions. The consistency should be similar to thick peanut butter.
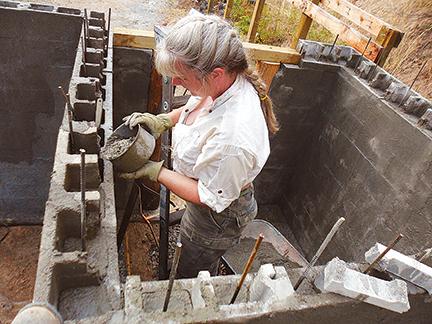
Lay the first course: Apply a bed of mortar to the cured footing. Carefully place the first course of cinder blocks, ensuring they are level and aligned. Use a level to check both horizontally and vertically.
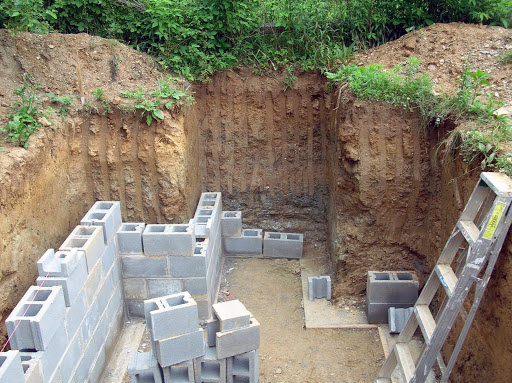
Descriptive Alt Text: The first row of cinder blocks being laid on the concrete footing, with mortar applied.Continue laying courses: Stagger the joints between courses for added strength. Apply mortar to the top and sides of each block before placing it. Use a level to ensure each course is straight and plumb.
Descriptive Alt Text: Building cinder block walls of the root cellar, showing the staggered joints and mortared connections.Incorporate Ventilation: As you lay the blocks, leave an opening for the ventilation pipe near the top of one wall.
Backfill (Partial): After the mortar has cured for a few days, backfill around the exterior walls with gravel for drainage. Backfill to about halfway up the walls.
Step 3: Building the Roof and Door
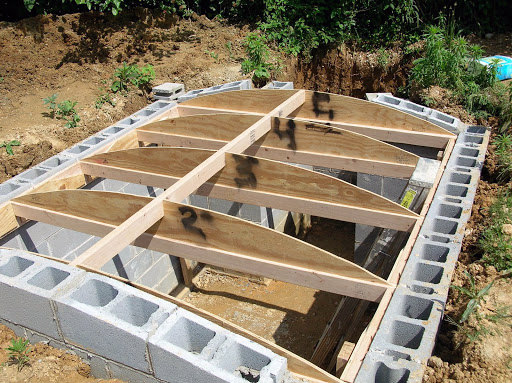
Roof Framing: Construct a simple roof frame using reclaimed lumber. A slightly sloped roof will allow water to run off easily. Ensure the frame is sturdy enough to support the roofing material.
Descriptive Alt Text: An example of root cellar design with a focus on the roof and entrance.Roofing Material: Cover the roof frame with your chosen roofing material. Overlap the material to prevent leaks. Secure it tightly to the frame.
Door Construction: Build a sturdy door from reclaimed lumber. Ensure it fits snugly in the doorway and is well-insulated.
Install the Door: Attach the door using hinges and install a secure latch.
Step 4: Ventilation and Finishing Touches
Install Ventilation Pipe: Insert the ventilation pipe into the opening you created in the wall. Ensure the pipe extends above the ground surface. You may want to add a screen to the end of the pipe to prevent pests from entering.
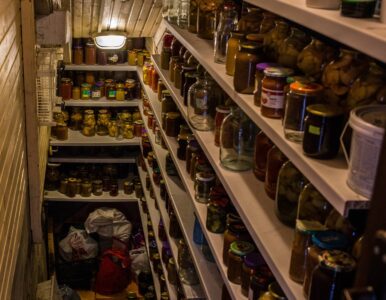
Descriptive Alt Text: Example of a root cellar with proper ventilation in the basement.Interior Finishing: Add shelving using reclaimed lumber to maximize storage space. Consider adding a dirt floor or laying down gravel for drainage.
Final Backfill: Complete the backfilling around the root cellar walls, sloping the earth away from the structure.
Step 5: Curing and Initial Setup
- Cure: Allow the entire structure to cure fully for at least a week before storing any food.
- Monitor: Monitor the temperature and humidity levels inside the root cellar.
- Adjust: Adjust ventilation as needed to maintain optimal storage conditions.
Troubleshooting and Tips for a Successful Root Cellar
- Humidity Control: Maintain high humidity (80-95%) to prevent vegetables from drying out. A dirt floor or occasional watering can help.
- Ventilation: Proper ventilation is essential for preventing mold and mildew. Adjust the ventilation pipe opening based on the weather conditions.
- Pest Prevention: Seal any cracks or openings to prevent rodents and insects from entering. Store vegetables in rodent-proof containers.
- Temperature Control: The ideal temperature range for a root cellar is 32-40°F (0-4°C). Burying the cellar deeper or adding insulation can help maintain a consistent temperature.
- Proper Storage: Store different vegetables in separate containers to prevent cross-contamination. Remove any damaged or decaying produce promptly.
Descriptive Alt Text: Inside a root cellar with vegetables stored in containers on wooden shelves.
Optimal Storage Conditions for Different Vegetables
- Root Vegetables (carrots, potatoes, beets): High humidity, cool temperatures. Store in bins or crates covered with damp sand or burlap.
- Apples: Cool temperatures, moderate humidity. Store in single layers in crates or boxes.
- Onions and Garlic: Cool, dry conditions. Hang in mesh bags or store in well-ventilated containers.
- Cabbage: Cool, humid conditions. Hang upside down from the ceiling.
Share the Harvest
Building a root cellar is an investment in self-sufficiency and a connection to the rhythms of nature. It's a project that empowers you to enjoy the fruits (and vegetables!) of your labor long after the growing season ends. We encourage you to embark on this rewarding endeavor and share your experiences with the Better Homes and Harvests community. Post photos of your root cellar progress and your bountiful harvests in the comments below. Let's inspire each other to embrace a more sustainable and self-reliant lifestyle!