Unearth the Secrets to Homesteading Happiness: Transform Your Barn into a Thriving Artisan Workshop!
For years, our old barn stood as a silent sentinel on our homestead, a relic of a bygone era. Weather-beaten and filled with forgotten tools and dusty memories, it held a certain charm, but little practical purpose. The challenges were evident: crumbling walls, a leaky roof, and a general air of disrepair. My initial dream felt audacious: to breathe new life into this neglected space, transforming it into a vibrant DIY barn workshop – a place where I could pursue my passion for woodworking and perhaps even generate some homesteading income. The idea of the scent of sawdust mingling with fresh-cut herbs grown nearby, sunlight streaming through restored windows, and the satisfaction of crafting handmade goods was deeply meaningful. It was about more than just a workshop; it was about honoring the past while building a sustainable future.

This blog post chronicles my journey of transforming our barn into an artisan woodworking shop, focusing on barn restoration for workshop use and sharing the DIY workshop ideas that brought my vision to life. I’ll provide a step-by-step guide to building a dust-collection system – a critical element for any woodworking space. Get ready to roll up your sleeves!
Step 1: Assessment and Planning – Laying the Foundation for Your Barn Workshop
Before diving into any demolition or construction, take a thorough assessment of your barn’s condition. Identify areas needing immediate attention, like structural damage or water leaks. A detailed plan will save you time and money in the long run.
- Structural Integrity: Carefully inspect the foundation, walls, and roof. Are there any signs of rot, insect damage, or sagging? Consult with a professional if you suspect major structural issues.
- Weatherproofing: Evaluate the existing siding and roofing. Are there gaps or cracks that need to be sealed? Proper weatherproofing a barn for year-round workshop use is essential for comfort and preventing further damage.
- Layout and Design: Sketch out a rough layout of your ideal workshop. Consider the placement of tools, workbenches, storage, and dust-collection systems. Think about workflow and how you can maximize space.
- Budgeting: Create a realistic budget that accounts for materials, tools, and potential professional services. Prioritize essential repairs and safety upgrades. This is key to achieving a budget-friendly workshop.
Step 2: Dust Collection System – Protecting Your Health and Tools
Woodworking generates a significant amount of dust, which can be harmful to your health and detrimental to your tools. A good dust-collection system is a must-have. Here's how I built mine:
- Choosing a Dust Collector: I opted for a single-stage dust collector with a 2 HP motor and a 4-inch inlet. These can be found used or new online, through retailers such as Craigslist, Facebook Marketplace, or from Rockler Woodworking. A central ducted system is also an option, but this is the most economical and easy to install.
- Ductwork Installation: Run PVC piping from the dust collector to each of your major woodworking tools (table saw, planer, jointer, etc.). Use blast gates to control airflow to individual tools. I used 4-inch PVC sewer and drain pipe with flexible hose connections to each machine. Consider a flexible hose for tools that move, like a sander. Be sure to ground the ductwork to prevent static buildup.
- Cyclone Separator (Optional): A cyclone separator pre-separates larger wood chips and debris before they reach the dust collector’s filter, improving its efficiency and prolonging its lifespan. This can be added as a later upgrade.
- Cost Breakdown:
- Dust Collector: $200 - $400 (used or new)
- PVC Piping and Fittings: $50 - $100
- Blast Gates: $10 - $20 each
- Flexible Hose: $30 - $50
- Total Estimated Cost: $290 - $590
- Time Investment: Approximately 1-2 days, depending on the complexity of your setup.

Step 3: Lighting – Illuminating Your Creative Space
Adequate lighting is crucial for detailed work and preventing eye strain. Natural light is ideal, so prioritize restoring or adding windows whenever possible. Supplement natural light with artificial lighting.
- Assess Your Needs: Determine the amount of light needed for each area of your workshop. Task lighting is essential for workbenches and machine areas, while ambient lighting provides overall illumination.
- LED Lighting: LED lights are energy-efficient, long-lasting, and provide excellent illumination. Consider using a combination of overhead LED shop lights and adjustable LED task lights.
- Positioning: Position lights to minimize shadows and glare. Adjustable task lights allow you to direct light where you need it most.
- Cost Breakdown:
- LED Shop Lights: $30 - $50 each
- LED Task Lights: $20 - $40 each
- Wiring and Electrical Supplies: $20 - $50
- Total Estimated Cost: $70 - $140
- Time Investment: Approximately 1 day, depending on the complexity of your wiring.
Step 4: Workbench and Storage – Organizing Your Tools and Materials
A well-organized workshop is an efficient workshop. A sturdy workbench and ample storage are essential for keeping your tools and materials within easy reach.
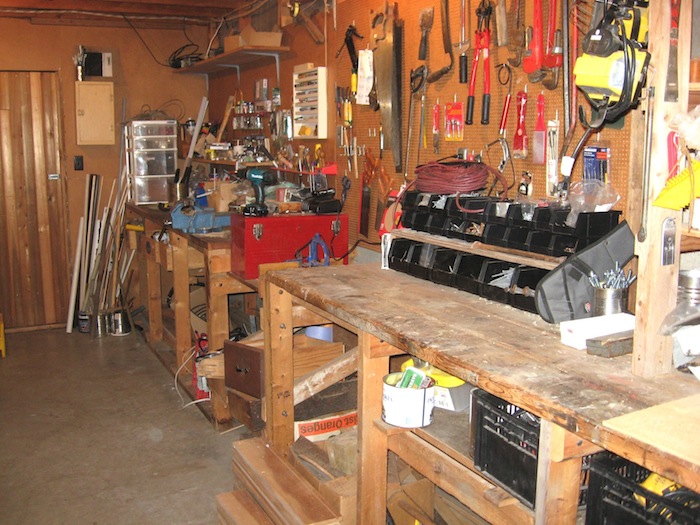
- Workbench Construction: Build a sturdy workbench using reclaimed lumber or construction-grade plywood. Design it with a solid top, ample legroom, and built-in storage.
- Storage Solutions: Utilize shelves, cabinets, and drawers to organize your tools, hardware, and materials. Consider building custom storage solutions to fit your specific needs and space constraints. Utilize upcycled materials for a barn workshop renovation wherever possible.
- Mobile Tool Carts: Mobile tool carts provide convenient storage and portability. They are perfect for moving tools around the workshop as needed.
- Cost Breakdown:
- Lumber or Plywood: $50 - $100
- Hardware (screws, nails, etc.): $20 - $40
- Shelving Materials: $30 - $60
- Total Estimated Cost: $100 - $200
- Time Investment: Approximately 2-3 days, depending on the complexity of your workbench and storage solutions.

Step 5: Weatherproofing and Insulation – Creating a Comfortable Workspace
Weatherproofing a barn for year-round workshop use is vital. Sealing gaps and adding insulation will create a more comfortable and energy-efficient workspace.
- Sealing Gaps and Cracks: Use caulk, weather stripping, and expanding foam to seal any gaps or cracks in the walls, windows, and doors.
- Insulation: Insulate the walls and roof with fiberglass batts, spray foam, or rigid foam insulation. Proper insulation will help regulate the temperature and reduce energy costs.
- Ventilation: Ensure adequate ventilation to prevent moisture buildup and improve air quality. Consider installing a ventilation fan or opening windows regularly.
- Cost Breakdown:
- Caulk, Weather Stripping, and Expanding Foam: $30 - $50
- Insulation Materials: $100 - $300
- Ventilation Fan: $20 - $50
- Total Estimated Cost: $150 - $400
- Time Investment: Approximately 2-3 days, depending on the size of your barn and the type of insulation you choose.
From Hobby to Hustle: Generating Income from Your Barn Workshop
Transforming your homesteading workshop DIY into a source of income is incredibly fulfilling. Here are some ideas:
- Online Sales: Create an Etsy shop or other online storefront to sell your handmade goods.
- Local Markets and Craft Fairs: Participate in local farmers' markets and craft fairs to showcase your products and connect with customers.
- Commissions and Custom Orders: Offer custom woodworking services to individuals and businesses.
- Workshops and Classes: Teach woodworking skills to others in your community.
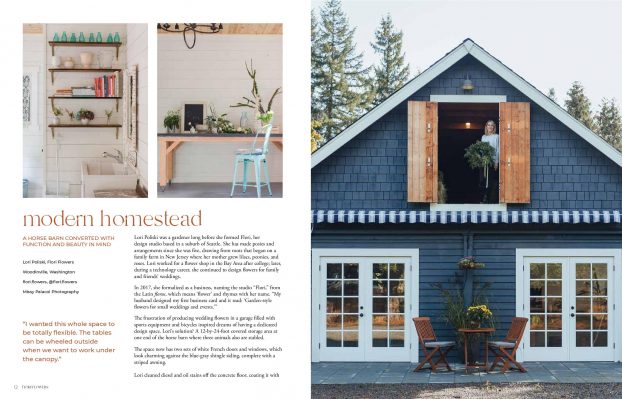
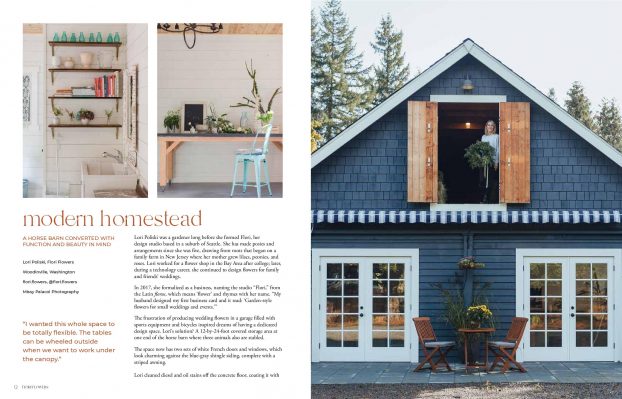
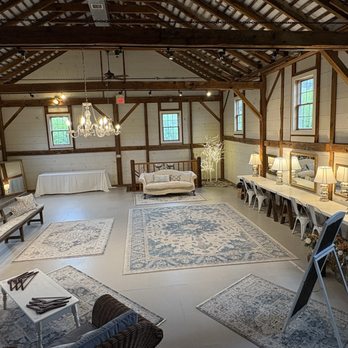
- Social Media Marketing: Utilize social media platforms to promote your products and services. Consider professional quality images like those shown below.

Turning our barn into a thriving artisan workshop has been a challenging but incredibly rewarding experience. It's a place where I can express my creativity, hone my skills, and contribute to the sustainability of our homestead. This project has enhanced my self-sufficiency, promoted creativity, and opened doors to potential income. I hope this guide inspires you to embark on your own barn-to-artisan workshop transformation.
Now it’s your turn! What are your barn workshop dreams? Share your progress and questions in the comments below. Let’s transform barns into beacons of creativity and self-reliance, one project at a time!