Unearth the Colors of Autumn: Natural Dyes from Your Fall Harvest
As the days shorten and a crispness fills the air, our homestead transforms into a tapestry of reds, oranges, and browns. The instinct to preserve the bounty of our gardens kicks into high gear, with canning, freezing, and drying taking center stage. But what if we could preserve not only the sustenance of the harvest but also its beauty? Enter the world of natural dyes, a fascinating and rewarding way to capture the vibrant colors of autumn and infuse them into our homes and wardrobes.
In this post, we'll explore the art of extracting beautiful, natural colors from your fall garden bounty and even kitchen scraps, transforming them into unique, sustainable textiles. This is a beautiful way to enrich your homestead and introduce sustainability to every aspect of your home and crafting projects. Imagine the joy of wearing a scarf dyed with colors harvested directly from your own backyard!
Let's delve into the captivating world of natural dyeing, where history, creativity, and nature intertwine to create something truly special. You'll learn how to create slow and thoughtful projects which reflect your love for a life in harmony with the seasons. And best of all, you'll find a deep sense of satisfaction in transforming what would otherwise be waste into something beautiful and useful.
Discovering Your Dye Plants: A Fall Harvest Inventory
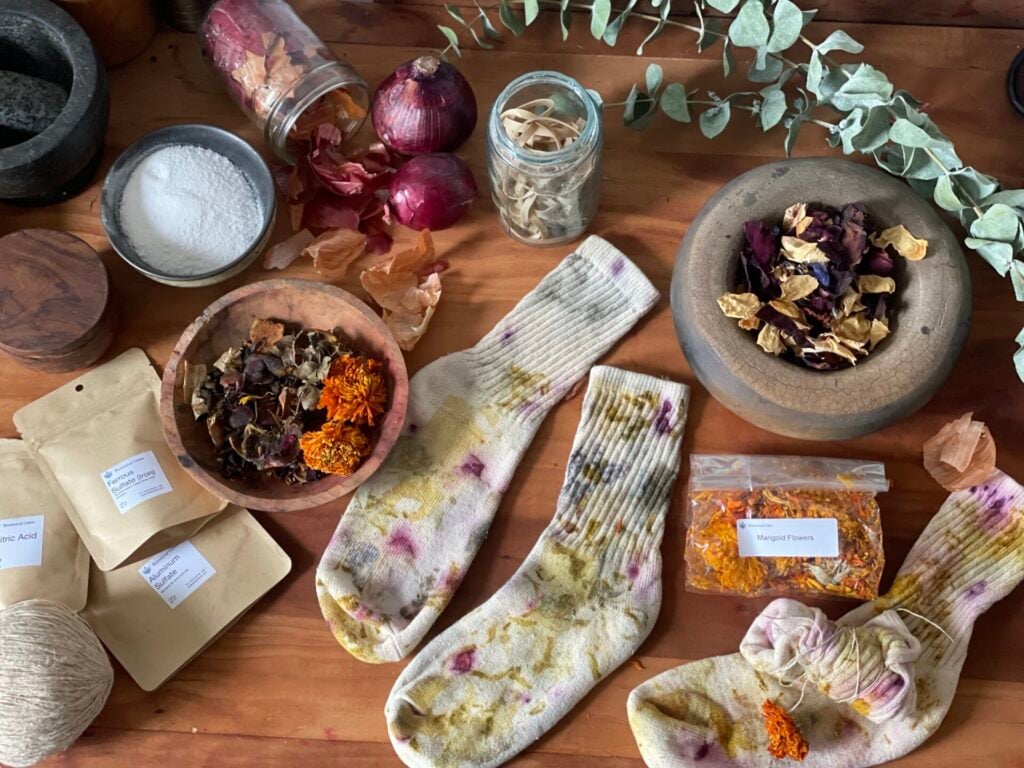
Autumn provides a rich palette of potential dye sources, readily available in many gardens or as kitchen scraps. Take a walk around your property and identify the possibilities!
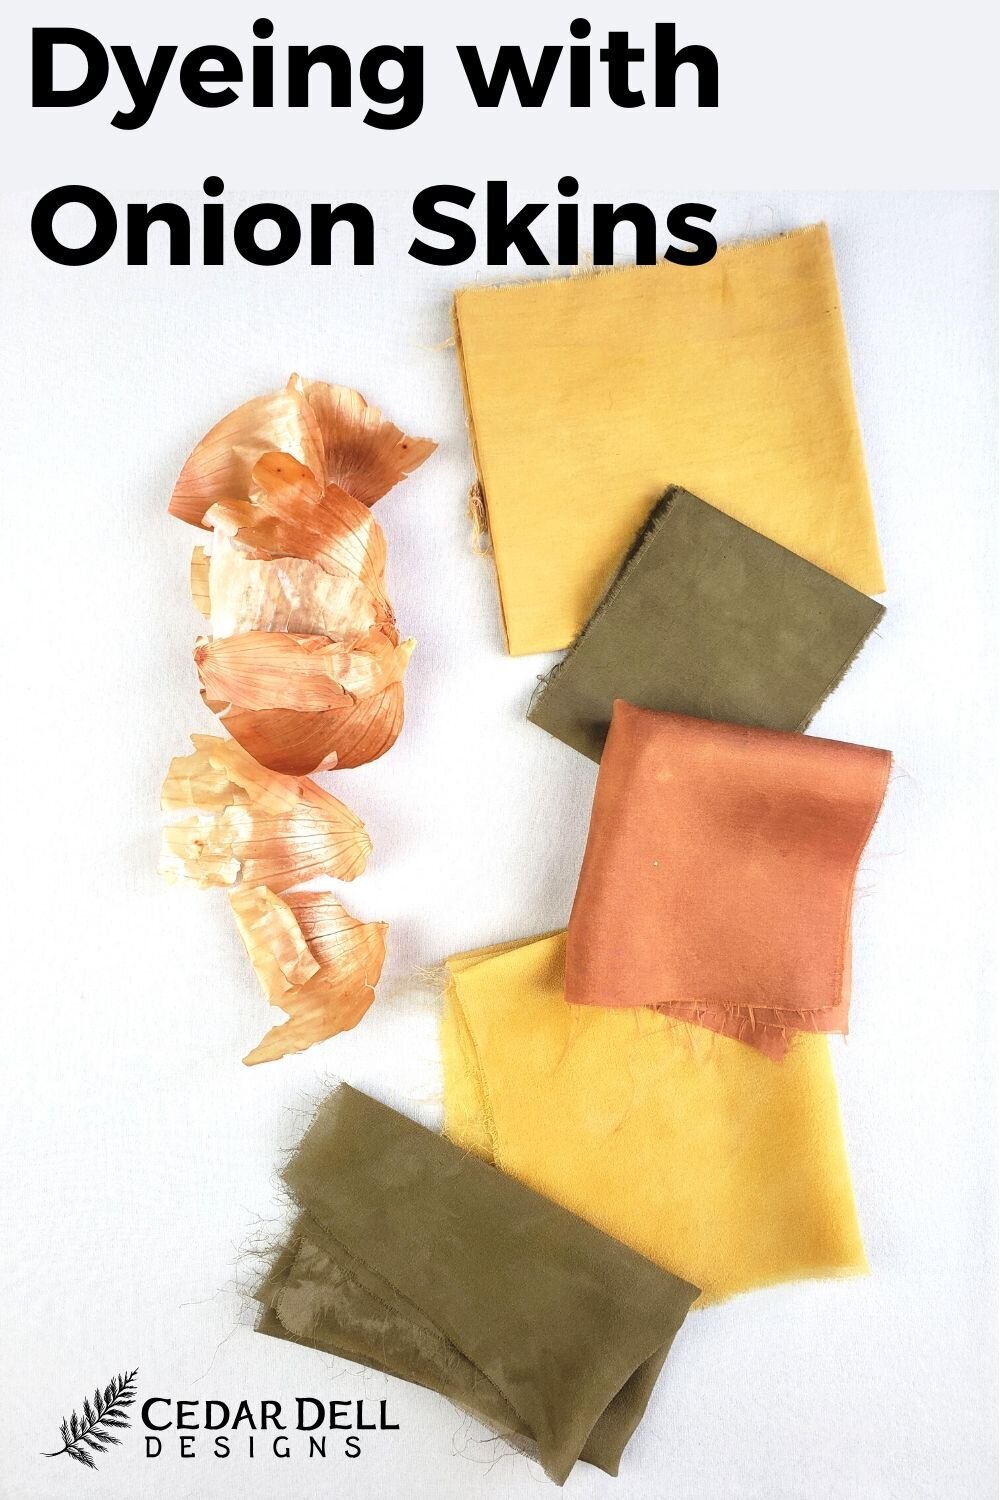
- Onion skins (yellows/oranges): A readily available kitchen scrap that yields surprisingly vibrant yellows and oranges.
- Beetroot (pinks/purples): This root vegetable offers beautiful pinks and purples, although they may be less colorfast than some other dyes.
- Black walnuts (browns): Gather fallen black walnuts (wear gloves!) for rich, earthy browns.
- Marigolds (yellows/oranges): These cheerful flowers provide sunny yellows and oranges, especially vibrant when used fresh.
- Goldenrod (yellows): These vibrant flowers commonly growing alongside fields or roadways (ensure you have permission to harvest).
Remember that color variations are possible depending on the plant variety, mordants used, and the dyeing process. Experimentation is key to unlocking the full potential of each dye source. Foraged elements, such as fallen leaves and acorns, can also contribute unique hues to your dye pot. Always practice responsible foraging, ensuring you have proper identification of the plant and only taking what you need, leaving plenty for the ecosystem.
This year, I decided to dedicate a portion of my garden specifically for dye plants. It's been so rewarding to watch them grow and know that they'll not only add beauty to the landscape but also provide a sustainable source of color.
Key Takeaway: Identify potential dye sources in your garden, kitchen, and surrounding landscape to see what colours you can unearth.
Preparing for the Dye Process: Tools and Safety
Before you begin dyeing, it's essential to gather the necessary equipment and understand the safety precautions.
Essential Equipment:
- Stainless steel pots: Choose pots large enough to accommodate your fabric and dye bath comfortably.
- Wooden spoons: Use wooden spoons for stirring, as they won't react with the dye.
- Measuring cups: Accurate measurements are crucial for achieving consistent results.
- Cheesecloth or muslin bags: Use these to contain loose plant material in the dye bath.
- Rubber gloves: Protect your hands from dye stains and potential irritants.
- Ventilation: Work in a well-ventilated area to avoid inhaling fumes.
It's crucial to use dedicated equipment for dyeing that isn't used for cooking, to avoid any contamination. Mordants, substances that help the dye bond to the fabric, are also essential. Common mordants include alum, iron, and copper. Natural mordant options like soy milk pre-treatment or tannin-rich materials (oak gall, sumac) are great alternatives.
Always wear gloves and eye protection when handling mordants and dye baths, and work in a well-ventilated area. Think about sourcing materials from sustainable sources when possible. Consider the impact of buying commercial materials versus sourcing local or homegrown.
Key Takeaway: Gather the necessary tools and understand the safety precautions before you begin the dyeing process.
The Dyeing Process: A Step-by-Step Guide
Now for the exciting part – the dyeing process! Here’s a step-by-step guide to help you create beautiful, naturally dyed fabrics:
Mordanting the Fabric:
- Mordanting helps the dye bind permanently to the fiber. For alum mordant, use about 1 tablespoon of alum per 100g of fabric.
- Dissolve the alum in hot water in a stainless steel pot.
- Add your pre-wetted fabric and gently simmer for 1 hour, stirring occasionally.
- Remove the fabric, rinse well, and let it dry completely. For an alternative, soak fabrics in soy milk and allow to dry completely before mordanting.
Preparing the Dye Bath:
- Fill a stainless steel pot with water and add your chosen dye material.
- For onion skins, use a generous amount – the more, the richer the color.
- Simmer the mixture for 1-2 hours to extract the dye.
- Strain the dye bath through cheesecloth or muslin to remove any plant particles.
- Consider different extraction methods: simmering or solar extraction can create different results.
Dyeing the Fabric:
- Wet your mordanted fabric thoroughly.
- Add the fabric to the dye bath, ensuring it's fully submerged.
- Simmer the mixture for 1-2 hours, stirring regularly to ensure even dyeing.
- Maintain a consistent temperature for best results.
- After dyeing, remove the fabric and rinse it thoroughly with cool water until the water runs clear.
- Wash the fabric with a mild detergent and hang it to dry away from direct sunlight.
Troubleshooting Tips:
- If the colors are too faded, use a stronger dye bath or remordant the fabric.
- For uneven dyeing, stir the fabric more frequently during the dyeing process.
This year, I experimented with using rainwater in my dye baths, and I noticed a subtle but noticeable difference in the depth of color. It's these small details that make natural dyeing so fascinating.
Key Takeaway: Follow the step-by-step process to create beautiful, naturally dyed fabrics.
Creative Projects with Naturally Dyed Fabrics
Naturally dyed fabrics offer endless possibilities for creative projects. Here are a few ideas to spark your imagination:
- Cozy quilt squares: Create a one-of-a-kind quilt with a palette of autumnal hues.
- Unique table runners: Add a touch of rustic charm to your dining table with a naturally dyed table runner.
- Hand-stitched pillowcases: Craft unique pillowcases that bring warmth and color to your living space.
- Small batches of unique yarn for knitting projects: Create small yarn bundles from various plant materials and embark on unique knitting projects.
- Fabric scraps for visible mending on well-loved garments: Using naturally dyed fabric to mend clothes adds texture and artistic flair to well-loved items.
Embrace the beauty of imperfections in naturally dyed fabrics, as they add to the uniqueness of the process. Combine different natural dyes to create custom color palettes and experiment with different techniques to achieve your desired results. Don't be afraid to get creative and explore the possibilities!
Key Takeaway: Naturally dyed fabrics offer endless possibilities for creative projects, limited only by your imagination.
The Earth's Rich Palette
The beauty of natural dyeing lies in its connection to nature, sustainability, and the joy of creating something beautiful from simple ingredients. It’s about slowing down, appreciating the colors around us, and transforming what would otherwise be discarded into something treasured. As the autumn leaves fall and the days grow shorter, there's no better time to embrace the art of natural dyeing and bring the warmth and beauty of the season into your home.
As the winter months approach, consider how creating these colorful textiles can bring a touch of autumn warmth into your home.
Ready to try it yourself? Here’s how to get started:
- Collect your materials: Gather onion skins, beetroot, marigolds, or any other dye plants you have available.
- Prepare your mordant: Choose a mordant like alum or explore natural alternatives like soy milk.
- Follow the dyeing process: Simmer, soak, and stir your way to beautiful, naturally dyed fabrics.
- Share your creations: Tag us on social media to show off your naturally dyed masterpieces!
What are you waiting for? Connect with nature and create something amazing. I cannot wait to see your creations!