Unearth the Bounty: Craft Your Own Root Cellar for a Thriving Homestead (A Step-by-Step Guide)
Imagine biting into a crisp apple in the dead of winter, its flavor a burst of summer sunshine in the midst of a snowy landscape. Or simmering a hearty stew with potatoes and carrots dug fresh – well, almost fresh – from your own backyard. This isn't just a fantasy; it's the reality of homesteading with a root cellar. For anyone serious about self-sufficiency and food preservation, a root cellar is an invaluable asset. It allows you to extend your harvest, reduce food waste, and connect with the natural rhythms of the seasons.
Building a root cellar might seem daunting, but it doesn't have to be a massive undertaking. This guide focuses on a small-scale, easily achievable design using affordable materials, perfect for the beginner-to-intermediate homesteader. So, let's get started on your journey to year-round, homegrown goodness!
1. Planning & Preparation: The Foundation of Success
Before you grab your shovel, careful planning is crucial. This stage sets the groundwork for a successful and efficient root cellar.
Site Selection: Location, Location, Location!
Choosing the right location is paramount. Consider these factors:
- Drainage: Water is the enemy of stored produce. Select a site with good drainage to prevent flooding. Avoid low-lying areas where water tends to pool.
- Sunlight: Minimize direct sunlight exposure, as it warms the soil. A north-facing slope or a location shaded by trees is ideal.
- Proximity to the House: A convenient location near your home makes accessing your stored produce easier, especially during inclement weather. However, be mindful of potential heat transfer from your house foundation.
- Existing Structures: Check for buried utility lines or septic systems before you dig. Call your local utility companies to mark any underground lines.
- Soil Type: Sandy or well-draining soil is best. Clay soil can retain moisture, leading to problems.
Essential Tools and Materials: Gather Your Supplies
Here's a basic list to get you started. Prices are estimates and may vary depending on your location and supplier.
- Shovels, Pickaxes, and Wheelbarrow: For excavation. ($50-100)
- Cinder Blocks: For the walls. Calculate the number needed based on your design. ($1-2 per block)
- Mortar Mix: To bind the cinder blocks. ($10-20 per bag)
- Reclaimed Lumber: For shelving and door framing. (Cost varies greatly – check local salvage yards or online marketplaces).
- Corrugated Metal Roofing: For the roof. ($10-20 per sheet)
- Insulation: Rigid foam insulation or straw bales for the roof. ($20-50)
- Ventilation Pipe: 4-inch PVC pipe for air circulation. ($10-20)
- Hardware Cloth: To prevent rodents from entering the ventilation pipe. ($10-20)
- Level: To ensure your walls are straight. ($20-40)
- Measuring Tape: For accurate measurements. ($10-20)
- Mortar Trowel: For applying mortar. ($10-20)
- Safety Glasses and Gloves: Essential for protection. ($10-20)
Estimated Total Cost: $300 - $700 (depending on the size of your root cellar and the materials you choose).
Simple Blueprint and Design: Visualize Your Vision
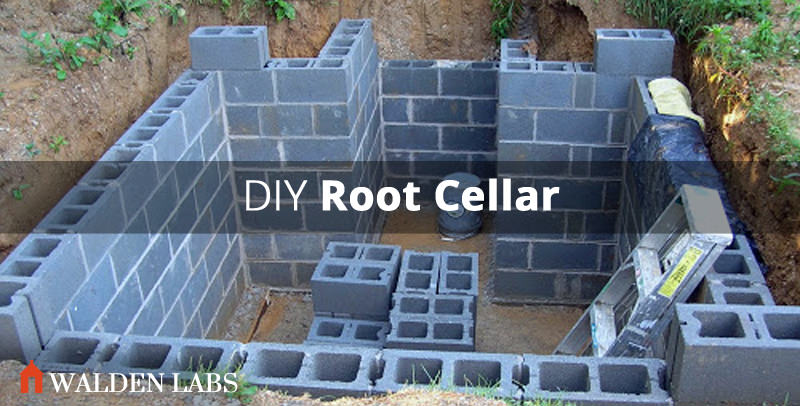
A basic root cellar can be a simple rectangular structure. For this guide, we'll assume a 6ft x 8ft footprint. Adapt these measurements to suit your needs.
- Foundation: A concrete slab or gravel base provides a stable foundation.
- Walls: Cinder blocks laid in a running bond pattern.
- Roof: A slightly sloped corrugated metal roof covered with insulation and soil.
- Entrance: A simple wooden door.
- Ventilation: A pipe extending from near the floor to above ground level.
Locating the Frost Line: Dig Deep Enough!
The frost line is the depth to which the ground freezes in winter. Your root cellar must be built below the frost line to maintain a stable temperature. Contact your local extension office to find out the frost line depth in your area. Typically, it ranges from 3 to 5 feet.
2. Construction Phase: Building Your Underground Oasis
Now for the fun part! Here's a step-by-step guide to building your root cellar:
Excavation: Digging In
- Mark the Perimeter: Use stakes and string to mark the outline of your root cellar.
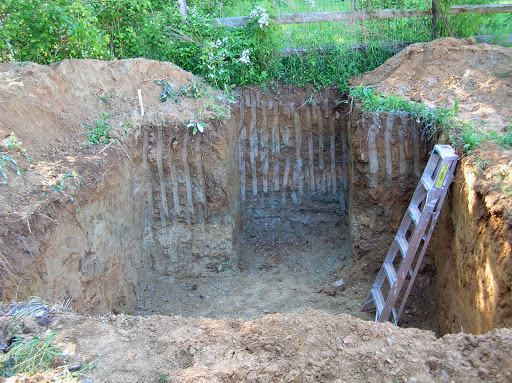
- Excavate the Hole: Dig down to the required depth, ensuring the walls are straight and the bottom is level. Remember to factor in the thickness of your foundation. This is strenuous work; consider renting a small excavator if possible.
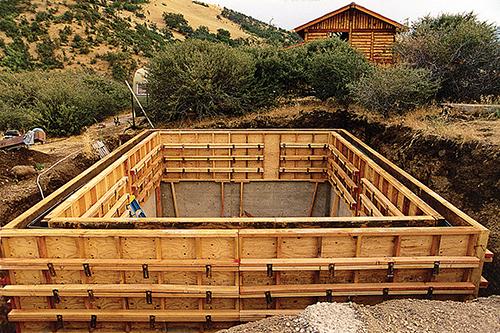
- Safety First: Shore up the walls of the excavation to prevent collapse, especially in sandy soil. Use plywood or timber to brace the sides.
Foundation Laying: A Solid Base
- Gravel Base (Optional): Spread a 4-6 inch layer of gravel at the bottom of the excavation for drainage.
- Concrete Slab (Optional, but Recommended): Pour a 4-inch concrete slab for a durable foundation. This will help prevent rodent entry and maintain consistent humidity. Let it cure for at least 48 hours before proceeding.
Wall Building: Cinder Block Construction
- Mix the Mortar: Follow the instructions on the mortar mix bag. Add water gradually until you achieve a thick, pasty consistency.
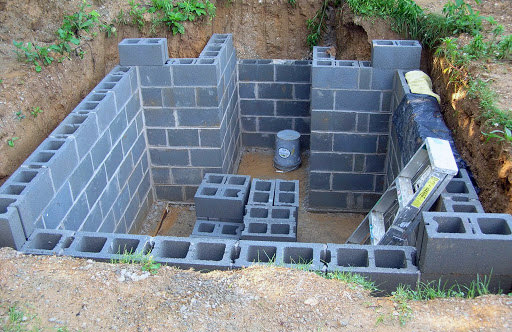
- Lay the First Course: Apply a layer of mortar to the foundation and carefully position the first course of cinder blocks. Use a level to ensure they are perfectly aligned.
- Running Bond Pattern: Lay subsequent courses of cinder blocks in a running bond pattern, where each block overlaps the joint between the blocks in the course below. This provides structural integrity.
- Mortar Application: Apply mortar to the ends and top of each block before setting it in place. Use a trowel to remove excess mortar.
- Wall Height: Build the walls to the desired height, typically 4-5 feet above ground level.
- Safety and Best Practices: Wear safety glasses and gloves. Build the walls slowly and deliberately, checking for level and alignment frequently.
Roof Construction: Shelter from the Elements
- Framing (Optional): If you want a steeper roof, construct a simple wooden frame to support the corrugated metal roofing. Reclaimed lumber works well for this.
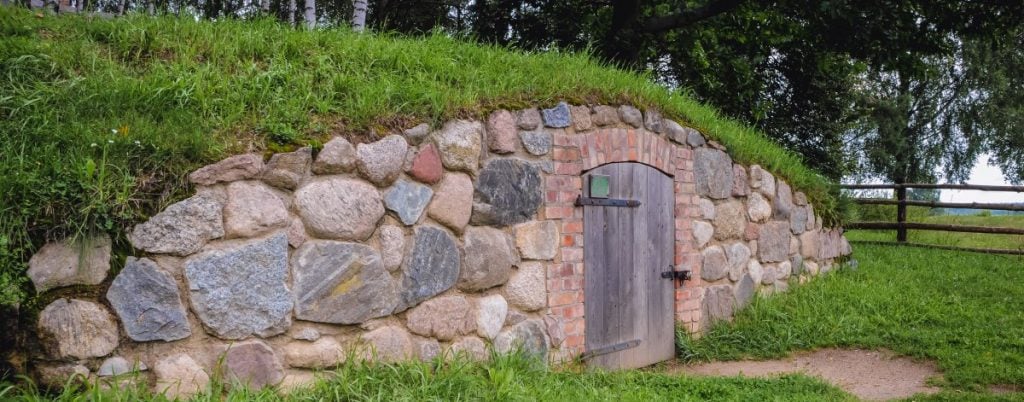
- Corrugated Metal Roofing: Overlap the sheets of corrugated metal roofing by at least one corrugation. Secure them to the framing (if used) or directly to the cinder block walls using screws or roofing nails.
- Insulation: Cover the corrugated metal roofing with a layer of rigid foam insulation or straw bales. This will help maintain a stable temperature inside the root cellar.
- Soil Cover: Cover the insulation with a layer of soil. This provides additional insulation and helps blend the root cellar into the landscape.
- Important Considerations: Make sure the roof is watertight to prevent leaks. Slope the roof slightly to allow rainwater to drain off.
Ventilation: Let the Air Flow
- Install the Ventilation Pipe: Insert a 4-inch PVC pipe near the floor level, extending it through the wall and up above ground level. Bend the top of the pipe downwards to prevent rain from entering.
- Hardware Cloth: Cover the end of the ventilation pipe with hardware cloth to prevent rodents from entering.
- Air Circulation: Ventilation is crucial for maintaining proper humidity and preventing mold growth.
3. Finishing Touches: Making it Functional
The construction is done, now it's time to personalize your root cellar!
Shelving Systems: Organize Your Harvest
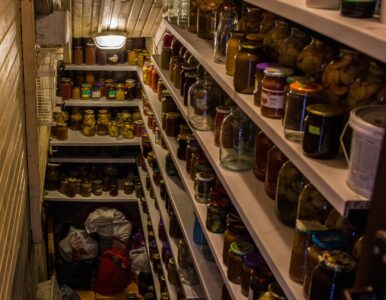
- Reclaimed Lumber Shelves: Build simple shelving units using reclaimed lumber. Space the shelves according to the size of the vegetables you plan to store.
- Wire Mesh Baskets: Use wire mesh baskets for storing onions and garlic. These allow for good air circulation.
Humidity and Temperature Management: The Key to Preservation
- Humidity Control: Maintain a humidity level of 80-90% for most root vegetables. Place a container of water in the root cellar to increase humidity if needed. Add ventilation to reduce humidity.
- Temperature Control: Aim for a temperature of 32-40°F (0-4°C). Monitor the temperature regularly and adjust ventilation as needed.
- Natural Methods: Use sand or sawdust to pack around root vegetables to help maintain humidity and prevent drying.
Pest Control: Keeping Unwanted Guests Out
- Hardware Cloth: As mentioned earlier, use hardware cloth to cover the ventilation pipe and any other openings.
- Regular Inspection: Regularly inspect your root cellar for signs of pests.
- Natural Deterrents: Consider using natural pest deterrents like peppermint oil or diatomaceous earth.
Organization Tips: Maximize Storage Efficiency
- Label Everything: Label your shelves and containers with the name of the vegetable and the date it was stored.
- First In, First Out: Use the oldest produce first to prevent spoilage.
- Separate Storage: Store different vegetables in separate containers to prevent cross-contamination of odors.
What to Store and For How Long: A Quick Guide
- Potatoes: Store in burlap sacks in a dark, cool, and humid environment. Can last for 4-6 months.
- Onions: Store in mesh bags in a cool, dry, and well-ventilated area. Can last for 1-2 months.
- Garlic: Store in mesh bags in a cool, dry, and well-ventilated area. Can last for 6-8 months.
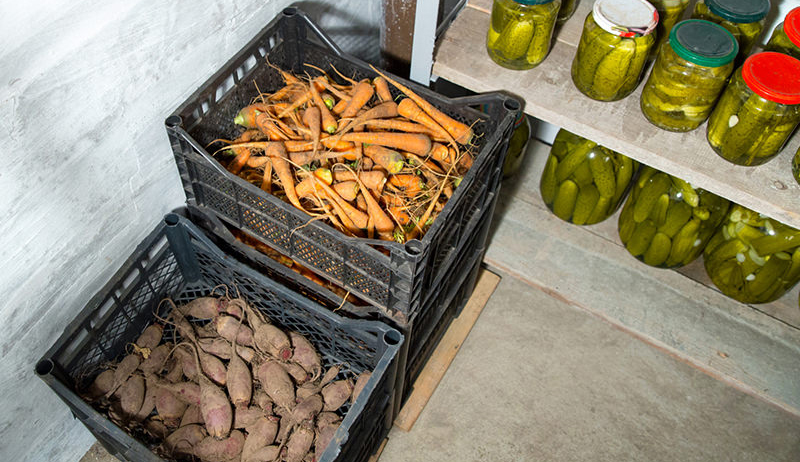
- Carrots: Store in damp sand or sawdust in a cool and humid environment. Can last for 4-6 months.
- Apples: Store in single layers in a cool and humid environment. Can last for 2-4 months.
- Cabbage: Hang upside down in a cool and humid environment. Can last for 2-3 months.
4. A Taste of Winter's Bounty: The Rewards of Your Labor
There’s something profoundly satisfying about eating food you’ve grown and preserved yourself. I remember the first winter after building my root cellar. Pulling up a perfectly preserved carrot in January, its sweetness undiminished by the cold, was an experience that connected me to the land in a way I hadn't felt before. It was a tangible reward for the effort, a testament to the power of simple living and self-reliance.
Conclusion: Embrace the Abundance
Building a root cellar is an investment in your homesteading journey, your health, and your connection to the earth. It's a practical and rewarding way to embrace food preservation, extend your harvest, and enjoy the taste of homegrown goodness throughout the winter months. This DIY root cellar project may seem like a lot of work, but the benefits of secure winter food storage will be well worth the effort. Whether you're looking for a budget root cellar option or a small root cellar solution, this guide provides a foundation for crafting your own underground oasis. Remember to consult root cellar plans and adapt them to your needs and climate for the best results. So, grab your shovel, gather your materials, and get ready to unearth the bounty!
Now it's your turn! Share your own root cellar experiences, questions, and tips in the comments below. And don't forget to take a photo of your DIY root cellar project and share it on social media with the hashtag #BHHRootCellar. We can't wait to see what you create!