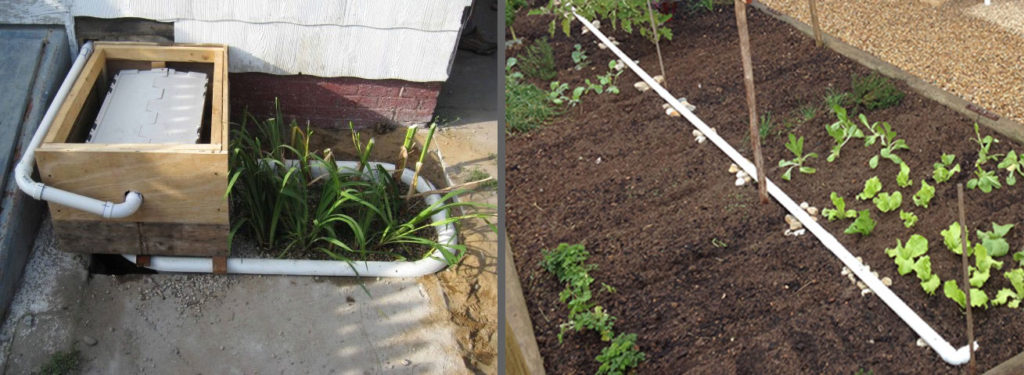
Turn Your Shower into a Garden Oasis: A DIY Gray Water System for Your Homestead
Remember last summer? The relentless sun beat down, the well started to whine, and the water bill seemed to climb higher every week. I was spending hours hauling water to my thirsty vegetable garden, watching precious resources – and money – disappear into the parched earth. It felt like a losing battle against the drought. Then, I stumbled upon the idea of a gray water system. After a bit of research and a weekend of tinkering, I built a simple system to divert my shower water to my garden. Now, my plants are thriving, my water bill is significantly lower, and I'm using about 30% less municipal water! Let me show you how you can do the same.

What is a Gray Water System?
Gray water is gently used water from your household, excluding toilet water. Sources include showers, bathtubs, bathroom sinks, and laundry water (excluding water used to wash diapers or heavily soiled items). This water can be a valuable resource for irrigation, particularly in drought-prone areas or for homesteaders seeking greater self-sufficiency.
Why Build a Gray Water System for Your Garden?
Here's why you should consider building a DIY gray water system for your existing outdoor garden:
- Water Conservation: Reduce your reliance on municipal water and conserve this precious resource, especially vital during droughts.
- Cost Savings: Lower your water bill significantly by using recycled water for irrigation.
- Healthier Plants: Many plants thrive on the slightly acidic pH and nutrients present in gray water (soap, hair, etc.).
- Environmentally Friendly: Reduce your environmental impact by decreasing your water consumption and lessening the strain on local water sources.
- Increased Homestead Sustainability: Take another step towards self-sufficiency and resourcefulness on your homestead.
Important Note: Before starting any gray water system project, check your local regulations and codes. Gray water system legality varies widely, and permits may be required. This blog post provides general guidance; you are responsible for complying with all applicable laws.
Building Your Simple Shower-to-Garden Gray Water System: A Step-by-Step Guide
This guide outlines a straightforward, low-cost system that diverts shower water to your garden using readily available materials.
Materials List:
- 4-inch PVC Pipe (Schedule 40): Length determined by the distance between your shower drain and garden (measure carefully!). Example: [Link to a similar product on a hardware store website, e.g., Lowes or Home Depot]. (Approx. $20-$50 depending on length)
- 4-inch PVC Elbows (90-degree): To change direction of the pipe run. (Approx. $5 each)
- 4-inch PVC Tee Fitting: To connect to your existing shower drain line. (Approx. $8)
- PVC Primer and Cement: For securely joining PVC pipes and fittings. (Approx. $10)
- Drill with Hole Saw Attachment: To create holes in the PVC pipe for water distribution. (Most homesteaders already own this)
- Gravel or Wood Chips: For creating a filtration/distribution trench in your garden. (Approx. $15-$30)
- Shovel or Spade: For digging the trench. (Most homesteaders already own this)
- Plumbing Tape (Teflon Tape): To seal threaded connections, if needed. (Approx. $2)
- Optional: Inline Filter: A simple screen filter to catch hair and larger debris before it enters the garden. (Approx. $15-$30) [Link to a similar product on a hardware store website, e.g., Amazon]
- PVC Cleaner: To clean the pipes before applying cement. (Approx. $5)
Tools You'll Need:
- Measuring tape
- PVC pipe cutter or saw
- Drill
- Gloves
- Safety glasses
- Shovel or spade
Step-by-Step Instructions:
1. Planning and Measurement:
- Carefully measure the distance from your shower drain to the intended area in your garden where you want to distribute the gray water.
- Plan the route of the PVC pipe, considering any obstacles and the necessary number of elbows for turns.
- Determine where you will cut into your existing plumbing to install the PVC Tee.
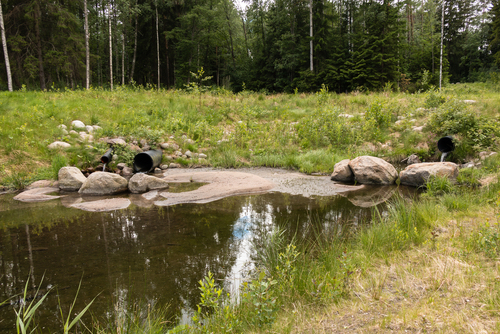
2. Safety First!
- Turn off the water supply to your shower before beginning any plumbing work.
- Wear safety glasses and gloves throughout the project.
3. Plumbing Modifications:
- Carefully cut into your existing shower drainpipe (after the P-trap) and install the PVC Tee fitting. Ensure the Tee is positioned to direct the gray water towards your garden.
- Use PVC primer and cement to securely connect the Tee to the existing drainpipe. Follow the manufacturer's instructions carefully.
- Important: Consider installing a valve on the drain line before the Tee, so you can divert the grey water into the original drain line if needed.
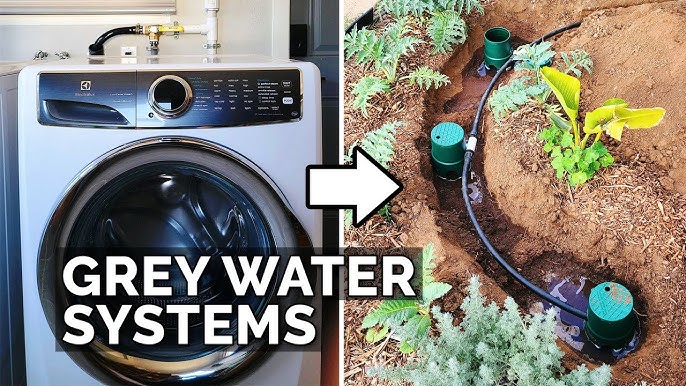
4. Laying the PVC Pipe:
- Connect the PVC pipe to the Tee fitting using primer and cement.
- Run the pipe along the planned route to your garden, using elbows to navigate turns.
- Secure the pipe to the ground using stakes or brackets if necessary. Maintain a slight downward slope towards the garden to encourage water flow.

5. Creating the Distribution Trench:
- In your garden, dig a shallow trench (6-12 inches deep) where you want to distribute the gray water. The length of the trench will depend on the size of your garden area.
- Line the trench with gravel or wood chips to improve drainage and filtration.

6. Drilling Distribution Holes:
- Drill small holes (1/4-inch to 1/2-inch) along the length of the PVC pipe that will be placed in the trench. Space the holes a few inches apart.
- These holes will allow the gray water to seep out into the surrounding soil.
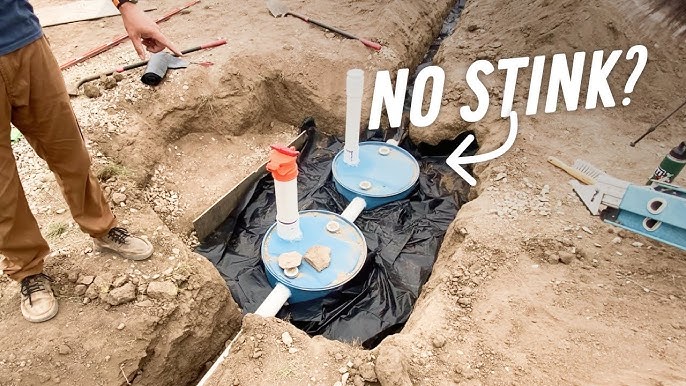
7. Installing the Distribution Pipe:
- Place the drilled PVC pipe into the trench, ensuring the holes are facing downwards.
- Cover the pipe with more gravel or wood chips to further enhance filtration and prevent soil from clogging the holes.

8. Testing the System:
- Turn the water supply back on to your shower.
- Take a shower and observe the system in operation. Check for leaks and ensure the gray water is flowing properly into the garden trench.
- Adjust the hole size or spacing if needed to achieve even water distribution.
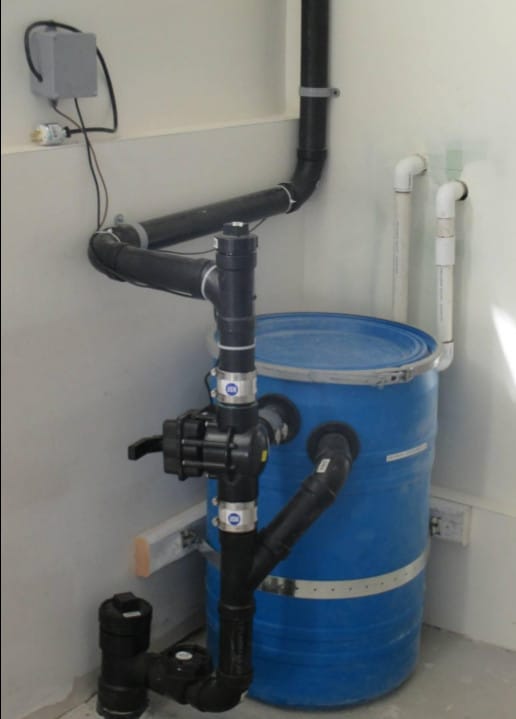
9. Optional: Inline Filter Installation:
- If you chose to purchase an inline filter, install it before the distribution trench to filter out excess debris and hair.
Safety Precautions:
- Avoid using harsh chemicals in your shower. Opt for biodegradable soaps and shampoos that are less harmful to plants.
- Do not use gray water on root vegetables or any edible plant parts that come into direct contact with the soil.
- Ensure proper drainage to prevent waterlogging and potential health hazards.
- Never store gray water for extended periods. Use it immediately.
- Label the system clearly to avoid accidental consumption.
Troubleshooting Tips:
- Clogs: If the system becomes clogged, check the inline filter (if installed) and clear any debris. You may also need to flush the PVC pipe with a garden hose.
- Leaks: Check all connections for leaks and tighten or reseal as necessary.
- Uneven Water Distribution: Adjust the size or spacing of the holes in the distribution pipe to achieve more even water distribution. You may need to add more holes to areas of the garden that need more water.
- Smell: If you experience unpleasant odors, ensure proper drainage and consider adding more wood chips or gravel to the distribution trench for better filtration. Make sure the greywater isn't pooling on the surface of the soil.
Maintenance Advice:
- Periodically inspect the system for leaks, clogs, and damage.
- Clean the inline filter regularly.
- Flush the PVC pipe with a garden hose annually to remove any buildup.
- Replenish the gravel or wood chips in the distribution trench as needed.
Call to Action:
Ready to give your garden a drink from your shower? Building a DIY gray water system is a rewarding project that can save you money, conserve water, and improve the health of your plants. I am confident you can implement this simple system on your homestead.
What are your biggest water-saving challenges on the homestead? Share your thoughts and experiences in the comments below! Don't forget to check out our other articles on water conservation and sustainable gardening here on Better Homes and Harvests!
By following these steps, you can harness the power of gray water and create a thriving, sustainable garden while reducing your environmental footprint. Happy homesteading!