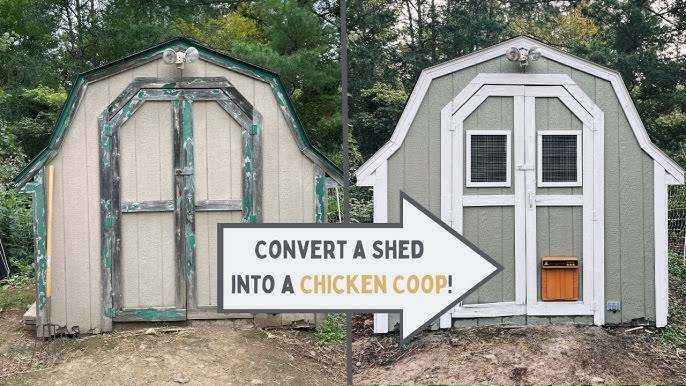
Turn Your Neglected Shed into a Thriving Chicken Coop: A Weekend DIY Guide for the Modern Homesteader
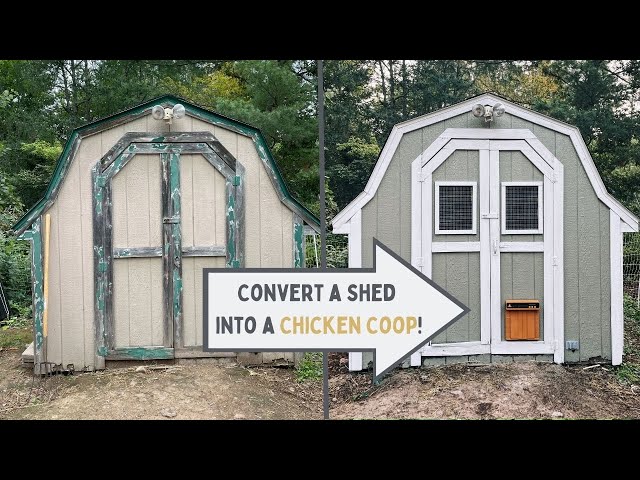
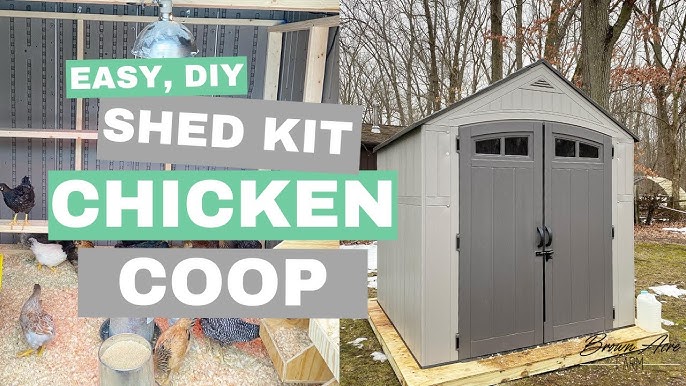
Remember that old shed in the corner of your yard? The one filled with forgotten tools, dusty flowerpots, and maybe even a family of spiders? For years, ours was exactly that – a repository for everything we didn’t know what to do with. Then, the homesteading bug bit, and the idea of fresh eggs every morning became irresistible. That shed, previously a symbol of clutter, became the perfect candidate for a DIY chicken coop transformation. This is the story of how we turned our neglected shed into a thriving home for our feathered friends, and how you can too!
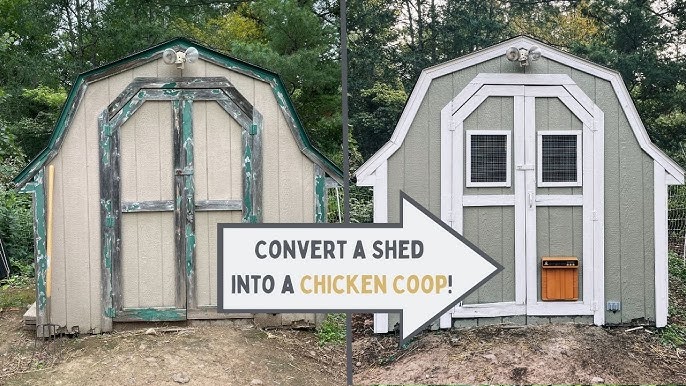
From Shed to Coop: Why We Chose This Project
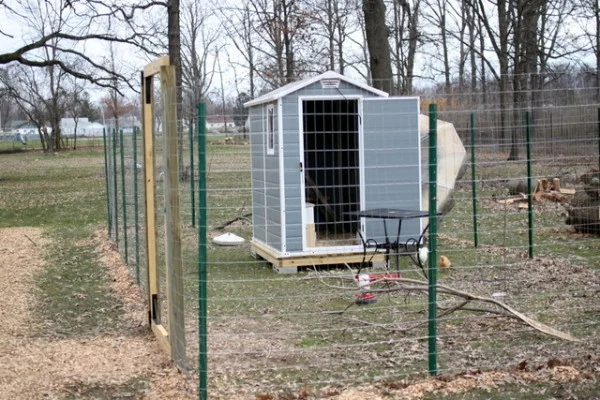
Beyond the allure of farm-fresh eggs, converting our shed into a chicken coop addressed several key needs. Space was a major factor. Building a coop from scratch felt daunting and time-consuming. The shed offered a solid foundation, existing walls, and a roof – a significant head start. Secondly, weather protection was crucial. Our winters can be harsh, and the shed provided a secure, draft-free shelter. Finally, security. A sturdy structure was essential for protecting our chickens from predators like foxes, raccoons, and hawks. This shed to chicken coop conversion became the perfect solution!
Planning Your Chicken Coop Conversion: The Essential Steps
Before you grab your hammer and nails, careful planning is essential for a successful shed conversion. Here's a step-by-step guide to get you started:
1. Assessing Your Shed's Suitability
First, thoroughly inspect your shed. Is the structure sound? Are the walls and roof intact? Check for rot, insect damage, and leaks. A solid foundation is crucial. If the shed is beyond repair, it might be more cost-effective to start from scratch. Consider the size of your shed. A general rule of thumb is 4 square feet of coop space per chicken inside the coop, and 8-10 square feet per chicken in the outside run.
2. Designing Your Chicken Coop Layout
Think about the interior layout. You'll need:
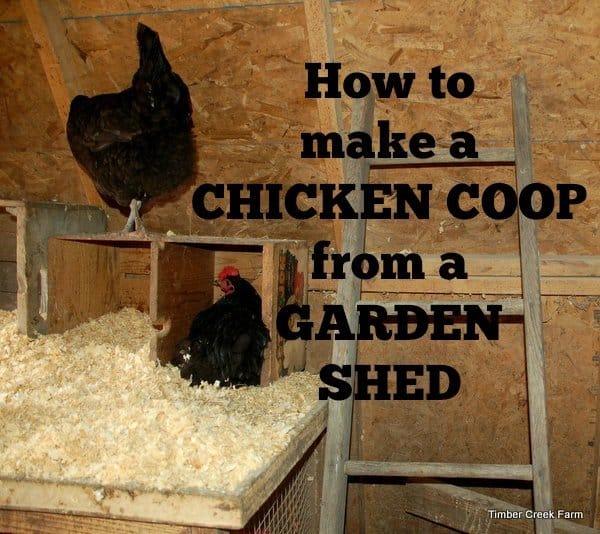
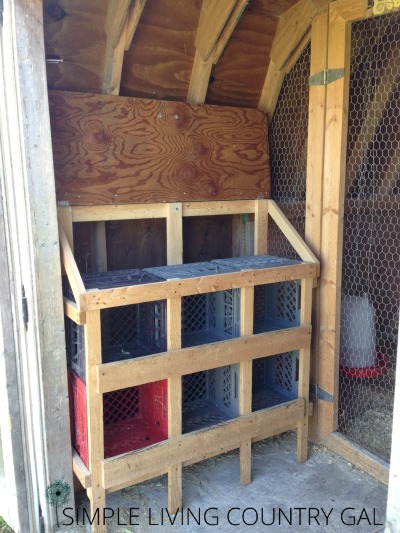
- Nesting Boxes: Provide one nesting box for every 3-4 hens. A standard size is 12x12x12 inches.
- Roosting Bars: Chickens naturally roost at night. Provide sturdy bars at least 2 inches wide, placed 2-3 feet off the ground.
- Feeding and Watering Stations: Choose feeders and waterers that are easy to clean and refill.
- Storage Space: Consider incorporating a small storage area for feed and supplies.
3. Creating a Secure Outdoor Run
The run is where your chickens will spend most of their time. It needs to be spacious, predator-proof, and provide access to sunlight and fresh air. Enclose the run with sturdy chicken wire or hardware cloth, burying it at least 12 inches deep to prevent digging predators. Cover the top of the run with netting or wire to protect against aerial predators.
4. Ventilation is Key
Proper ventilation is crucial for a healthy chicken coop. Stale, ammonia-filled air can lead to respiratory problems. Install vents near the roofline to allow for airflow, but avoid drafts directly on the chickens.
DIY Chicken Coop: The Conversion Process – Our Real-World Experience
Here’s how we transformed our dilapidated shed into a chicken paradise:
Phase 1: Demolition and Cleaning
The first step was a complete clean-out. We removed all the junk, swept the floor, and power-washed the interior to get rid of years of accumulated grime. We also removed any rotten wood and made necessary repairs to the shed's structure.
Safety First: Wear a dust mask and gloves during this phase. Be careful when handling old materials, as they may contain lead paint or other contaminants.
Phase 2: Framing and Construction
Next, we focused on building the interior components:
- Nesting Boxes: We built simple nesting boxes from scrap lumber, placing them along one wall of the shed.
- Roosting Bars: We installed sturdy 2x4 roosting bars at varying heights, allowing the chickens to choose their preferred spot.
- Chicken Door: We cut an opening in the shed wall for the chicken door, ensuring it was large enough for the chickens to pass through comfortably. We installed a simple latch to close the door at night for added security.
Phase 3: Creating the Outdoor Run
Building the run was the most labor-intensive part of the project. We used pressure-treated lumber to build a sturdy frame, attaching it to the side of the shed. We then enclosed the frame with heavy-duty chicken wire, burying it 12 inches deep. We also added a wire mesh roof to keep out predators.
Troubleshooting Tip: Make sure the chicken wire is securely attached to the frame to prevent predators from tearing through it. Use heavy-duty staples or screws for added security.
Phase 4: Ventilation and Insulation
To ensure proper ventilation, we installed two screened vents near the roofline. In our climate, insulation wasn’t necessary, but if you live in a colder region, consider insulating the walls and roof of the coop to keep your chickens warm in the winter.
Budget-Friendly Tip: Use recycled materials like old blankets or hay bales for insulation.
Phase 5: The Finishing Touches
Finally, we added the finishing touches:
- Flooring: We covered the floor of the coop with a thick layer of wood shavings to absorb moisture and odor.
- Dust Bath Area: Chickens need a place to take dust baths to keep their feathers clean and free of parasites. We created a small dust bath area in the run by filling a container with sand and diatomaceous earth.
- Decorations: We added a few decorative touches to make the coop more inviting, such as a painted sign and some potted plants.
Supply List and Estimated Costs
Here's a breakdown of the materials we used and their approximate costs:
- Lumber (pressure-treated for the run): $150 - $300
- Chicken Wire/Hardware Cloth: $50 - $100
- Nesting Boxes (scrap lumber): $0 - $20
- Roosting Bars (2x4s): $10 - $20
- Chicken Door: $20 - $50 (or DIY from scrap)
- Wood Shavings: $10 - $20 per bag
- Fasteners (screws, nails, staples): $20 - $30
- Ventilation Screens: $10 - $20
- Optional: Roofing Materials (if needed): $50 - $100
Total Estimated Cost: $320 - $650
Budget-Friendly Alternatives:
- Use reclaimed lumber whenever possible.
- Build your own chicken door from scrap materials.
- Look for discounted chicken wire at farm supply stores.
Tool List
- Hammer
- Screwdriver
- Saw (circular saw or hand saw)
- Drill
- Staple Gun
- Wire Cutters
- Measuring Tape
- Level
- Safety Glasses
- Gloves
Choosing the Right Chicken Breeds
Consider the size of your coop and your climate when choosing chicken breeds. Some good breeds for small coops include:
- Bantams: These small chickens are great for confined spaces.
- Silkies: Gentle and docile, Silkies are also good for small coops.
- Orpingtons: These large, fluffy chickens are cold-hardy and good egg layers.
- Rhode Island Reds: A reliable and hardy breed known for their consistent egg production.
Maintaining Your Chicken Coop
Regular maintenance is essential for keeping your chickens healthy and happy:
- Clean the coop regularly: Remove droppings and replace soiled bedding at least once a week.
- Clean the waterer and feeder: Keep them free of algae and bacteria.
- Check for pests: Inspect your chickens regularly for mites and lice.
- Provide fresh water and food daily.
- Collect eggs daily.
Benefits of a Converted Chicken Coop
Converting our shed into a chicken coop has been a rewarding experience. We now enjoy:
- Fresh, delicious eggs every day.
- Reduced grocery bills.
- A sustainable source of fertilizer for our garden.
- The satisfaction of raising our own food.
- A fun and educational experience for the whole family.
Integrating the Coop into Your Homestead Landscape
Consider how the coop fits into your overall homestead design. Place it in a location that receives plenty of sunlight and is protected from the wind. Plant shrubs and trees around the coop to provide shade and shelter. You can even integrate the chicken run into your garden by using the chickens to control pests and weeds.
Final Thoughts: Embrace the DIY Homesteading Spirit
Turning our neglected shed into a thriving chicken coop was a challenging but ultimately rewarding project. It’s a testament to the DIY spirit of homesteading, proving that with a little planning and effort, you can transform forgotten spaces into productive assets. We hope our experience inspires you to take on your own shed conversion project and enjoy the many benefits of raising backyard chickens. So, what are you waiting for? Gather your tools, grab your supplies, and get ready to create a happy home for your feathered friends!
Now it's your turn! Share your own chicken coop projects or ask any questions you have in the comments below. We'd love to hear from you!