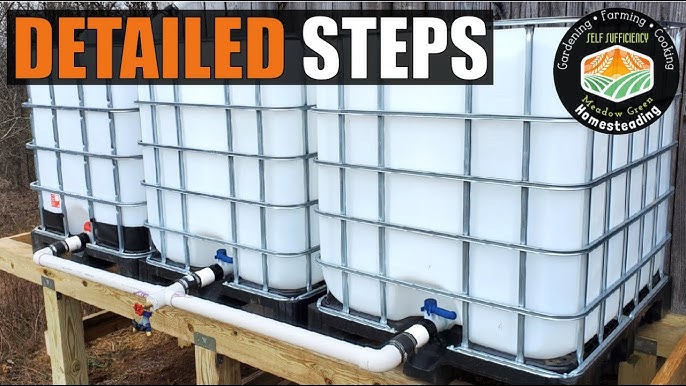
Transform Your Homestead: Step-by-Step Guide to a DIY Rainwater Harvesting System for a More Resilient Future
Imagine the satisfaction of watering your flourishing garden with water you've collected yourself, free from chemicals and the rising costs of municipal water. In this step-by-step guide, we'll walk you through building a DIY rainwater harvesting system for your garden to bolster your homestead's self-sufficiency and prepare for whatever comes your way. Perfect for intermediate homesteaders with a weekend to spare, this project will empower you to conserve precious water resources and nurture thriving plants, even during dry spells. This is homesteading rainwater harvesting at its finest.
Why Rainwater Harvesting?
Water is life, and on a homestead, access to a reliable water source is crucial. While wells and municipal water are options, rainwater harvesting offers several key advantages:
- Cost Savings: Reduce your water bill and reliance on external water sources.
- Environmental Friendliness: Conserve precious water resources and reduce your environmental footprint.
- Water Quality: Rainwater is naturally soft and free from chemicals like chlorine, making it ideal for plants.
- Resilience: Provides a backup water source during droughts or water restrictions.
- Self-Sufficiency: Increases your homestead's independence and resilience.
Is this Project Right for You?
This DIY rainwater harvesting project is designed for intermediate homesteaders with some basic DIY skills. You should be comfortable with:
- Using basic hand tools (drill, saw, wrenches).
- Working with PVC pipe and fittings.
- Understanding basic plumbing principles.
- Working safely on a ladder.
If you possess these skills and are motivated to enhance your homestead's water security, then let's get started!
Planning Your Rainwater Harvesting System
Before diving into the construction process, careful planning is essential. Consider the following factors:
- Rainfall: Research your average annual rainfall to determine the potential water yield. Online resources and local weather stations can provide this information.
- Roof Area: Measure the square footage of your roof that will be used to collect rainwater. This will help you estimate the amount of water you can harvest.
- Storage Capacity: Determine the size and number of rain barrels or tanks needed to meet your gardening needs. Consider the size of your garden and your watering habits.
- Location: Choose a suitable location for your rain barrels or tanks. Ensure the location is level, accessible, and close to your garden.
- Regulations: Check local regulations regarding rainwater harvesting. Some areas may have restrictions on the size or placement of rain barrels.
Step-by-Step Guide to Building Your DIY Rainwater Harvesting System
Here's a detailed guide to building a simple and effective rainwater harvesting system for your garden. This system utilizes a rain barrel connected to your existing gutter downspout.
Materials List (Estimated Cost: $150 - $300)
- Rain Barrel (50-75 Gallon): Food-grade plastic barrel (e.g., repurposed olive barrel). Check Craigslist, local farms, or online retailers (approx. $50 - $100).
- Downspout Diverter: Diverts rainwater from the downspout into the rain barrel (approx. $20 - $40). Available at Lowes or Home Depot.
- Spigot: Brass or plastic spigot for dispensing water from the barrel (approx. $10 - $20). Available at local hardware store.
- Hose Connector: For attaching a garden hose to the spigot (approx. $5 - $10). Available at local hardware store.
- PVC Pipe and Fittings: For connecting the downspout diverter to the rain barrel (approx. $10 - $20). Available at Lowes or Home Depot.
- Screen Mesh: To prevent debris from entering the barrel (approx. $5 - $10). Available at local hardware store.
- Gravel or Concrete Blocks: To elevate the rain barrel (approx. $10 - $20). Available at Lowes or Home Depot.
- Drill: With various sized drill bits.
- Saw: For cutting PVC pipe.
- Wrench: For tightening fittings.
- Measuring Tape:
- Safety Glasses:
- Gloves:
Step 1: Prepare the Rain Barrel
- Thoroughly clean the rain barrel with soap and water to remove any residue. If the barrel previously contained food, ensure it is food-grade and thoroughly cleaned.
- Drill a hole near the bottom of the barrel for the spigot. The size of the hole will depend on the size of the spigot.
- Install the spigot, ensuring a tight seal. You may need to use Teflon tape to prevent leaks.
Step 2: Install the Downspout Diverter
- Cut the downspout above the desired location for the diverter.
- Install the downspout diverter according to the manufacturer's instructions. Most diverters are designed to fit standard downspout sizes.
Step 3: Connect the Diverter to the Rain Barrel
- Measure the distance between the downspout diverter and the rain barrel.
- Cut PVC pipe to the appropriate length and connect it to the diverter and the rain barrel using PVC fittings. Ensure all connections are secure and watertight.
- Angle the pipe slightly downward towards the rain barrel to facilitate water flow.
Step 4: Elevate the Rain Barrel
- Place gravel or concrete blocks on a level surface to create a stable base for the rain barrel.
- Elevate the rain barrel to provide sufficient gravity for watering your garden. A higher elevation will provide better water pressure.
Step 5: Install the Screen Mesh
- Cover the top of the rain barrel with screen mesh to prevent debris, insects, and leaves from entering the barrel.
- Secure the screen mesh with a bungee cord or other fastener.
Step 6: Test the System
- Wait for the next rainfall and observe the system in action.
- Check for leaks and make any necessary adjustments.
- Ensure the water is flowing properly from the downspout to the rain barrel.
Safety Precautions
- Always wear safety glasses and gloves when working with tools.
- Use caution when working on a ladder.
- Ensure the rain barrel is stable and secure to prevent it from tipping over.
- Do not drink rainwater collected from the system without proper filtration and purification. Rainwater can be contaminated with bacteria and other harmful substances.
- Be aware of local regulations regarding rainwater harvesting.
Troubleshooting Tips
- Leaks: Check all connections and fittings for leaks. Tighten connections or use Teflon tape to seal leaks.
- Clogged Diverter: Periodically clean the downspout diverter to remove debris and prevent clogs.
- Slow Water Flow: Ensure the rain barrel is elevated high enough to provide sufficient gravity for water flow. Check for any obstructions in the pipe or spigot.
- Mosquitoes: Add mosquito dunks to the rain barrel to prevent mosquito larvae from breeding.
Variations and Modifications
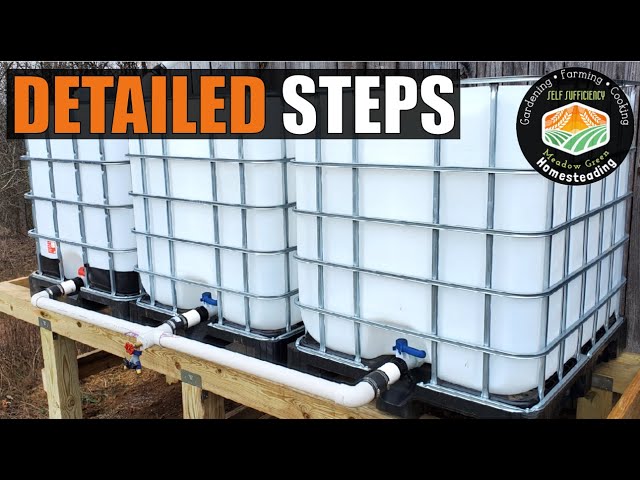
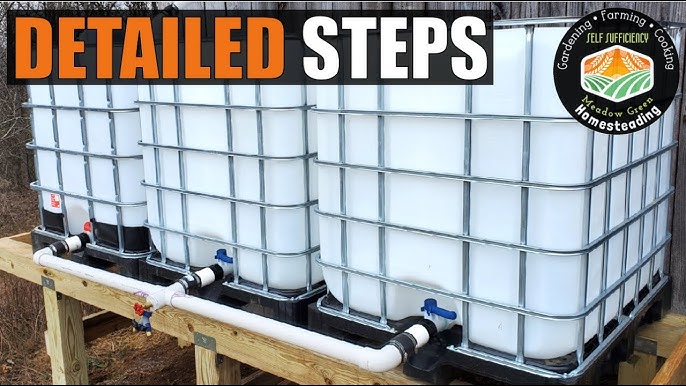
- Multiple Rain Barrels: Connect multiple rain barrels together to increase storage capacity.
- First Flush Diverter: Install a first flush diverter to divert the initial rainwater, which may contain contaminants from the roof.
- Submersible Pump: Use a submersible pump to increase water pressure for watering your garden.
- Automated Irrigation: Connect the rain barrel to an automated irrigation system for hands-free watering.
Maintenance Tips and Long-Term Care
- Regularly inspect the system for leaks, clogs, and damage.
- Clean the rain barrel and downspout diverter periodically to remove debris.
- Replace the screen mesh as needed.
- Winterize the system by disconnecting the downspout diverter and draining the rain barrel to prevent freezing.

My Experience and the Benefits I Anticipate
Building this DIY rainwater harvesting system was a rewarding experience. The biggest challenge was finding a suitable rain barrel, but after some searching, I found a used olive barrel in great condition. I learned a lot about plumbing and the importance of water conservation. I anticipate significant long-term benefits, including reduced water bills, a healthier garden, and increased self-sufficiency. Knowing that I'm utilizing a sustainable water source to nourish my plants gives me a great sense of satisfaction.
Now it's your turn! Share your own experiences with rainwater harvesting, ask questions, or suggest improvements in the comments below. Let's build a more resilient future, one rain barrel at a time!
Further Reading:
- Building a DIY Compost Bin for a Thriving Garden
- The Ultimate Guide to Seed Saving for Homesteaders
- Raising Chickens for Eggs: A Beginner's Guide
