Transform Your Homestead: Step-by-Step Guide to Building a Budget-Friendly Chicken Tractor
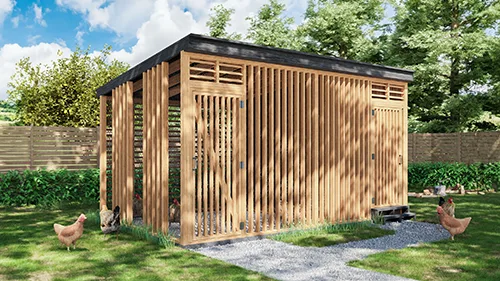
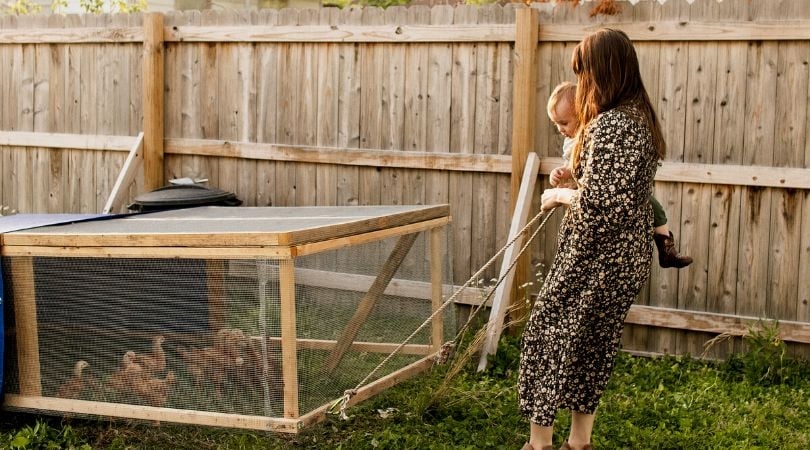
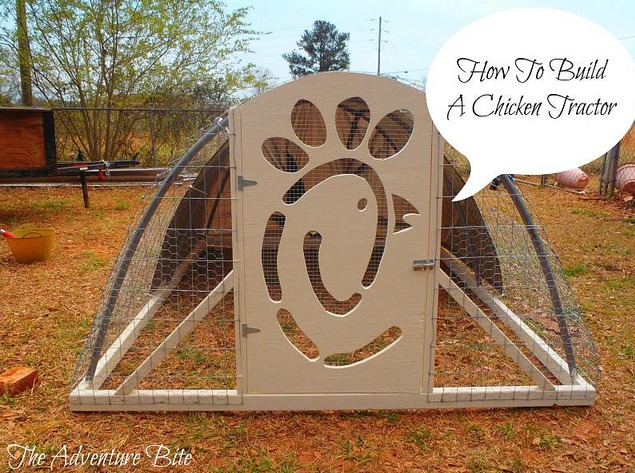
Are you dreaming of fresh eggs from happy hens, but the thought of building a permanent coop feels daunting (and expensive)? Or maybe you're concerned about your chickens overgrazing one area and turning it into a muddy mess? Then it's time to consider a chicken tractor! A chicken tractor, also known as a mobile chicken coop, offers a fantastic solution for the small-scale homesteader looking to boost self-sufficiency, improve chicken health, and save money on store-bought eggs. Given the rising costs of lumber and concerns around ethical egg production, building a chicken tractor is a particularly timely and relevant project. Let's dive into building a budget-friendly chicken tractor that's achievable for beginner to intermediate DIYers!
Why Build a Chicken Tractor?
Before we get into the nitty-gritty of building, let's talk about the "why." Why choose a chicken tractor over a traditional coop? Here's why I decided to build one myself:
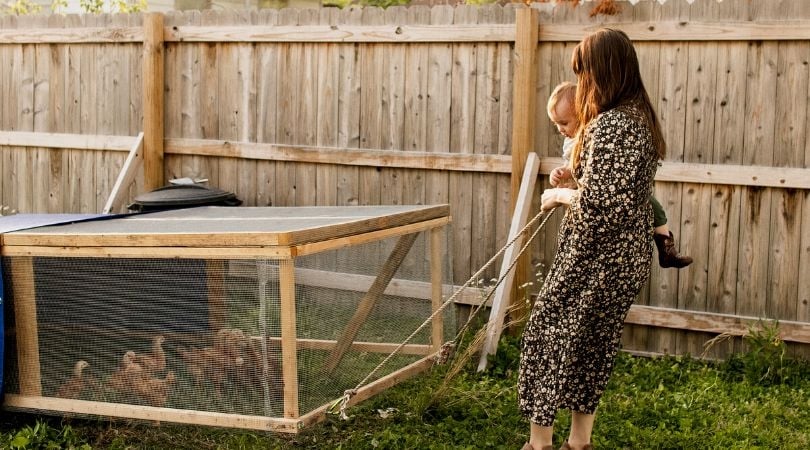
- Fresh Pasture, Happy Chickens: Chickens naturally forage for insects and greens. A chicken tractor allows you to move your flock to fresh pasture regularly, giving them access to a buffet of delicious and nutritious treats. This not only improves their health but also results in richer, more flavorful eggs.
- Fertilizer on the Go: As your chickens roam, they'll naturally fertilize the soil with their droppings. This is an amazing way to improve your garden soil and prepare it for planting.
- Pest Control: Chickens are voracious insect eaters. Moving the tractor through your garden area can help control pests naturally, reducing the need for harmful chemicals.
- Cost Savings: Building your own chicken tractor can save you significant money compared to purchasing a pre-built coop. Plus, you'll save on feed costs as your chickens forage for a portion of their diet.
- Ethical Egg Production: Knowing that your chickens are living a happy, healthy life, foraging on fresh pasture, gives you peace of mind and allows you to produce eggs ethically.
- Flexibility: A chicken tractor is mobile, allowing you to move it around your property to where it’s needed most. Need help clearing a garden bed after harvest? Place the tractor there for a week or two!
Planning Your Chicken Tractor: Size and Design
Before you head to the lumber yard, take some time to plan your chicken tractor. Here are some key considerations:
- Flock Size: The size of your tractor will depend on the number of chickens you plan to house. A general rule of thumb is to provide at least 4 square feet of space per chicken in the tractor.
- Mobility: How easy will it be to move? Consider the weight and the type of wheels you'll use. Larger wheels will make it easier to move over uneven terrain.
- Materials: We're aiming for budget-friendly, so think about using reclaimed lumber, pallets (ensure they are heat-treated and not chemically treated), or other recycled materials. However, pressure-treated lumber is ideal for ground contact to increase lifespan.
- Predator Protection: A secure chicken tractor is essential to protect your flock from predators like foxes, coyotes, and raccoons. Use sturdy hardware cloth (not chicken wire) to enclose the sides and top of the tractor.
- Features: Will your tractor include a roosting bar, nesting box, or feeder and waterer? Plan these features into your design.
Step-by-Step Guide to Building Your Chicken Tractor
Skill Level: Beginner to Intermediate
Estimated Cost: $100 - $300 (depending on materials used)
Tools You'll Need:
- Saw (circular saw or hand saw)
- Drill with various drill bits
- Screwdriver or drill with screwdriver bits
- Measuring tape
- Level
- Staple gun
- Wire cutters
- Safety glasses
- Gloves
Materials List:
- Lumber (2x4s, 1x4s, plywood – amounts will vary depending on the size of your tractor)
- Hardware cloth (1/2 inch mesh is recommended)
- Screws (various sizes)
- Staples
- Wheels (2 - 4, depending on design)
- Hinges
- Latch
- Roofing material (corrugated metal, plywood covered with tarp, or shingles)
- Optional: Reclaimed pallet wood
Step 1: Build the Base Frame
This will be the foundation of your chicken tractor.
- Cut the lumber to the desired dimensions for your base. A common size is 4 feet wide by 8 feet long, but adjust as needed for your flock size.
- Assemble the frame using screws, ensuring that the corners are square. Use a level to make sure the frame is level.
- Reinforce the corners with corner brackets for added stability.
Step 2: Add the Wheels
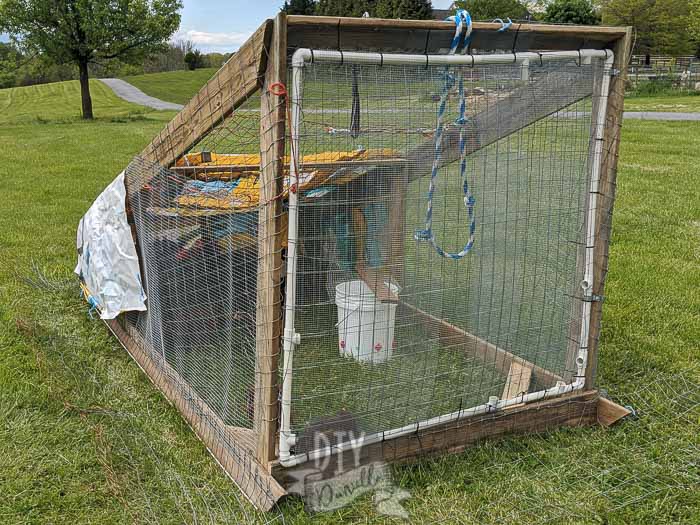
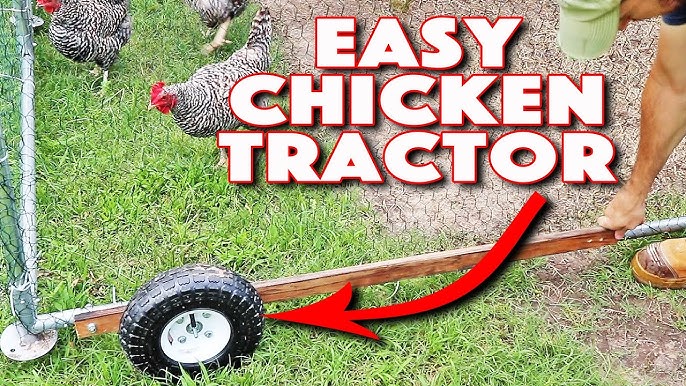
- Decide where you want to place the wheels. Typically, they are placed at one end of the tractor to allow for easy movement.
- Attach the wheels to the frame using bolts and nuts. Make sure the wheels are securely attached. I recommend using large pneumatic wheels if you plan to move the tractor frequently over rough terrain.
- Consider adding handles to the opposite end of the wheels to make pulling the tractor easier.
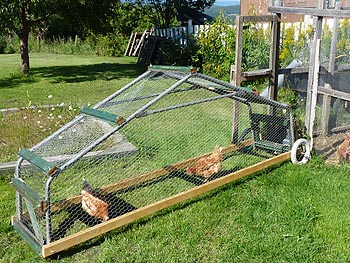
Step 3: Construct the Walls
- Cut the lumber to the desired height for the walls. A height of 3-4 feet is usually sufficient.
- Attach the wall frames to the base frame using screws. Again, make sure the walls are square and level.
- Cover the walls with hardware cloth, securing it with staples. Ensure there are no gaps where predators could enter. Overlap the edges of the hardware cloth for extra security.
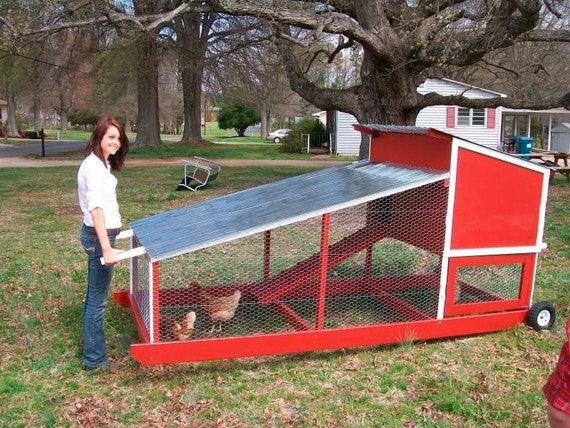
Step 4: Build the Roof
- Construct a frame for the roof, ensuring it’s sturdy enough to withstand the elements. A slightly slanted roof will help with water runoff.
- Cover the roof frame with your chosen roofing material. If using plywood, cover it with a tarp or shingles to protect it from the rain. Corrugated metal is a durable and cost-effective option.
- Attach the roof to the walls using hinges on one side, creating a hinged roof that can be opened for easy access to the chickens.
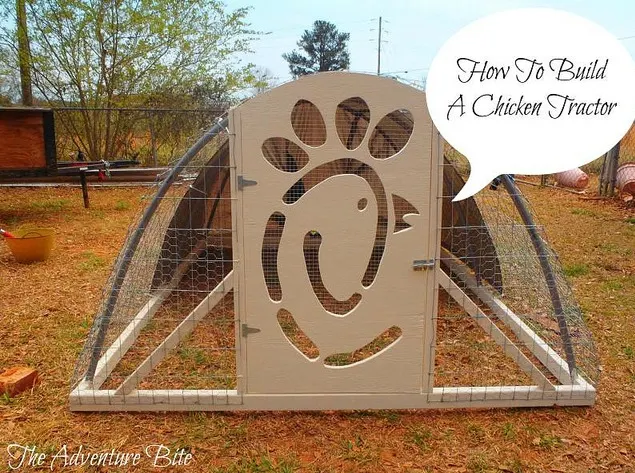
Step 5: Add a Door and Latch
- Cut an opening for a door in one of the walls.
- Build a simple door frame and cover it with hardware cloth.
- Attach the door to the frame using hinges and install a secure latch to keep predators out.
Step 6: Interior Features
- Roosting Bar: Install a roosting bar inside the tractor. This can be a simple 2x4 attached to the walls at a comfortable height for the chickens.
- Nesting Box (Optional): If you want your chickens to lay eggs inside the tractor, add a nesting box. This can be a small wooden box placed in a corner of the tractor.
- Feeder and Waterer: Choose a feeder and waterer that are appropriate for the size of your flock. Hang them from the walls or place them on the floor of the tractor.

Step 7: Safety Considerations
- Hardware Cloth: Always use hardware cloth instead of chicken wire for predator protection. Chicken wire is easily torn by predators.
- Secure Latches: Use sturdy latches that predators cannot open.
- Ground Contact: If the tractor will be sitting directly on the ground, consider adding a skirt of hardware cloth around the base to prevent predators from digging underneath.
- Supervision: While chicken tractors offer good protection, it’s always a good idea to supervise your chickens, especially during the first few weeks in their new home.
Cost-Effective Alternatives and Tips
- Reclaimed Wood: Source reclaimed lumber from construction sites, demolition projects, or online marketplaces.
- Pallet Wood: Pallets can be a great source of free lumber. Just make sure they are heat-treated (HT) and not chemically treated (look for an IPPC stamp).
- Repurpose Materials: Get creative and repurpose old doors, windows, or other materials into your chicken tractor.
- DIY Wheels: If you're on a tight budget, you can build your own wheels using scrap wood and old tires.
- Shop Around: Compare prices at different lumber yards and hardware stores to find the best deals.
Common Pitfalls to Avoid
- Not Enough Space: Make sure you provide enough space for your chickens to move around comfortably. Overcrowding can lead to stress and health problems.
- Inadequate Ventilation: Ensure the tractor has adequate ventilation to prevent moisture buildup and respiratory issues.
- Poor Predator Protection: Don't skimp on predator protection. Use sturdy materials and secure latches to keep your flock safe.
- Difficult to Move: Design your tractor with mobility in mind. Large wheels and handles will make it much easier to move.
- Ignoring Local Regulations: Before building, check with your local authorities to see if there are any regulations regarding chicken coops or chicken tractors.
My Personal Experience
When I first started homesteading, I was overwhelmed by the cost of building a large, permanent coop. I decided to build a chicken tractor as a more affordable and flexible alternative. I used reclaimed lumber from an old barn and repurposed some old wheels from a discarded wheelbarrow. It wasn't perfect, but it worked! I learned a lot about chicken behavior and the importance of pasture rotation. One modification I made was adding a small ramp to make it easier for the chickens to get in and out of the tractor. This simple addition made a big difference. The best part was seeing my chickens happily foraging in fresh pasture, and the eggs tasted incredible!
Conclusion
Building a budget-friendly chicken tractor is a rewarding project that can significantly enhance your homestead. It's a great way to improve chicken health, increase egg production, and save money on store-bought eggs. By following these steps and tips, you can create a mobile coop that will provide your flock with a happy and healthy life. Remember to prioritize safety, plan carefully, and get creative with your materials. Good luck, and happy homesteading!
Now it's your turn! Have you ever built a chicken tractor? What tips and tricks do you have to share? Post your questions, experiences, and photos of your finished projects in the comments below! Don't forget to use #BetterHomesAndHarvests to connect with other homesteaders on social media. We can't wait to see what you create!

