Transform Your Homestead: Building an Energy-Efficient, Earth-Sheltered Chicken Coop for a Sustainable Future
Better Homes and Harvests readers crave practical solutions that empower them to live more sustainably and independently. This week, we're diving deep into a hands-on project that will dramatically improve the efficiency and resilience of your homestead: Building an Energy-Efficient, Earth-Sheltered Chicken Coop. We're not just talking theory; we're providing a detailed, step-by-step guide – complete with photos and videos – that anyone with basic DIY skills can follow. Say goodbye to sky-high heating bills for your feathered friends and hello to a more self-sufficient and sustainable homestead!
Project Goal: A Warm Coop and Happy Chickens
The goal of this project is to construct an earth-sheltered chicken coop that provides a stable, temperature-controlled environment for your chickens, minimizing the need for supplemental heating in the winter and cooling in the summer. This is crucial for consistent egg production and the overall health and happiness of your flock. By utilizing the earth's natural insulating properties (thermal mass), we create a coop that buffers against extreme temperature fluctuations. Imagine collecting fresh eggs even on the coldest winter mornings without worrying about frozen combs or stressed-out chickens. That’s the power of an earth-sheltered coop! Furthermore, this DIY project aligns perfectly with sustainable living principles, reducing energy consumption and promoting self-sufficiency on your homestead.
Benefits of an Earth-Sheltered Chicken Coop:
- Reduced Heating Costs: Earth provides excellent insulation, significantly reducing or eliminating the need for artificial heating.
- Consistent Egg Production: Stable temperatures lead to consistent egg laying throughout the year.
- Predator Protection: The partially buried design offers enhanced protection from predators like foxes, coyotes, and hawks.
- Sustainable Living: Reduces energy consumption and promotes a more eco-friendly homestead.
- Storm Protection: Provides protection from high winds and extreme weather events.
Materials List: Building Your Coop
Here's a comprehensive list of materials you'll need, along with approximate costs (which may vary depending on your location and supplier):
- Lumber:
- Pressure-treated lumber (4x4 posts, 2x4 framing, for below-ground portions): $150 - $300 (Local Hardware Store)
- Untreated lumber (2x4 framing, sheathing, roofing): $200 - $400 (Local Lumber Yard)
- Concrete:
- Concrete mix (for foundation and retaining walls): $50 - $100 (Local Hardware Store)
- Insulation:
- Rigid foam insulation (for walls and roof): $100 - $200 (Home Improvement Store)
- Roofing Materials:
- Corrugated metal roofing or asphalt shingles: $100 - $300 (Home Improvement Store)
- Roofing felt: $20 - $40 (Home Improvement Store)
- Hardware:
- Screws, nails, bolts, hinges: $50 - $100 (Local Hardware Store)
- Chicken Wire/Hardware Cloth:
- For run and ventilation openings: $50 - $100 (Farm Supply Store)
- Ventilation:
- PVC pipe or vent covers: $20 - $50 (Home Improvement Store)
- Doors and Windows:
- Reclaimed doors and windows (optional, can save money): $0 - $100 (Reclamation Centers, Online Marketplaces) or New Doors and Windows ($50-$200 per unit at Home Improvement Store)
- Waterproofing:
- Waterproofing membrane or sealant (for below-ground portions): $50 - $100 (Home Improvement Store)
- Other:
- Gravel (for drainage): $30 - $60 (Landscaping Supply Store)
- Sand (for bedding): $20 - $40 (Landscaping Supply Store)
Total Estimated Cost: $840 - $2040 (This is an estimate; costs can vary significantly.)
Tools Required: Get Equipped
Before you start, make sure you have the following tools:
- Shovel
- Wheelbarrow
- Measuring tape
- Level
- Circular saw or hand saw
- Drill with various bits
- Hammer
- Safety glasses
- Work gloves
- Ear protection
- Utility knife
- Staple gun (for hardware cloth)
- Concrete mixing tools (hoe, mixing tub)
Step-by-Step Instructions: Building Your Earth-Sheltered Coop
Step 1: Planning and Preparation

First, determine the size of your coop based on the number of chickens you plan to keep. A general rule of thumb is 4 square feet per chicken inside the coop and 8-10 square feet per chicken in the run. Choose a location with good drainage and southern exposure (in the Northern Hemisphere) to maximize passive solar heating. Southern exposure helps the coop soak in as much heat as possible during the day. Mark out the dimensions of your coop and run. Call 811 before you dig! Ensure you are clear of any underground utilities. Excavate the area for the coop, digging down approximately 2-3 feet, depending on your local climate and desired level of earth sheltering.
Tip: Consider building a small-scale model of your coop to visualize the design and identify potential problems before you start construction. I found this to be invaluable!
Step 2: Construction/Installation
- Foundation: Pour a concrete foundation for the coop walls, ensuring it is level and properly cured.
- Wall Construction: Build the walls using pressure-treated lumber for the below-ground portions and untreated lumber for the above-ground portions. Frame the walls with 2x4s and sheathe them with plywood or OSB.
- Waterproofing: Apply a waterproofing membrane or sealant to the exterior of the below-ground walls to prevent moisture from seeping into the coop.
- Insulation: Insulate the walls and roof with rigid foam insulation. This will significantly improve the coop's energy efficiency.
- Backfilling: Backfill around the walls with gravel for drainage and then with soil, compacting it as you go. This is where the "earth-sheltered" aspect comes to life!
- Roof Construction: Build a sturdy roof using rafters and sheathing. Ensure the roof has a slight slope to allow for water runoff.
- Roofing: Cover the roof with roofing felt and then with your chosen roofing material (corrugated metal or asphalt shingles).
- Ventilation: Install ventilation openings near the top of the walls to allow for proper airflow. Cover the openings with hardware cloth to keep out predators.
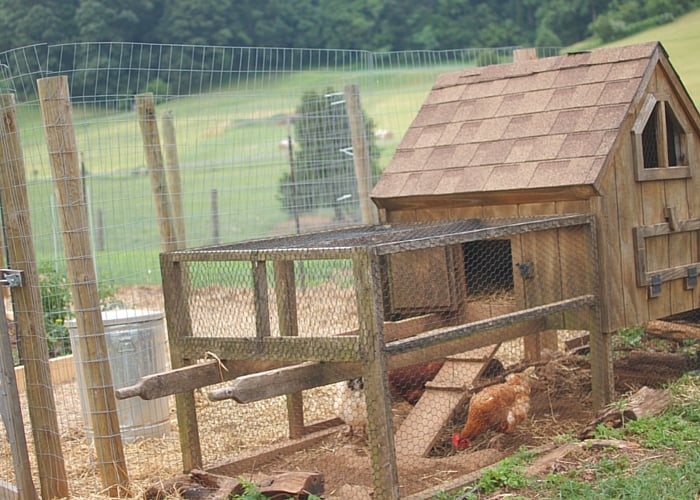
- Door and Window Installation: Install a secure door for access to the coop and windows for natural light.
Tip: When framing the walls, be sure to leave openings for ventilation and windows. Proper ventilation is crucial for maintaining a healthy environment for your chickens. Stale air can cause respiratory issues.
Step 3: Finishing Touches
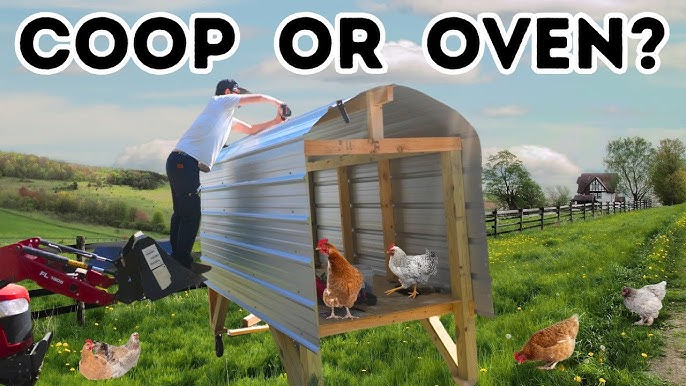
- Interior Finishing: Line the interior walls with plywood or OSB for a clean and durable surface.
- Roosting Bars: Install roosting bars at varying heights for the chickens to perch on.
- Nesting Boxes: Build or purchase nesting boxes and place them in a quiet, dark corner of the coop.
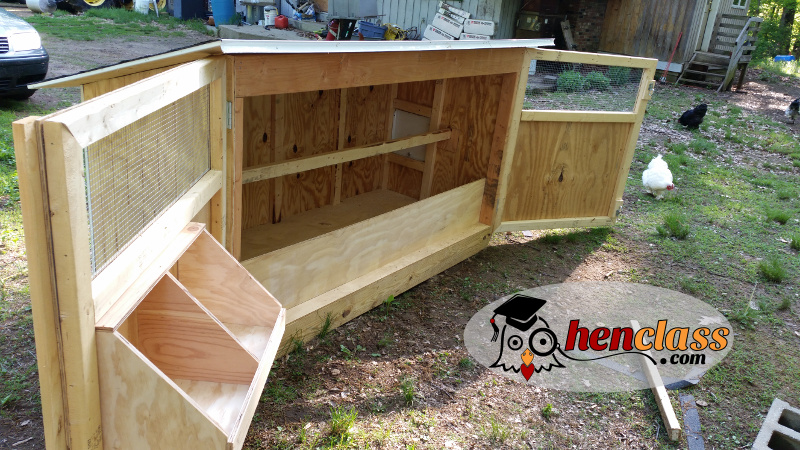
- Run Construction: Enclose the run with chicken wire or hardware cloth, ensuring it is buried at least 12 inches deep to prevent predators from digging under.
- Bedding: Add bedding to the coop floor, such as straw, wood shavings, or hemp bedding.
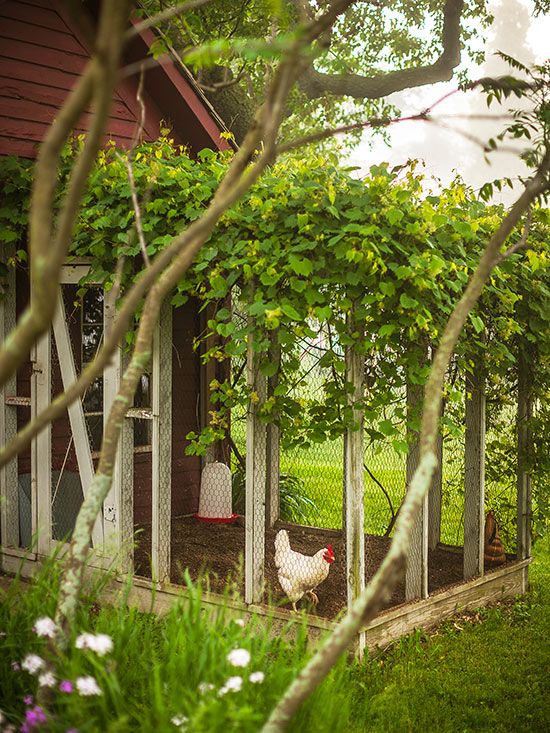
- Testing: Check the door and window to make sure that they are secure and there are no holes where predators could come in.
Step 4: Maintenance and Troubleshooting
- Regular Cleaning: Clean the coop regularly to prevent the buildup of ammonia and bacteria.
- Ventilation Check: Ensure the ventilation openings are clear and functioning properly.
- Predator Check: Regularly inspect the coop and run for any signs of predator activity.
- Waterproofing Maintenance: Reapply waterproofing sealant as needed to prevent moisture intrusion.
- Pest Control: Implement pest control measures to prevent infestations of mites, lice, and rodents.
Troubleshooting:
- Moisture Buildup: Increase ventilation if you notice moisture buildup inside the coop.
- Temperature Fluctuations: Add more insulation if the coop is not maintaining a stable temperature.
- Predator Problems: Reinforce the coop and run with stronger materials if you are experiencing predator problems.
Include Tips and Tricks:
- Salvaged Materials: Use salvaged materials whenever possible to save money and reduce waste. Old windows, doors, and lumber can often be repurposed for your coop.
- Composting Bedding: Consider using a deep litter method and composting the bedding to create valuable fertilizer for your garden.
- Planting Vegetation: Plant vegetation around the coop to provide additional insulation and camouflage.
- Chicken Dust Bath: Chickens naturally take dust baths to get rid of pests and mites. Create an area filled with sand and diatomaceous earth so the chickens have a place to clean themselves.
Personal Anecdote: When I built my earth-sheltered coop, I initially underestimated the importance of proper drainage. After a heavy rain, the coop flooded slightly. I quickly learned my lesson and added additional drainage around the foundation, which solved the problem. Don't make the same mistake I did!
Conclusion: A Sustainable Haven for Your Flock
Congratulations! You've successfully built an energy-efficient, earth-sheltered chicken coop! Now, put your newfound skills to use and enjoy the benefits of a more self-sufficient homestead! We encourage you to share your progress, ask questions, and connect with fellow homesteaders in the comments below. Upload photos of your finished project—we can't wait to see what you create! The joy of collecting warm eggs on a snowy morning from chickens housed in a coop you built yourself is truly rewarding.
Call to Action: Get Involved!
- What DIY projects have you tackled on your homestead? Share your experiences in the comments!
- Did you find this guide helpful? Share it with your fellow homesteaders on social media! #Homesteading #DIY #SelfSufficiency #EarthShelteredCoop #BetterHomesAndHarvests
- Subscribe to our newsletter for more homesteading tips, tricks, and DIY projects! Get exclusive plans and early access to new guides!
