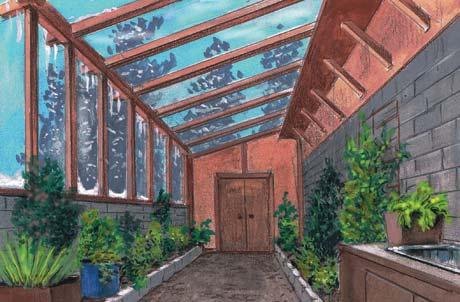
Transform Your Homestead: Build a Passive Solar Greenhouse for Year-Round Bounty!
Imagine stepping into a lush, green oasis in the dead of winter, harvesting fresh tomatoes, crisp spinach, and fragrant herbs while the world outside is blanketed in snow. A passive solar greenhouse makes this dream a reality, allowing you to extend your growing season and significantly boost your homestead's self-sufficiency. This isn't just a DIY project; it's an investment in your family's food security, a way to reduce your environmental footprint, and a chance to connect with the earth year-round. Building a homestead greenhouse empowers you to take control of your food supply, reduces reliance on grocery stores, and provides a sustainable way to access fresh, healthy produce, even during the coldest months.
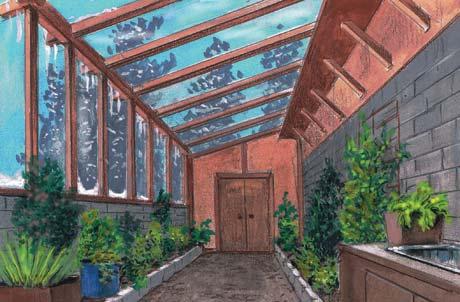
This comprehensive guide will walk you through the process of building a small-to-medium sized (8'x12' suggested, adaptable to different spaces) passive solar greenhouse using primarily reclaimed or locally sourced materials, minimizing environmental impact and costs. You’ll learn how to efficiently heat your greenhouse using solar energy, even during the coldest months, and discover the most effective growing strategies for winter crops.
The Allure of the Passive Solar Greenhouse: Why Build One?
Building a DIY greenhouse offers a multitude of benefits for the modern homesteader:
- Extended Growing Season: Grow vegetables, herbs, and flowers well beyond the typical growing season. Harvest fresh produce even in the dead of winter. Year-round gardening greenhouse capability is a game-changer for food security.
- Food Security: Increase your self-sufficiency by producing a significant portion of your family's food needs. Reduce reliance on external food sources and ensure access to healthy, fresh produce.
- Cost Savings: Lower your grocery bills by growing your own food. Reduce or eliminate the need to purchase expensive out-of-season produce.
- Environmental Sustainability: Reduce your carbon footprint by minimizing food miles and utilizing reclaimed materials. Embrace sustainable gardening practices and contribute to a healthier planet.
- Healthy Living: Access fresh, nutritious, and chemical-free produce year-round. Enjoy the therapeutic benefits of gardening and connect with nature.
- Seed Starting Powerhouse: Get a head start on your spring garden by starting seeds indoors early. Propagate plants and expand your garden effortlessly.
Planning Your Passive Solar Greenhouse: Site Selection and Design
Before you start hammering and sawing, careful planning is essential. The success of your passive solar greenhouse hinges on strategic site selection and a well-thought-out design.
1. Site Selection: Maximize Solar Gain
- Sunlight: Choose a location that receives at least 6-8 hours of direct sunlight per day, especially during the winter months. A south-facing slope is ideal in the Northern Hemisphere. Avoid areas shaded by trees or buildings.
- Wind Protection: Select a site sheltered from prevailing winds. Wind can rob your greenhouse of valuable heat. Consider using existing structures, trees, or windbreaks to provide protection.
- Accessibility: Locate your greenhouse near your home for easy access, especially during inclement weather. Consider proximity to a water source for convenient watering.
- Drainage: Ensure the site has good drainage to prevent waterlogging and root rot.
- Soil Conditions: While the greenhouse will have raised beds or containers, consider the surrounding soil for potential drainage issues and ease of access.
2. Design Considerations: Optimizing for Passive Solar Heating
- Orientation: Orient the long axis of your greenhouse east to west, with the south-facing wall receiving the most sunlight.
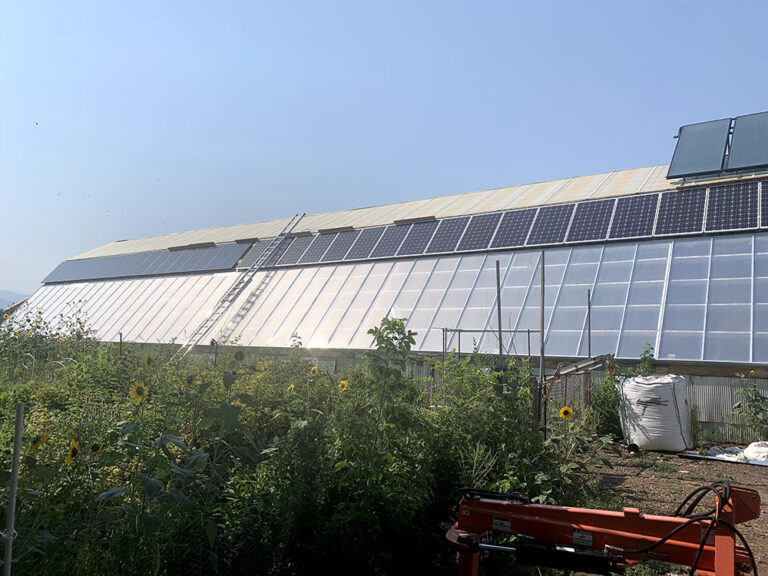
- Glazing: Use clear, high-quality glazing materials (windows) for the south-facing wall to maximize solar gain. Reclaimed windows are an excellent, sustainable, and cost-effective greenhouse option. Insulated glazing (double-pane or triple-pane) will further improve heat retention.
- Insulation: Insulate the north, east, and west walls of the greenhouse to minimize heat loss. Use materials like straw bales, recycled foam insulation, or earth berming.
- Thermal Mass: Incorporate thermal mass materials inside the greenhouse to absorb and store solar heat during the day and release it at night. Water barrels, concrete blocks, or dark-colored stone are excellent choices.
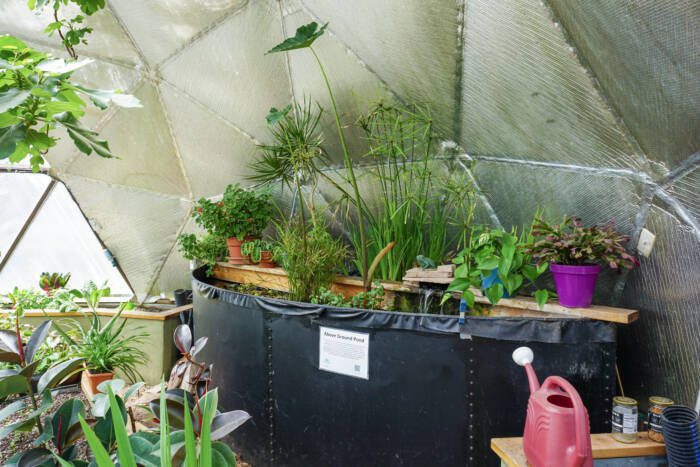
- Ventilation: Design for adequate ventilation to prevent overheating during sunny days. Install vents at the top and bottom of the greenhouse to allow for natural convection.
- Size: An 8'x12' greenhouse is a good starting point, but adjust the size to fit your needs and available space. Consider building a smaller structure initially and expanding later.
Materials List: Sustainable and Budget-Friendly Choices
This materials list focuses on reclaimed and locally sourced materials to minimize environmental impact and costs. Prices are estimates and may vary depending on your location and availability.
- Framing Lumber: Reclaimed lumber (pallets, construction waste) - Quantity depends on design. Estimated Cost: Free - $100
- Glazing: Reclaimed windows (double-pane preferred) - Approximately 40-50 sq ft. Estimated Cost: Free - $200
- Insulation: Straw bales, recycled foam board, or earth for berming. Estimated Cost: Free - $150
- Roofing Material: Corrugated metal roofing (recycled or new). Estimated Cost: $100 - $200
- Foundation: Concrete blocks, gravel, or compacted earth. Estimated Cost: Free - $100
- Door: Reclaimed door or build your own. Estimated Cost: Free - $50
- Vents: Reclaimed windows or build your own. Estimated Cost: Free - $30
- Fasteners: Screws, nails, bolts. Estimated Cost: $30 - $50
- Thermal Mass: Water barrels (55-gallon drums), concrete blocks, or dark-colored stone. Estimated Cost: Free - $100
- Gravel for Drainage: Estimated Cost: $30 - $50
- Soil and Compost: For raised beds or containers. Estimated Cost: $50 - $100
Total Estimated Project Cost: $390 - $1130
Note: These are estimates. Scavenging, bartering, and utilizing free resources can significantly reduce costs.
Step-by-Step Construction Guide: Building Your Dream Greenhouse
Step 1: Foundation Preparation
- Clear the site and level the ground.
- Construct a foundation using concrete blocks, gravel, or compacted earth. A simple perimeter foundation is sufficient for a small greenhouse. Ensure the foundation is level and provides good drainage.
Step 2: Framing the Structure
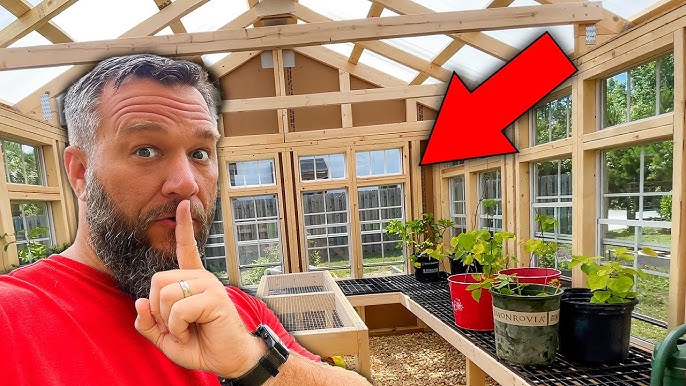
- Build the frame using reclaimed lumber. Construct the north, east, and west walls, ensuring they are sturdy and well-braced.
- The south-facing wall will primarily consist of glazing (windows). Design the frame to accommodate the size and shape of your reclaimed windows.
- Ensure accurate measurements and square corners for a structurally sound greenhouse.
Step 3: Installing Glazing (Windows)
- Install the reclaimed windows on the south-facing wall. Secure them tightly to the frame using screws or caulk.
- Ensure proper sealing to prevent air leaks and heat loss. Use weather stripping or caulk to seal any gaps.
- Consider using polycarbonate panels for the roof, as they are lightweight, durable, and provide good light transmission.
Step 4: Insulating the Walls
- Insulate the north, east, and west walls using straw bales, recycled foam board, or earth berming.
- Straw bales can be stacked against the walls and covered with a protective layer of plastic or stucco.
- Recycled foam board can be attached to the frame and covered with siding.
Step 5: Roofing
- Install the roofing material (corrugated metal or polycarbonate panels). Ensure proper overlap and secure attachment to prevent leaks.
- Consider a sloped roof to maximize sunlight penetration and allow for rainwater runoff.
Step 6: Installing Ventilation
- Install vents at the top and bottom of the greenhouse. Hinged windows or manually operated vents work well.
- Proper ventilation is crucial for preventing overheating and maintaining optimal growing conditions.
Step 7: Adding Thermal Mass
- Place water barrels, concrete blocks, or dark-colored stone inside the greenhouse to absorb and store solar heat.
- Position the thermal mass in direct sunlight to maximize heat absorption.
Step 8: Building Raised Beds or Setting Up Containers
- Construct raised beds or set up containers for planting.
- Use high-quality soil and compost to provide optimal growing conditions for your plants.
Step 9: Installing the Door
- Install a reclaimed door or build your own.
- Ensure the door is well-sealed to prevent heat loss.
Step 10: Finishing Touches
- Add any finishing touches, such as shelving, benches, or a watering system.
- Test the ventilation system and make any necessary adjustments.
Addressing Common Challenges: Troubleshooting Your Greenhouse
Building and maintaining a passive solar greenhouse isn't always smooth sailing. Here are some common challenges and practical solutions:
- Condensation Build-up: Condensation can lead to fungal diseases and reduce light transmission. Increase ventilation, use a dehumidifier, or wipe down the windows regularly.
- Overheating: Greenhouses can quickly overheat on sunny days, even in winter. Ensure adequate ventilation and consider using shade cloth during peak sunlight hours.
- Pest Control: Pests can thrive in the warm, humid environment of a greenhouse. Use organic pest control methods, such as introducing beneficial insects or using insecticidal soap.
- Temperature Fluctuations: Passive solar greenhouses can experience temperature fluctuations, especially during cloudy days or cold nights. Maximize thermal mass and insulation to stabilize temperatures. Consider adding a small electric heater for backup heat during extreme cold.
- Insufficient Light: During the shortest days of winter, sunlight may be limited. Supplement with grow lights if necessary to ensure optimal plant growth.
Expert Advice: Thriving in Your Winter Greenhouse
- Soil Preparation: Use a well-draining, nutrient-rich soil mix. Amend with compost and other organic matter to improve soil fertility.
- Watering Techniques: Water deeply but infrequently to encourage strong root growth. Avoid overwatering, which can lead to root rot.
- Crop Selection: Choose cold-hardy crops that thrive in winter conditions. Spinach, kale, lettuce, arugula, carrots, beets, and herbs like cilantro and parsley are excellent choices.
- Succession Planting: Plant new crops every few weeks to ensure a continuous harvest throughout the winter.
- Vertical Gardening: Maximize space by growing vining crops like tomatoes and cucumbers vertically.
Considerations for Different Climates
The design of your passive solar greenhouse should be adapted to your specific climate zone.
- Cold Climates: Maximize insulation and thermal mass to retain heat. Consider using a double-layered glazing system or a greenhouse within a greenhouse for added insulation.
- Temperate Climates: Focus on ventilation and shading to prevent overheating during the warmer months.
- Hot Climates: Provide ample ventilation and shade to prevent excessive heat build-up. Consider using evaporative cooling techniques to lower the temperature.
A Call to Action
Building a passive solar greenhouse is a rewarding project that can transform your homestead and enhance your self-sufficiency. Embrace the challenge, gather your reclaimed materials, and start building your own DIY solar greenhouse today! The joy of harvesting fresh, homegrown produce in the middle of winter is an experience you won't soon forget. Share your progress, ask questions, and connect with fellow homesteaders in the comments below. Let's build a community of thriving winter gardeners!