Transform Your Homestead: Build a DIY Root Cellar & Slash Your Grocery Bills
Remember that bumper crop of tomatoes last summer? The one that turned into a mountain of sauce, a flurry of canning activity, and still, inevitably, a compost pile of the slightly-too-ripe? Or the sting of those January grocery bills, inflated by the cost of imported, flavorless produce? I've been there. We all have. But what if there was a way to savor the bounty of your garden year-round, without the energy-guzzling refrigerator or the endless canning sessions? Enter the root cellar – the unsung hero of the self-sufficient homestead.
A root cellar is more than just a place to store potatoes. It's a pathway to food security, a powerful tool for reducing waste, and a tangible connection to the cyclical rhythms of the land. It’s a cornerstone of off-grid living and a way to dramatically reduce your reliance on the grocery store. Let’s explore how you can build your own DIY root cellar, even on a tight budget, and reap the rewards of truly sustainable living.

Why Build a Root Cellar?
Before we dive into the how-to, let's reinforce the why. Beyond the obvious food storage benefits, a root cellar provides:
- Food Security: A reliable source of food regardless of weather or supply chain disruptions.
- Reduced Waste: Properly stored produce lasts significantly longer, minimizing spoilage.
- Cost Savings: Substantially lower grocery bills, especially during the winter months.
- Healthier Eating: Enjoy fresh, nutrient-rich produce long after the growing season ends.
- Sustainability: Reduces your carbon footprint by minimizing transportation and refrigeration.
Step-by-Step Guide to Building Your DIY Root Cellar
This guide outlines the construction of an underground root cellar, a common and effective design. Always check local building codes and regulations before starting any construction project.
1. Planning and Site Selection:
- Location is Key: Choose a location with good drainage, ideally on a slight slope. North-facing slopes are preferred as they stay cooler. Avoid areas prone to flooding or with a high water table. Consider proximity to your garden for easy access.
- Size Matters: Determine the size based on your storage needs. A 6x8 foot cellar is a good starting point for a small family.
- Design: Sketch out your design, including dimensions, door placement, and ventilation. Consider shelving and storage arrangements.
2. Excavation:
- Dig Deep: Excavate the area to the desired dimensions, ensuring the walls are straight and the floor is level. Account for the thickness of the walls and roof.
- Safety First: Shore up the walls of the excavation to prevent collapse, especially in unstable soil.
- Drainage: Install a drainage system around the perimeter of the excavation. This could involve a gravel bed and perforated drainage pipes leading to a suitable outflow.

3. Foundation and Walls:
- Foundation: Pour a concrete slab foundation or create a gravel base for drainage.
- Wall Construction: Several options exist for wall construction:
- Concrete Blocks: Durable and relatively easy to work with. Mortar the blocks together, ensuring they are level and plumb.
- Poured Concrete: Provides a strong, waterproof wall. Requires formwork.
- Treated Lumber: More affordable but requires proper treatment to prevent rot. Consider using pressure-treated lumber and a waterproof membrane. (Note: Avoid direct soil contact.)
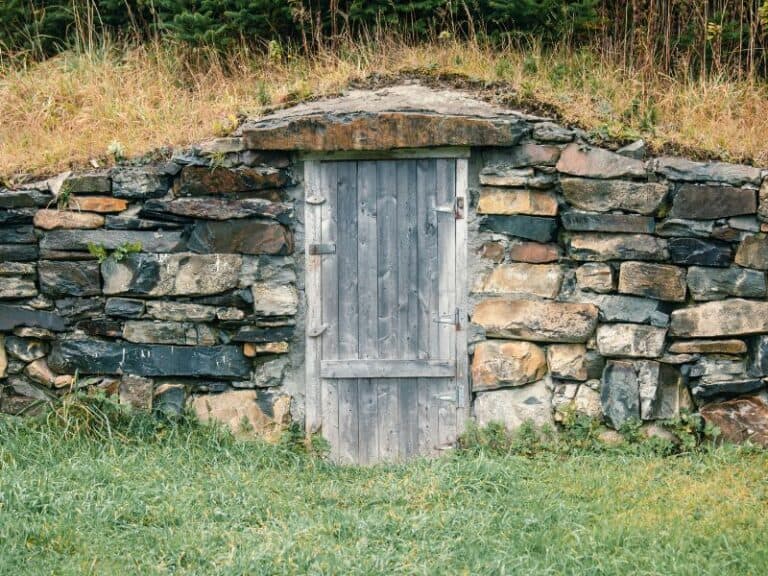
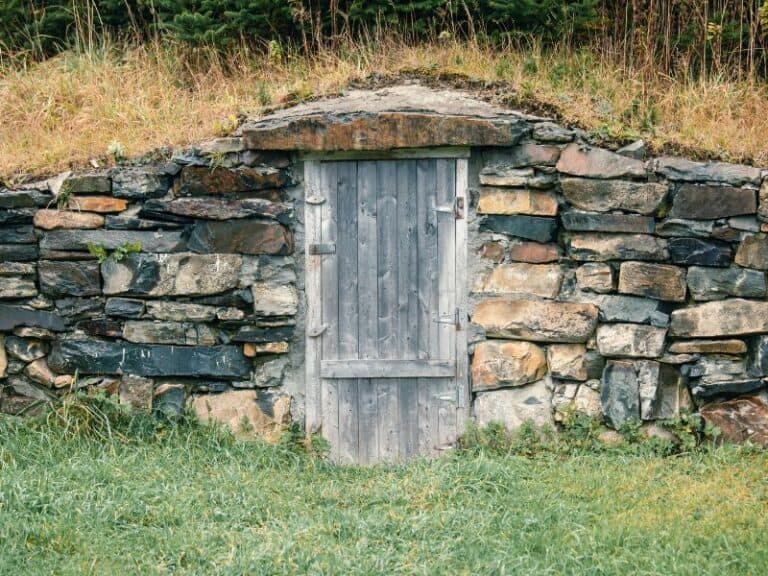
- Stone: Natural and aesthetically pleasing but requires more skill to construct.
4. Roofing:
- Structural Support: Build a sturdy roof structure using lumber. Consider a slightly sloped roof for water runoff.
- Waterproofing: Cover the roof with a waterproof membrane, such as roofing felt or a rubber membrane.
- Insulation: Add a layer of insulation to help maintain a consistent temperature. Straw bales, rigid foam insulation, or even a thick layer of earth can be used.
- Backfilling: Cover the roof with soil, creating a berm. This provides additional insulation and helps blend the root cellar into the landscape.

5. Door and Entrance:
- Weatherproof Door: Build or purchase a sturdy, insulated door. Ensure it seals tightly to prevent drafts.
- Entrance Design: Consider a small vestibule or airlock to further insulate the entrance.
- Steps: Construct steps leading down to the root cellar floor.
6. Ventilation:
- Airflow is Essential: Proper ventilation is crucial for maintaining the correct temperature and humidity levels.
- Two-Vent System: Install two ventilation pipes – one near the floor and one near the ceiling. This creates a natural convection current.
- Adjustable Vents: Use adjustable dampers to control the airflow based on the season and weather conditions.

7. Interior Finishing:
- Shelving: Build or install shelving to maximize storage space. Use untreated wood to avoid contaminating food.
- Flooring: A dirt floor provides natural humidity. Alternatively, use gravel or flagstones.
- Lighting: Install a low-wattage light for occasional use. Consider a solar-powered option for off-grid living.
Materials List (Estimated Costs):
- Lumber (for framing and shelving): $200 - $500
- Concrete blocks or Poured concrete: $300 - $800
- Roofing materials (membrane, insulation): $150 - $300
- Door: $100 - $300
- Ventilation pipes and dampers: $50 - $100
- Drainage pipes and gravel: $50 - $100
- Fasteners, tools, etc.: $50 - $100
Total Estimated Cost: $900 - $2200 (depending on materials and size)
8. Stocking Your Root Cellar:
- Preparation is Key: Harvest produce at its peak ripeness and cure root vegetables like potatoes and onions before storing.
- Storage Methods: Use a variety of storage methods, such as crates, baskets, and sand, to maintain optimal humidity for different vegetables.
- Monitor Regularly: Check your root cellar regularly for signs of spoilage and remove any affected produce.
Problem-Solving Tips:
- Drainage Issues: If you experience water seepage, improve the drainage around the root cellar. Consider installing a sump pump.
- Pest Control: Seal any cracks or openings to prevent rodents and insects from entering. Use traps or natural repellents if necessary.
- Ventilation Problems: Adjust the ventilation dampers to maintain the correct temperature and humidity levels. A simple thermometer and hygrometer can help monitor conditions.
- High Humidity: Increase ventilation to reduce moisture levels. Add a layer of gravel to the floor to absorb excess moisture.
- Low Humidity: Add a container of water to increase humidity. Store root vegetables in damp sand or sawdust.

Emphasizing Aesthetics
Your root cellar doesn't have to be an eyesore! Here are some tips for making it a beautiful and functional addition to your homestead:
- Natural Materials: Use natural materials like stone and wood to blend the root cellar into the landscape.
- Green Roof: Plant a green roof with herbs or wildflowers to add beauty and provide additional insulation.
- Decorative Touches: Add decorative touches like a hand-carved door or a stone pathway.
- Clever Space-Saving Designs: Utilize vertical space with shelving and hanging baskets.
- Camouflage: Integrate the root cellar into a hillside or berm to make it less visible.
Resources:
- National Center for Appropriate Technology (NCAT): Offers resources on sustainable agriculture and food preservation. https://attra.ncat.org/
- University Extension Offices: Provide information on local growing conditions and food storage techniques. (Search for your state's Extension Office)
- "Root Cellaring: Natural Cold Storage of Fruits & Vegetables" by Mike & Nancy Bubel: A comprehensive guide to root cellaring techniques. (Available on Amazon and other booksellers)
Concluding Benefits
Building a DIY root cellar is an investment in your future – a future filled with fresher, healthier food, lower grocery bills, and a deeper connection to the land. It’s a testament to self-reliance and a celebration of the seasons. By harnessing the power of natural cold storage, you can extend the bounty of your garden and savor the flavors of summer long into the winter months. It’s more than just preserving food; it’s preserving a way of life.
So, are you ready to transform your homestead? Start planning your DIY root cellar today and experience the many benefits of this timeless food storage solution. Share your plans, questions, or experiences in the comments below – we'd love to hear from you!

