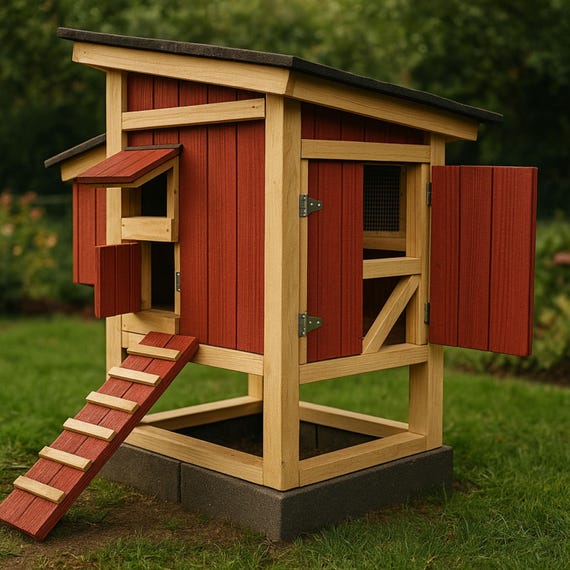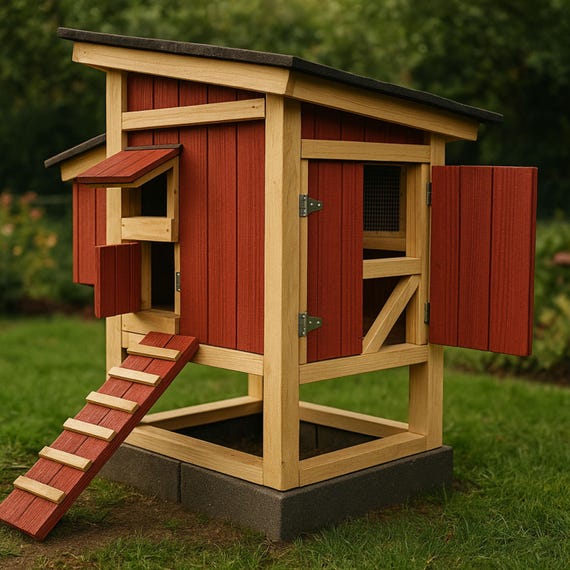
Transform Your Homestead: A Step-by-Step Guide to Building a Chicken Coop from Pallets
Better Homes and Harvests readers, are you dreaming of a more self-sufficient homestead? Want to raise your own chickens for fresh eggs and natural pest control, but find commercially available coops too expensive? This blog post will guide you through building a Chicken Coop from Pallets – a project anyone can tackle, even if you're just starting your homesteading journey! We'll focus on cost-effective solutions by utilizing readily available and often free pallet wood.

Part 1: Planning & Preparation
- Why This Project?
Many chicken coop options can be pricey, putting a strain on your homesteading budget. Building your own coop from pallets is a budget-friendly way to provide a safe and comfortable home for your chickens. Concerns about using pallets are valid – you want to avoid treated wood! Always check for the IPPC stamp on the pallet; HT (Heat Treated) is safe, while others (especially those marked MB for Methyl Bromide) should never be used for animal housing. This system emphasizes utilizing untreated pallets, giving you a chance to repurpose materials and save money while providing your chickens with a safe haven.
- Tools & Materials:
Here's a detailed list of the tools and materials you'll need. Estimated costs are included, but these can vary depending on your location and where you source your materials. Many materials may be found locally, at construction sites, or hardware stores.
| Tool/Material | Description | Estimated Cost | Purchase Link (Affiliate) |
|---|---|---|---|
| Untreated Pallets | (4-6 depending on desired size) Look for HT stamped pallets. | Free | N/A |
| Circular Saw | For cutting pallets to size. | $50-$150 | [Example Link - Amazon] |
| Drill/Driver | For screwing pieces together. | $50-$150 | [Example Link - Amazon] |
| Screws | Exterior-grade wood screws. | $10-$20 | [Example Link - Amazon] |
| Chicken Wire/Hardware Cloth | For enclosing the coop and run. | $30-$50 | [Example Link - Amazon] |
| Hammer | For prying apart pallets and other tasks. | $10-$20 | [Example Link - Amazon] |
| Measuring Tape | For accurate measurements. | $10-$20 | [Example Link - Amazon] |
| Safety Glasses | To protect your eyes from flying debris. | $5-$10 | [Example Link - Amazon] |
| Work Gloves | To protect your hands. | $5-$10 | [Example Link - Amazon] |
| Wood Glue (Exterior Grade) | For added strength. | $5-$10 | [Example Link - Amazon] |
| Roofing Material | Shingles, metal roofing, or even repurposed materials. | $20-$50 | [Example Link - Amazon] |
| Hinges & Latch | For the coop door. | $10-$20 | [Example Link - Amazon] |
| Level | Ensuring coop structure is square and level | $15-$30 | [Example Link - Amazon] |
| Wire Cutters | Cutting the chicken wire into shape | $10-$20 | [Example Link - Amazon] |

- Safety First!
Safety is paramount when working with power tools and potentially rough materials like pallets. Always wear safety glasses to protect your eyes from flying debris when cutting or hammering. Work gloves will protect your hands from splinters and rough wood. When using power tools, be sure to read and understand the manufacturer's instructions. If you are disassembling pallets, watch out for rogue nails. If they cannot be safely removed, flatten or bend them to prevent injury. It is also worth enlisting a helping hand when lifting pallets. Finally, double-check that your electricity cables are clear of the working area.

Part 2: Step-by-Step Instructions
Disassemble the Pallets
Carefully disassemble the pallets, trying to salvage as much usable lumber as possible. A reciprocating saw or specialized pallet buster tool will be helpful here. Pry bars and hammers can also be effective, but take your time to avoid splitting the wood. Remove any nails or staples.

- Potential Challenge: Pallets can be difficult to disassemble without damaging the wood.
- Solution: Use a specialized pallet-busting tool or take your time and use a pry bar carefully. Consider sacrificing some wood to make the process easier. Soaking the wood slightly beforehand will help to reduce splitting.
Build the Base Frame
Construct a rectangular base frame using the pallet lumber. The size of the frame will depend on the number of chickens you plan to house. A good rule of thumb is 4 square feet per chicken inside the coop and 8-10 square feet per chicken in the run. Ensure that it is level and square. Use screws and wood glue for a strong, durable frame.

- Potential Challenge: Uneven ground can make it difficult to build a level base.
- Solution: Use shims to level the frame before attaching the walls. Consider building the coop on a slightly elevated platform.
Construct the Walls
Use pallet boards to build the walls of the coop. You can either use full pallet sections or cut the boards to size. Ensure the walls are securely attached to the base frame. Leave an opening for a door and windows (optional). Consider adding a small "pop door" that the chickens can use to access the run.

- Potential Challenge: Pallet boards may be warped or uneven.
- Solution: Choose the straightest boards possible. Use shims to compensate for any unevenness. Overlap joints can also add strength.
Build the Roof
Construct a simple sloping roof using pallet lumber. A sloping roof will help to prevent water from pooling on top of the coop. Cover the roof with roofing material such as shingles, metal roofing, or even repurposed materials like tarps or heavy-duty plastic. Ensure the roof is waterproof to protect your chickens from the elements.

- Potential Challenge: Creating a waterproof roof can be tricky.
- Solution: Overlap roofing materials generously. Use sealant around any seams or openings. Ensure good ventilation to prevent moisture buildup inside the coop.
Build the Door
Construct a door for the coop using pallet lumber. Attach hinges to the door and the coop frame. Install a latch to secure the door. Make sure the door is easy to open and close. A secure door is essential to protect your chickens from predators.

- Potential Challenge: A poorly constructed door can be difficult to open and close.
- Solution: Use sturdy hinges and a reliable latch. Ensure the door fits snugly against the frame to prevent drafts and predator entry.
Build the Run
Enclose an area adjacent to the coop to create a run for your chickens. Use chicken wire or hardware cloth to create the walls of the run. Attach the wire to wooden posts or the coop walls. Ensure the run is secure to protect your chickens from predators. You can cover the top of the run with netting or wire to prevent birds from escaping.

- Potential Challenge: Predators can dig under the run.
- Solution: Bury the chicken wire or hardware cloth at least 12 inches deep around the perimeter of the run. You can also add a layer of rocks or concrete to prevent digging.
Add Finishing Touches
Add nesting boxes inside the coop. Provide roosting bars for the chickens to perch on. Add bedding material such as straw or wood shavings to the floor of the coop. Ensure the coop has adequate ventilation. Provide food and water for your chickens.

- Potential Challenge: Poor ventilation can lead to moisture buildup and respiratory problems in chickens.
- Solution: Add vents near the top of the coop to allow for air circulation. Clean the coop regularly to remove manure and prevent ammonia buildup.
Part 3: Troubleshooting & Tips
"What if my reclaimed lumber is warped?"
Warped lumber is a common issue when working with reclaimed materials. If the warp is minor, you can often force the board into place and secure it with screws. For more severely warped boards, consider using them for smaller pieces or cutting them down to avoid the warped section. You can also try steaming the wood to make it more pliable, although this requires specialized equipment.
Pro Tip: Use a stud finder to ensure you're drilling into solid wood when attaching the walls and roof. This will prevent screws from stripping and ensure a more secure structure.
If you don't have access to reclaimed lumber, you can substitute dimensional lumber from a local hardware store. While this will increase the cost of the project, it will ensure that you have straight, consistent boards to work with. Consider purchasing lumber from sustainable sources to minimize your environmental impact.
Conclusion:
Congratulations! You've successfully built a chicken coop from pallets! Now you can enjoy fresh eggs, natural pest control, and the satisfaction of knowing you've created a sustainable home for your flock using repurposed materials. Share your progress and any modifications you made in the comments below. We'd love to see your photos! Don't forget to share this post with your fellow homesteaders!
Keywords: DIY chicken coop, pallet chicken coop, homesteading chicken coop, build chicken coop, cheap chicken coop, reclaimed wood chicken coop, backyard chicken coop, easy chicken coop, chicken coop construction, pallet projects for homestead