Transform Your Fall Leaves: From Garden Waste to Garden Gold with Composting
The air is getting crisper, the days shorter, and the trees are putting on their annual spectacular display. It's a beautiful time of year, but it also means one thing: leaves. Piles and piles of them! Instead of dreading the raking and bagging, what if you could transform those fallen leaves into something incredibly valuable for your garden? That's right, we're talking about composting! This isn't just about getting rid of yard waste; it's about creating nutrient-rich "black gold" that will feed your plants, improve your soil, and help you create a more sustainable home environment. Join me as we explore the wonderful world of composting and turn those autumn leaves into a gardener's treasure.

Why Compost Your Leaves? The Benefits of "Black Gold"
Composting is nature's recycling program, and it's a fantastic way to give back to your garden. So, why should you bother turning those leaves into compost?
Enriches the Soil: Compost is packed with nutrients that plants need to thrive. It adds essential elements like nitrogen, phosphorus, and potassium to your soil, naturally fertilizing your garden.
Improves Soil Structure: Compost helps to bind sandy soils and loosen clay soils, improving drainage and aeration. This creates a better environment for plant roots to grow.
Retains Moisture: Compost acts like a sponge, holding onto water and releasing it slowly to plants. This can reduce your watering needs, especially during dry spells.
Suppresses Plant Diseases and Pests: Healthy soil leads to healthy plants, which are naturally more resistant to diseases and pests. Compost helps create that healthy soil ecosystem.
Reduces Waste: Composting diverts organic waste from landfills, reducing greenhouse gas emissions and helping to create a more sustainable home. We're all about backyard projects that benefit the earth!
Getting Started: What You Need for Leaf Composting
Don't be intimidated! Composting leaves is easier than you might think. Here's what you'll need to get started:
- Leaves: Obviously! Gather those fallen leaves from your yard. It's best to shred them first (more on that later!).
- Compost Bin or Pile: You can use a commercially made compost bin, build your own, or simply create a pile in a corner of your yard. A bin helps contain the compost and keep it looking tidy.
- "Green" Materials: Compost needs a balance of "brown" (carbon-rich) materials like leaves and "green" (nitrogen-rich) materials. Grass clippings, kitchen scraps (vegetable peels, coffee grounds), and garden waste all work well.
- Water: Compost needs to be moist, like a wrung-out sponge.
- Pitchfork or Shovel: For turning the compost pile.
The Magic Ratio: Balancing Browns and Greens
The key to successful composting is achieving the right balance of "browns" and "greens." Browns are carbon-rich materials, like leaves, straw, and shredded paper. Greens are nitrogen-rich materials, like grass clippings, kitchen scraps, and manure.
A good rule of thumb is to aim for a ratio of 2:1 or 3:1 browns to greens. This means for every one part of green materials, you should have two or three parts of brown materials. Too much brown, and your compost will decompose slowly. Too much green, and it will become smelly and anaerobic.
I remember one year, I added way too many grass clippings to my compost pile. The smell was awful! It taught me the importance of that brown-to-green balance. Now, I always make sure to layer my grass clippings with plenty of shredded leaves.
Shredding Your Leaves: Speeding Up the Process
Shredding your leaves is a crucial step in speeding up the composting process. Whole leaves can mat together and take a long time to break down. Shredded leaves provide more surface area for the microbes to work on, accelerating decomposition.
You have several options for shredding leaves:
- Lawn Mower: Run your lawn mower over the leaves a few times to shred them. You can collect the shredded leaves in the bagger attachment.
- Leaf Shredder: These machines are specifically designed for shredding leaves and other yard waste.
- String Trimmer: Place the leaves in a trash can or large container and use a string trimmer to chop them up.
I prefer using my lawn mower with the bagger. It's quick, easy, and I can collect the shredded leaves in one step.
Building Your Compost Pile: Layering for Success
Now that you have your materials ready, it's time to build your compost pile. Here's how:
- Start with a Layer of Browns: Begin with a layer of shredded leaves at the bottom of your compost bin or pile. This will provide aeration and drainage.
- Add a Layer of Greens: Next, add a layer of green materials, such as grass clippings or kitchen scraps.
- Water Thoroughly: Moisten the layers with water until they are damp but not soggy.
- Repeat Layers: Continue layering browns and greens, watering each layer as you go.
- Turn Regularly: Turn the compost pile every week or two to aerate it and speed up decomposition.

Troubleshooting Common Composting Problems
Even with the best intentions, composting can sometimes present challenges. Here are a few common problems and how to fix them:
- Smelly Compost: This usually indicates too much green material or not enough aeration. Add more brown materials and turn the pile more frequently.
- Dry Compost: If the compost is dry and dusty, it's not decomposing properly. Add water until it's moist like a wrung-out sponge.
- Compost Not Heating Up: This could mean there's not enough nitrogen or that the pile is too small. Add more green materials and make sure the pile is at least 3 feet by 3 feet by 3 feet.
- Pests: Avoid adding meat, dairy, or oily foods to your compost pile, as these can attract pests. Cover the pile with a layer of soil or leaves.
When Is It Ready? Recognizing Finished Compost
After several weeks or months, your compost will be ready to use. Here's how to tell:
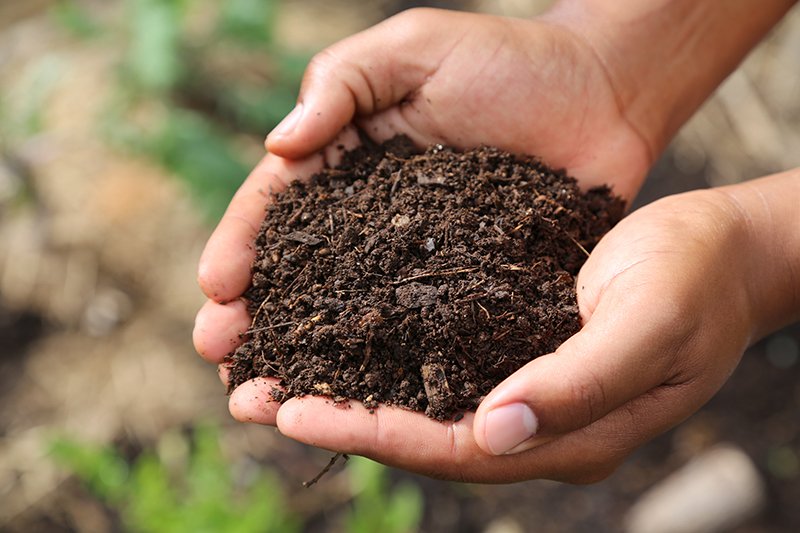
- Dark and Crumbly: Finished compost will be dark brown or black in color and have a crumbly texture.
- Earthy Smell: It should smell earthy and sweet, not foul or ammonia-like.
- No Recognizable Materials: You shouldn't be able to easily identify the original materials that went into the compost.
Using Your Compost: Garden Gold in Action
Now for the best part: using your finished compost! Here are a few ways to put it to work in your garden:
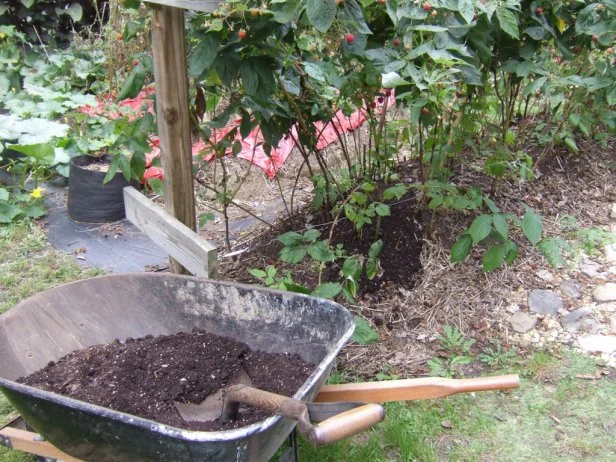
- Soil Amendment: Mix compost into your garden beds before planting to improve soil structure and fertility.
- Top Dressing: Spread a layer of compost around existing plants as a natural fertilizer.
- Potting Mix: Add compost to your potting mix for container gardening.
- Mulch: Use compost as a mulch around plants to retain moisture and suppress weeds.
This year, I used my homemade compost to amend the soil in my raised beds before planting my tomatoes and peppers. The results were amazing! My plants were healthier, more productive, and the flavor of the vegetables was outstanding.

Actionable Tips for Composting Success
- Shred those leaves! It makes a huge difference in decomposition time.
- Maintain the right moisture level. Think wrung-out sponge.
- Turn your compost regularly. Aeration is key.
- Don't add meat, dairy, or oily foods. These attract pests and create odors.
- Be patient. Composting takes time, but the results are worth it.
- Layer compost in the spring and fall to give the soil the nutrients it needs during crucial growing periods!
Cozy Up Your Garden and Home with Sustainable Practices
Composting your leaves is more than just a way to get rid of yard waste. It's a way to connect with nature, improve your soil, and create a more sustainable home environment. Embrace the changing seasons, gather those fallen leaves, and transform them into garden gold!
Now, I'd love to hear from you. What are your top tips for composting? Share your experiences and any creative composting methods you may have developed! Let’s build a community, together! Don't forget to share photos of your compost bins and gardens on Instagram using #BetterHomesAndHarvests and tag us @BetterHomesAndHarvestsBlog. Happy composting!