Tiny Seeds, Big Rewards: Easy Seed Starting for a Bountiful Harvest
There's something truly magical about holding a tiny seed in your hand, knowing it holds the promise of a bountiful harvest. After months of bare branches and frozen ground, the urge to get our hands dirty and start planning our gardens is practically irresistible! But where do you even begin? If you're dreaming of fresh, homegrown tomatoes, peppers, or your favorite blooms before the local nurseries even open, then seed starting is for you.
This guide will walk you through the basics of seed starting, demystifying the process and empowering you to grow healthy, thriving seedlings, no matter your experience level or climate. I remember the first time I started seeds indoors. I was so nervous, afraid I'd do something wrong. But with a little research and a lot of patience, I was rewarded with the most delicious tomatoes I'd ever tasted. It's an incredibly satisfying experience, and I can't wait to share what I've learned with you.
In this post, we'll cover everything from why you should start seeds indoors to the essential supplies, the step-by-step process, and even a handy calendar to tailor your planting schedule. Let's get growing!
Section 1: Why Start Seeds Indoors? Unveiling the Benefits

Starting seeds indoors might seem daunting, but the advantages it offers are well worth the effort, especially for us rural homeowners and backyard gardeners striving for a truly homegrown experience. Here's why you should consider it:
Extended Growing Season: This is perhaps the biggest perk. By starting seeds indoors, you can get a head start on the growing season, especially vital in regions with shorter summers. We can nurture warm-weather crops like tomatoes, peppers, and eggplants indoors before the last frost, giving them a crucial head start.
Control Over Environment: Mother Nature can be unpredictable. Starting seeds indoors allows you to create the perfect environment for germination and early growth. You have complete control over temperature, moisture, and light – ensuring optimal conditions for your tiny seedlings.
Cost-Effectiveness: Buying transplants from a nursery can get expensive, especially if you want a diverse garden. Starting your own seeds significantly reduces costs. A packet of seeds costs a fraction of the price of a single transplant, allowing you to grow more for less. If you're a farmhouse life enthusiast, this is a win-win.
Variety Selection: Nurseries often carry a limited selection of plants. Starting from seed unlocks a world of possibilities! You can choose from countless varieties of vegetables, herbs, and flowers that might not be available locally. This lets you cultivate unique and heirloom varieties, adding personality and uniqueness to your garden.
Connection to Nature: There's something deeply rewarding about nurturing a plant from its very beginning. Watching a tiny seed sprout and grow into a healthy seedling is a magical experience that connects you to the natural world in a profound way. It's a vital part of slow living and truly appreciating the fruits (and vegetables!) of your labor.
Last year, I decided to grow a specific heirloom tomato variety that I couldn't find anywhere locally. Starting it from seed allowed me to enjoy the most flavorful and unique tomatoes all season long. Plus, the feeling of accomplishment was unmatched!
Starting seeds indoors offers many advantages over buying transplants, including extending your growing season, cost savings, access to a wider variety of plants, and the joy of nurturing seedlings from the beginning. It's a rewarding step towards self-sufficiency and creating a truly homegrown harvest.
Section 2: Gathering Your Seed Starting Essentials: A Practical Checklist
To embark on your seed starting journey, you'll need a few key supplies. Don't worry, you don't need a fancy setup! Here's a practical checklist to get you started:
Seed Starting Trays/Pots: You have several options here. Plastic seed starting trays with individual cells are a popular choice, as are peat pots and biodegradable pots. Plastic trays are reusable and easy to clean, while peat and biodegradable pots can be planted directly into the ground, minimizing transplant shock. You can even repurpose items like yogurt cups or egg cartons (just be sure to poke drainage holes!).
Seed Starting Mix: This is crucial! Don't use regular garden soil, as it's too heavy and can harbor diseases. Use a sterile, lightweight seed starting mix specifically formulated for seedlings. These mixes are typically made from peat moss, vermiculite, and perlite, providing excellent drainage and aeration.
Watering Can/Spray Bottle: Gentle watering is key! Use a watering can with a gentle rose or a spray bottle to avoid dislodging the delicate seeds.
Heat Mat (Optional): Heat mats provide consistent bottom heat, which can significantly speed up germination, especially for warmth-loving plants like tomatoes and peppers. While not essential, they can be a worthwhile investment.
Grow Lights (Optional): Seedlings need plenty of light to grow strong and healthy. If you don't have a sunny windowsill that provides at least 6-8 hours of direct sunlight per day, you'll need to supplement with grow lights. LED grow lights are energy-efficient and effective, but fluorescent lights are also a good option. Position the lights a few inches above the seedlings and adjust as they grow.
Labels & Marker: Trust me, you'll want to label your seeds! It's easy to forget what you planted where, especially if you're starting multiple varieties. Use waterproof labels and a permanent marker to keep track of everything.
Seeds: Obviously! Choose high-quality seeds from reputable sources. Consider browsing organic gardening seed catalogs or finding local suppliers. Check the seed packet for information on planting depth, spacing, and days to maturity.
My go-to seed starting mix is a simple blend of peat moss, vermiculite, and perlite. You can even make your own by combining equal parts of these ingredients!
Having the right supplies can make seed starting easier and more successful. Choosing the right seed starting mix and containers is essential for healthy seedlings. With these essentials, you are well on your way to growing a thriving garden.
Section 3: The Seed Starting Process: From Planting to Transplanting

Now that you have your supplies, it's time to get planting! Here's a step-by-step guide to the seed starting process:
Moisten the Seed Starting Mix: Before planting, moisten the seed starting mix thoroughly. It should be damp but not soggy.
Fill the Containers: Fill your seed starting trays or pots with the moistened mix, leaving about half an inch of space at the top.
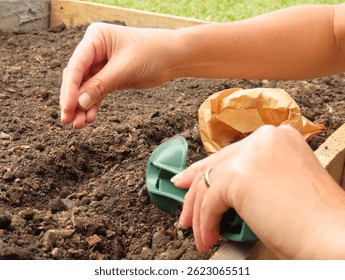
Plant the Seeds: Refer to the seed packet for specific planting depth instructions. As a general rule, plant seeds about twice as deep as their diameter. For example, tiny seeds like lettuce should be planted very shallowly, while larger seeds like peas can be planted a bit deeper.
Cover the Seeds: Gently cover the seeds with the seed starting mix.
Water Gently: Water the seeds gently using a watering can or spray bottle. Avoid overwatering, which can lead to damping-off (a fungal disease that can kill seedlings).
Provide Warmth: Seeds need warmth to germinate. Place the seed starting trays on a heat mat or in a warm location.
Provide Light: Once the seedlings emerge, they need plenty of light to grow strong and healthy. If you're using grow lights, position them a few inches above the seedlings.
Thin the Seedlings: Once the seedlings have developed their first true leaves (the second set of leaves), thin them out so that only the strongest seedling remains in each cell or pot. This prevents overcrowding and ensures that each seedling has enough space and nutrients to thrive.
Harden Off: Before transplanting your seedlings outdoors, you need to harden them off. This is a gradual process of acclimating them to outdoor conditions. Start by placing the seedlings outdoors in a sheltered location for a few hours each day, gradually increasing the amount of time they spend outdoors over the course of a week or two. This helps them adjust to the sunlight, wind, and temperature fluctuations.
Transplant: Once the seedlings are hardened off and the weather is right, you can transplant them into your garden. Choose a cloudy day to minimize stress on the seedlings. Dig a hole slightly larger than the root ball, gently remove the seedling from its container, and place it in the hole. Backfill with soil and water thoroughly.
Troubleshooting Tip: If you notice white, fuzzy growth on your seedlings, it's likely damping-off. Remove the affected seedlings immediately and improve air circulation to prevent it from spreading. Leggy seedlings (tall and spindly) are a sign of insufficient light. Move the seedlings closer to the grow lights or provide more sunlight.
Understanding the seed starting process, including watering, lighting, thinning, and hardening off, is crucial for growing strong and healthy transplants. With patience and care, you'll be rewarded with a bountiful harvest!
Section 4: Seed Starting Calendar: Tailoring Your Planting Schedule
The key to successful seed starting is timing! Knowing when to start your seeds is crucial for maximizing your growing season and ensuring a successful harvest. Here's how to create a seed starting calendar tailored to your region:
Determine Your First and Last Frost Dates: This is the most important factor. Knowing the average date of the last frost in spring and the first frost in fall will help you determine when to start your seeds indoors and when to transplant them outdoors. You can find this information on websites like the National Weather Service or by contacting your local agricultural extension office.
Check the Seed Packets: The seed packets will tell you how many weeks before the last frost you should start the seeds indoors. This information is crucial for planning your seed starting schedule.
Account for Days to Maturity: Consider the "days to maturity" listed on the seed packet. This is the number of days it takes for the plant to mature and produce a harvest after transplanting. This will help you determine if you have enough time to grow a particular crop in your region.
Create a Calendar: Use a calendar or spreadsheet to create a personalized seed starting schedule. List the vegetables, herbs, and flowers you want to grow, the number of weeks before the last frost to start them indoors, and the estimated transplant date.
For example, in my region, the last frost date is typically around April 15th. If I want to grow tomatoes, and the seed packet says to start them 6-8 weeks before the last frost, I would start my tomato seeds indoors in late February or early March.
Creating a seed starting calendar tailored to your region and crops is essential for maximizing your growing season and ensuring a successful harvest. It might seem like a lot of planning at first, but it’s the best way to achieve a bountiful and organic pollinator garden for you and your family to enjoy.
Conclusion: Nurturing Your Seedlings, Nurturing Your Garden
Seed starting is a rewarding journey that allows you to connect with nature, grow your own food, and create a beautiful garden. It's a skill that empowers you to take control of your food supply, cultivate unique varieties, and enjoy the satisfaction of nurturing plants from seed to harvest. Don't be afraid to experiment, learn from your mistakes, and enjoy the process!
As spring approaches, now is the perfect time to start planning your garden and gathering your seed starting supplies. Take the time to create a seed starting calendar, choose your favorite varieties, and prepare your seed starting station.
What are your favorite vegetables and flowers to start from seed? Share your tips and photos in the comments below!
Related content:
- "Composting 101: Unlock Rich Soil and Sustainable Gardening"
- "Boost Your Backyard: Creating a Pollinator Paradise in [Your Region]!"