Tiny Homestead, Big Harvest: Building Your Own Tiered Keyhole Garden Bed
Are you dreaming of homegrown tomatoes, fragrant herbs, and crisp salads, but feel limited by a small yard or even just a balcony? Don't let space constraints squash your homesteading dreams! With a little ingenuity and some reclaimed materials, you can create a thriving food source in even the most compact urban or suburban setting. We’re talking about a tiered, keyhole-shaped raised garden bed – a design marvel that maximizes space, sunlight, and accessibility, allowing you to harvest a surprising bounty from a small footprint. This guide will walk you through building your own, step-by-step, transforming discarded resources into a flourishing edible landscape.
The Allure of the Keyhole Garden
Before we dive into construction, let's talk about why the keyhole design is so brilliant. The central "keyhole" allows you to access all parts of the bed without stepping on the soil, preventing compaction and making tending a breeze. The tiered design further increases growing space, while also creating microclimates suitable for different plants. Plus, it’s just plain beautiful!
Step 1: Sourcing Your Reclaimed Treasures
The heart of this project is sustainability. We're turning trash into treasure, reducing waste, and saving money in the process. The thrill of the hunt is real! Here are some prime locations to find your building materials:
Pallets: These are readily available from businesses that receive large shipments. Check with local hardware stores, landscaping companies, construction sites, and even grocery stores. Don't be afraid to ask! A simple, "Hi, I'm building a garden project and was wondering if you ever have any pallets you're looking to get rid of?" can work wonders. Look for pallets labeled "HT" (heat treated) instead of "MB" (methyl bromide fumigated), which are safer for gardening.
Cinder Blocks: Construction sites are often a good source for leftover or slightly damaged cinder blocks. Check with contractors or building supply stores for seconds or discards. You might also find them on online marketplaces like Craigslist or Facebook Marketplace – often free or very cheap!
Salvaged Wood: Demolition sites (with permission, of course!), architectural salvage yards, and even your own shed can yield usable lumber. Old fence posts, decking, or even dismantled furniture can be repurposed. Look for wood that is relatively rot-resistant, such as cedar or redwood, if possible. If using treated wood, line the inside of the bed with plastic to prevent chemicals from leaching into the soil.
Online Marketplaces & Community Groups: Craigslist, Facebook Marketplace, Freecycle, and Nextdoor are goldmines for free or low-cost building materials. Search for terms like "free wood," "pallets," "cinder blocks," or "garden supplies."
My Sourcing Story: I remember once scouring my local online marketplace, desperate for some affordable lumber. I stumbled upon an ad for someone demolishing an old shed. After a quick message and a short drive, I was loading up my car with enough perfectly weathered wood to build the frame for my entire keyhole garden – and all for free! The satisfaction of rescuing those materials and giving them a new life was immense.
Step 2: Construction – Building Your Tiered Keyhole Oasis
This design creates a 6ft x 6ft (approximate) keyhole garden with three tiers, maximizing planting space. Adjust measurements to fit your specific space and material availability.
Materials You'll Need:
- Pallets (2-3, depending on size and design) OR salvaged wood (enough to build the frame)
- Cinder blocks (approx. 20-24)
- Landscape fabric or heavy-duty plastic sheeting
- Gloves
- Safety Glasses
- Measuring tape
- Saw (if modifying pallets or cutting wood)
- Hammer or Drill
- Screws or Nails
- Level
- Shovel
Instructions:
- Prepare the Ground: Choose a sunny location with good drainage. Clear the area of grass, weeds, and debris. Level the ground as much as possible.
Leveling the ground ensures a stable base for your keyhole garden bed, preventing uneven settling and ensuring proper drainage. The cleared area allows for accurate placement and construction of the bed.
- Lay the Foundation (Bottom Tier): Arrange cinder blocks in a semi-circle shape, leaving an opening for the "keyhole" entrance (about 2-3 feet wide). Create a diameter of roughly 6 feet. Feel the satisfying weight of the cinder blocks as you build your base. Use a level to ensure the blocks are even.
Arranging the cinder blocks in a semi-circle establishes the base of the garden, providing a sturdy and defined structure. Leaving a gap creates the keyhole entrance, ensuring easy access to the center of the bed.
- Build the Frame (Bottom Tier): If using pallets, disassemble them carefully, salvaging the planks. Cut the wood to create a frame that fits snugly inside the cinder block semi-circle. Alternatively, use salvaged wood to build a similar frame. Secure the frame to the inside of the cinder blocks using construction adhesive or by driving stakes into the ground along the outside.

Constructing the wooden frame within the cinder block base reinforces the structure and creates a contained space for the soil. This step adds durability and helps to prevent the soil from eroding outwards.
- Second Tier: Stack another layer of cinder blocks on top of the first layer, slightly offsetting them for stability and visual appeal. Construct a smaller wooden frame to fit inside this second tier.
Adding a second tier of cinder blocks and framing creates additional planting space at a higher level, increasing the overall growing area within the garden. Offsetting the blocks enhances stability and visual appeal.
- Third Tier (Optional): Repeat the process for a third, smaller tier in the center of the keyhole garden. This tier can be a simple raised mound of soil held in place with smaller pieces of wood or even large rocks.
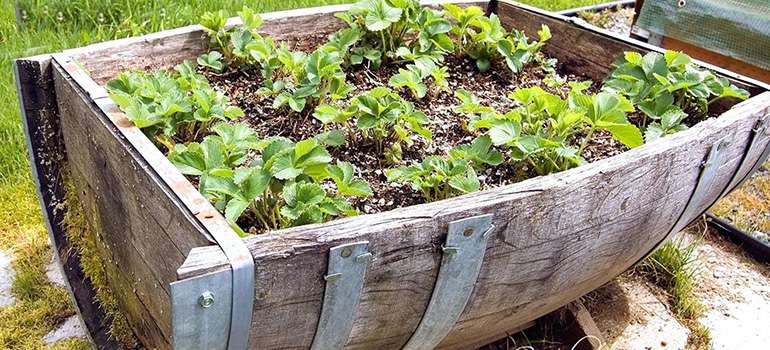
Adding a third tier, possibly as a mound, maximizes vertical space for planting and creates visual interest. This tiered structure enhances the garden's capacity to support a variety of plants.
Line the Bed: Line the inside of the entire structure with landscape fabric or heavy-duty plastic sheeting. This will prevent soil from eroding through the cracks and help retain moisture. Secure the lining with staples or tacks.
Fill with Soil: Now for the fun part! Fill the raised bed with your custom soil mixture (see next step).
Potential Challenges & Solutions:
- Uneven Ground: Use a level and a shovel to create a level base before starting construction. Shim cinder blocks with small stones or wood scraps if needed.
- Weak Pallets: Choose sturdy pallets or reinforce them with additional wood. Discard any pallets that are heavily damaged or rotten.
- Finding Enough Materials: Be patient and persistent in your search for reclaimed materials. Network with friends and neighbors and check online resources regularly.
Step 3: Soil Composition & Planting Your Edible Oasis
The right soil is crucial for a thriving garden. A good mix consists of:
- Topsoil (1/3): Provides structure and nutrients.
- Compost (1/3): Adds organic matter, improves drainage, and feeds the plants.
- Peat Moss or Coco Coir (1/3): Helps retain moisture and improves aeration.
Easy DIY Compost: Start a simple compost bin using kitchen scraps (vegetable peels, coffee grounds, eggshells), yard waste (leaves, grass clippings), and shredded paper. Turn the compost regularly to aerate it and speed up decomposition. In a few months, you'll have nutrient-rich compost to add to your garden.
Planting for Success:
Focus on drought-tolerant, high-yield crops that are suitable for beginners, such as:
- Lettuce: Plant different varieties for a continuous harvest.
- Spinach: A cool-season crop that thrives in raised beds.
- Kale: A nutritional powerhouse that can be harvested continuously.
- Herbs (Basil, Mint, Rosemary, Thyme): Plant in the upper tiers for good drainage.
Companion Planting Strategies:
- Basil and Tomatoes: Basil repels pests that attack tomatoes and improves their flavor.
- Marigolds and Vegetables: Marigolds deter nematodes and other soil pests.
- Carrots and Onions: Onions repel carrot root flies, and carrots repel onion flies.
Plant taller plants in the back (north side in the Northern Hemisphere) to avoid shading smaller plants.
Step 4: Maintenance & Troubleshooting – Keeping Your Garden Thriving
- Watering: Water deeply and regularly, especially during hot, dry weather. Use a soaker hose or drip irrigation to conserve water.
- Pest Control (Organic Methods!):
- Handpicking: Remove pests by hand and drop them into a bucket of soapy water.
- Neem Oil: A natural insecticide that is effective against many pests.
- Companion Planting: As mentioned above, certain plants repel pests.
- Diatomaceous Earth: A natural powder that kills pests by dehydrating them.
- Extending the Growing Season:
- Cold Frames: Build a simple cold frame over your raised bed to protect plants from frost.
- Row Covers: Use lightweight fabric covers to protect plants from cold temperatures and pests.
- Choose Cold-Hardy Varieties: Select plants that are known to tolerate cooler temperatures.
- Common Problems:
- Drainage Issues: Ensure your soil is well-draining. Add more compost or peat moss to improve drainage.
- Soil Compaction: Avoid stepping on the soil. Add organic matter to improve soil structure.
- Nutrient Deficiencies: Amend the soil with compost or organic fertilizer.
The Emotional Harvest
More than just a source of food, my raised garden bed has become a sanctuary. There's something incredibly grounding about working with the earth, nurturing life from seed to harvest. The vibrant colors of the lettuce, the pungent aroma of the herbs, the sweet taste of a homegrown tomato – these are the rewards of a simple, sustainable lifestyle. And knowing that I'm reducing my carbon footprint and contributing to a healthier planet makes it all the more meaningful.
Ready to embark on your own homesteading adventure? Building a tiered keyhole garden bed is a rewarding project that will bring you fresh produce, a sense of accomplishment, and a deeper connection to nature.
Now it's your turn! Share your own raised garden bed projects in the comments below! Download our free guide to companion planting for raised beds and join our homesteading community on Facebook for more tips and inspiration!