The Winter Gardener's Secret: Sprouting Seeds Indoors for an Early Spring Harvest
As the snow falls and the days grow short, the gardener's heart yearns for the taste of sun-ripened tomatoes and crisp lettuce. The vibrant colors of summer seem a distant memory, and the earth slumbers under a blanket of white. But don't despair; the winter months are the perfect time to plan, and even begin your spring harvest! Seed starting indoors provides a head start on the growing season, allowing you to nurture your favorite plants from tiny seeds into thriving seedlings, all while cozying up inside. It gives you control over growing conditions, beats the winter blues, and brings the joy of gardening indoors. Let’s unlock the secrets to successfully sprouting seeds indoors and set the stage for a bountiful harvest! This winter, we'll cover the essentials: soil, light, water, seeds, and your determination to beat old man winter!

Section 1: Gathering Your Supplies: What You'll Need to Succeed
Before you dive headfirst into the world of indoor seed starting, it's essential to gather the right supplies. Having everything you need on hand will streamline the process and set you up for success. Think of it like preparing for a culinary masterpiece – the right ingredients and tools are essential for a delicious outcome!
Seed Trays/Containers: Your seedlings need a place to call home, at least initially. There are several options available, each with its own pros and cons:
Plastic Seed Trays: These are readily available at garden centers and offer good drainage. They can be reused for multiple seasons, making them a cost-effective choice. However, they require careful cleaning between uses to prevent disease.
Peat Pots: Made from compressed peat moss, these pots can be planted directly into the garden, eliminating the need to transplant seedlings. This minimizes root disturbance. However, peat is a non-renewable resource, and its harvesting can have environmental impacts. Consider alternatives like coco coir pots.
Recycled Containers: Yogurt cups, egg cartons (cardboard only), and other household containers can be repurposed as seed starting vessels. Just be sure to poke drainage holes in the bottom! This is an eco-friendly option, but the containers may not be as durable as commercially available trays.
Soil Blocks (Advanced Gardeners): Using a soil blocker, you can create blocks of compressed soil that seedlings can grow in. This method eliminates the need for containers altogether and promotes strong root development. It requires more skill and a specialized tool.
Seed Starting Mix: This is not the same as potting soil or garden soil! Seed starting mix is a lightweight, sterile medium that provides excellent drainage and aeration for delicate seedlings. Garden soil is too heavy and can compact, hindering root growth. Potting soil may contain fertilizers that are too strong for young seedlings.
- You can purchase seed starting mix at most garden centers, or create your own:
- DIY Seed Starting Mix: Combine equal parts peat moss (or coco coir), vermiculite, and perlite. Note: Peat moss harvesting is not sustainable, so it’s more responsible to substitute it with coco coir, a waste product from coconut processing.
- You can purchase seed starting mix at most garden centers, or create your own:
Seeds: The foundation of your garden lies in the quality of your seeds. Opt for high-quality seeds from reputable sources, such as local nurseries, seed catalogs, or online retailers. Look for varieties that are well-suited for your climate and growing conditions.
- Consider varieties that are particularly well-suited for indoor starting, such as tomatoes, peppers, herbs, lettuce, and broccoli. These plants transplant well and thrive under grow lights.
- If you saved seeds from previous harvests (a fantastic way to connect with your garden!), be sure to test their viability before planting a large batch.
- Tip: Check seed packets for "days to maturity" to help plan your indoor start dates so plants are ready for the garden when weather permits!
Watering Can/Spray Bottle: Gentle watering is essential to avoid disturbing delicate seeds and seedlings. A watering can with a fine rose or a spray bottle will do the trick.
Heat Mat (Optional): A heat mat can speed up germination, especially for warm-weather crops like tomatoes and peppers. It provides consistent bottom heat, creating optimal conditions for seed sprouting.
Grow Lights (Recommended): Natural light can be limited, especially during the winter months. Grow lights provide the necessary light intensity and spectrum for strong, healthy seedlings.
Types of Grow Lights: Fluorescent lights and LED grow lights are both excellent choices. LEDs are more energy-efficient and have a longer lifespan, making them a cost-effective option in the long run.
Positioning Grow Lights: Place grow lights a few inches above the seedlings and adjust the height as they grow. Aim for 14-16 hours of light per day. A timer can automate the process.
Labels & Markers: Don't underestimate the importance of labeling your seeds! It's easy to forget what you planted where, especially when you're starting multiple varieties. Use waterproof markers to label each tray or container with the plant name and planting date.

Key Takeaway: Proper preparation and the right supplies are crucial for successful seed starting.
DIY Level: Easy (sourcing supplies) to Medium (creating a DIY seed starting mix).
Section 2: The Seed Starting Process: From Planting to Germination
With your supplies gathered, it's time to get your hands dirty! This is where the magic happens – watching tiny seeds transform into vibrant seedlings.
Sowing Seeds:
- Moisten the seed starting mix. It should be damp, but not soggy.
- Fill the seed trays/containers with the mix, leaving about half an inch of space at the top.
- Create small depressions in the soil, using a pencil or your finger. The depth will depend on the size of the seed; refer to the seed packet for instructions. A general rule is to plant seeds twice as deep as their diameter.
- Sow seeds according to packet instructions (depth and spacing). Avoid overcrowding.
- Gently cover seeds with soil.
- Water gently, using a watering can with a fine rose or a spray bottle.
- Label each tray/container.
Creating Optimal Germination Conditions:
- Temperature: Most seeds germinate best in a warm environment, typically between 70-75°F (21-24°C). Use a heat mat to maintain a consistent temperature, especially for heat-loving crops like tomatoes and peppers.
- Moisture: Keep the soil consistently moist, but not waterlogged. Covering the trays with a humidity dome or plastic wrap can help retain moisture. Be sure to vent the dome or plastic wrap occasionally to prevent fungal growth.
- Darkness: Some seeds germinate better in darkness, while others require light. Check the seed packet for specific instructions. If darkness is required, cover the trays with a dark cloth or place them in a dark location until germination occurs.
Monitoring Germination:
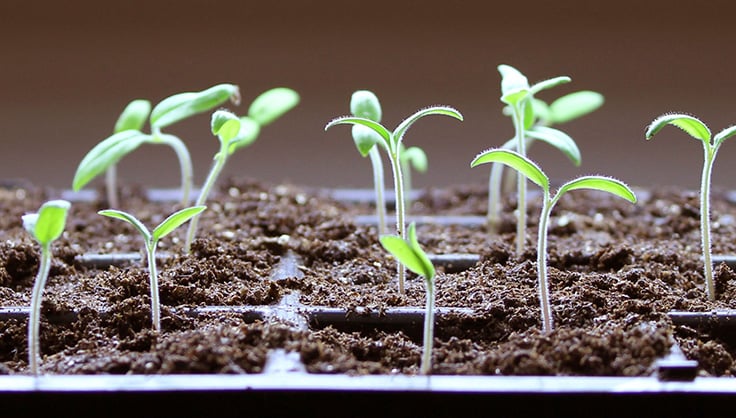
- Check daily for signs of germination. This is the exciting part! You'll see tiny sprouts emerging from the soil.
- Remove humidity domes/plastic wrap once seedlings emerge.
- Move the trays under grow lights as soon as seedlings emerge.

Key Takeaway: Understanding the germination process and providing the right conditions will significantly increase your success rate.
DIY Level: Easy (following instructions).
Section 3: Nurturing Your Seedlings: Light, Water, and Air Circulation
Once your seedlings have emerged, it's time to provide them with the care they need to grow strong and healthy. This involves providing adequate light, water, and air circulation.
Light:
- Adequate light is crucial to prevent leggy seedlings. Leggy seedlings are tall and spindly, with weak stems, and are less likely to thrive when transplanted.
- Position grow lights close to the seedlings (2-4 inches).
- Adjust the height of the grow lights as seedlings grow, keeping them a consistent distance from the plants.
- If seedlings are getting enough light, they will exhibit strong, compact growth. If they are becoming tall and spindly, they need more light.
Watering:
- Water gently and regularly, allowing the soil to dry slightly between waterings. Overwatering can lead to fungal diseases, such as damping off.
- Water from the bottom to prevent damping off. Place the seed trays in a shallow tray of water and allow the soil to absorb the water from below.
- Check the soil moisture regularly. If the top inch of soil is dry, it's time to water.
Air Circulation:
- Provide adequate air circulation to prevent fungal diseases.
- Use a small fan to gently circulate air around the seedlings.
- Avoid overcrowding the seedlings, which can restrict air flow.
Fertilizing (Optional):
- Once seedlings have their first true leaves (the second set of leaves that appear after the initial seed leaves), begin fertilizing with a diluted organic fertilizer.
- Be careful not to over-fertilize, as this can burn the delicate roots. Follow the instructions on the fertilizer label carefully.
Key Takeaway: Light, water, and air circulation are crucial for healthy seedling development.
DIY Level: Easy (monitoring and adjusting conditions).
Section 4: Hardening Off: Preparing Your Seedlings for the Great Outdoors
Hardening off is the process of gradually acclimating seedlings to outdoor conditions before transplanting them into the garden. This is essential for preventing shock and ensuring a smooth transition from the controlled indoor environment to the harsher outdoor environment.
Why Hardening Off is Necessary:
- Indoor seedlings are accustomed to consistent temperatures, humidity, and light levels.
- Outdoor conditions are more variable, with fluctuations in temperature, humidity, and sunlight.
- Hardening off allows seedlings to gradually adjust to these changes, strengthening their stems and leaves.
Step-by-Step Instructions:
- Begin by placing seedlings outdoors in a sheltered location (e.g., porch, patio) for a few hours each day.
- Gradually increase the amount of time seedlings spend outdoors each day, starting with 1-2 hours and gradually increasing to 6-8 hours.
- Protect seedlings from direct sunlight, wind, and frost.
- Monitor seedlings closely for signs of stress, such as wilting or sunburn. If seedlings show signs of stress, bring them back indoors and gradually reintroduce them to outdoor conditions.
- Hardening off typically takes 1-2 weeks.
Key Takeaway: Hardening off is essential for ensuring a smooth transition from indoors to outdoors.
DIY Level: Easy (following instructions).
Section 5: Transplanting Your Seedlings: Planting in the Garden
After weeks of nurturing your seedlings indoors and carefully hardening them off, it's finally time to transplant them into the garden! This is the culmination of your efforts, and the beginning of a bountiful harvest.
- Choose a suitable location in the garden with well-drained soil and adequate sunlight. (Aim for at least 6 hours of sunlight daily). Remember proper soil preparation is key. Incorporate compost or other organic matter into the soil to improve drainage and fertility.
- Prepare the planting hole. The hole should be slightly larger than the root ball of the seedling.
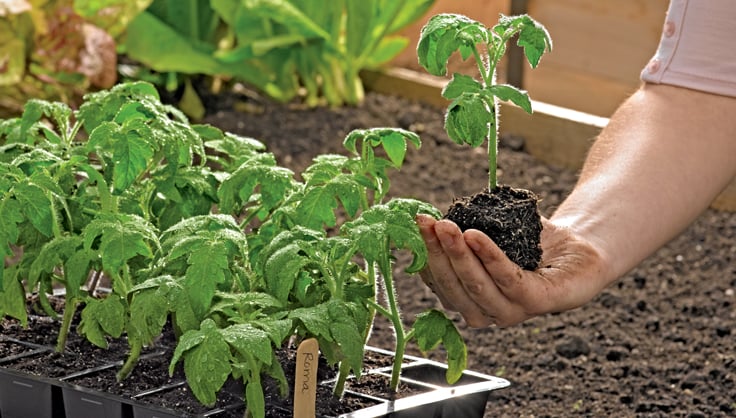
- Gently remove the seedling from its container. If the seedling is root-bound (roots circling the bottom of the container), gently loosen the roots before planting.
- Plant the seedling at the same depth it was growing in the container.
- Water thoroughly.
- Mulch around the seedlings to retain moisture and suppress weeds.
- Protect seedlings from pests and diseases, using organic methods such as row covers or insecticidal soap.
Key Takeaway: Proper transplanting techniques will give your seedlings the best chance of survival.
DIY Level: Easy (following instructions).
Conclusion: From Winter Dreams to Spring Harvest
Starting seeds indoors is a rewarding way to extend the growing season and enjoy fresh, homegrown produce earlier in the year. By following these simple steps, you can transform a dreary winter into a season of growth and anticipation. Even in the depths of winter, you can cultivate a vibrant connection to nature and nourish your body and soul with the fruits (and vegetables!) of your labor. Happy growing!
What are your favorite varieties to start indoors? Any tips or tricks to share? Let us know in the comments below! Don't forget to tag us in photos of your indoor starts @BetterHomesHarvestGardens!