The Magic of Microgreens: Grow a Tiny, Mighty Garden Indoors
Winter can feel long when you're craving the fresh, vibrant flavors of homegrown produce. Sure, you can find greens at the grocery store, but they often lack the intense flavor and vital nutrients of a freshly picked harvest. What if I told you there was a way to enjoy homegrown goodness, even in the dead of winter, without a sprawling garden or fancy equipment? Enter microgreens – tiny, nutrient-packed powerhouses that can be grown indoors, year-round, with minimal effort.
These aren't just sprouts; they're the future of fast, fresh, and flavorful eating! In this guide, we'll unlock the magic of microgreens, exploring what they are, how to grow them, and how to incorporate them into your daily diet. Whether you're a seasoned gardener or a complete beginner, you'll discover how to cultivate your own indoor garden and enjoy a burst of homegrown freshness any time of year.

Understanding Microgreens: Tiny Greens, Big Flavor
So, what exactly are microgreens? Unlike sprouts, which are grown and consumed along with the seed, microgreens are harvested after the cotyledon leaves (the first leaves to emerge) have fully developed and the first set of true leaves begins to appear. This usually takes about 7-21 days, depending on the variety.
Think of them as baby vegetables, packed with intense flavor and a concentrated dose of nutrients. Some popular microgreen varieties include:
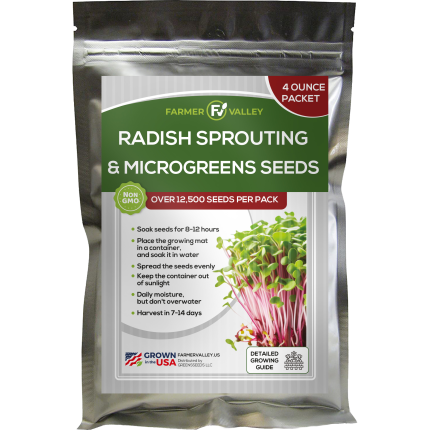
- Radish: Spicy and peppery, perfect for adding a kick to salads and sandwiches.
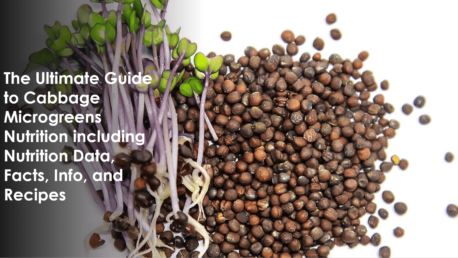
- Broccoli: Mild and slightly sweet, rich in vitamins and antioxidants.
- Sunflower: Nutty and crunchy, a great addition to salads and smoothies.
- Pea Shoots: Sweet and tender, delicious in stir-fries and salads.
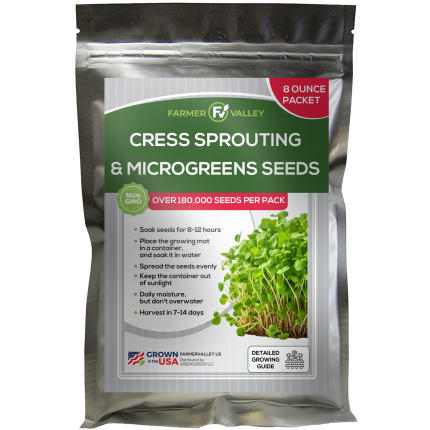
- Cress: Tangy and vibrant, adds a zesty flavor.
Nutritional Benefits: A Powerhouse of Goodness
Don't let their small size fool you – microgreens are incredibly nutrient-dense. Studies have shown that they can contain significantly higher levels of vitamins, minerals, and antioxidants than their mature counterparts. For example, broccoli microgreens are an excellent source of vitamin C, vitamin K, and sulforaphane, a powerful antioxidant known for its anti-cancer properties.
Flavor Profiles: A Symphony of Tastes
The flavor of microgreens varies greatly depending on the variety. Radish microgreens offer a spicy kick, while sunflower microgreens provide a nutty sweetness. Pea shoots are tender and subtly sweet, while cress delivers a tangy zest. Experiment with different varieties to discover your favorite flavor combinations.

Gathering Your Supplies: Affordable and Accessible
The beauty of growing microgreens is that it doesn't require expensive equipment or specialized knowledge. You can easily get started with a few basic supplies that you likely already have on hand.
- Containers: Recycled plastic containers, seed trays, shallow pots, or even repurposed clamshell containers from the grocery store all work well. Just make sure they have drainage holes.
- Growing Medium: Coconut coir, seed starting mix, or even well-rotted compost are all excellent choices. The key is to use a well-draining medium that retains moisture.
- Seeds: Opt for organic, untreated seeds specifically intended for sprouting or microgreens. You can find a wide variety of seeds at your local garden center or online.
- Lighting: A sunny windowsill is often sufficient for growing microgreens, but supplemental grow lights can significantly improve growth, especially during the darker winter months.
- Spray Bottle: A spray bottle is essential for misting the microgreens to keep them consistently moist.
Planting and Growing Your Microgreens: A Step-by-Step Guide
Growing microgreens is a simple and rewarding process. Here's a step-by-step guide to get you started:
- Prepare the Container: Fill your chosen container with the growing medium, leaving about an inch of space at the top. Moisten the medium thoroughly.
- Sow the Seeds: Sprinkle the seeds evenly over the surface of the growing medium. Don't overcrowd them – aim for a relatively dense but not packed layer.
- Watering: Gently mist the seeds with water, ensuring they are thoroughly moistened.
- Germination: Cover the container with a lid or plastic wrap to create a humid environment. Place the container in a dark, warm location (around 70-75°F) for the first few days, until the seeds germinate.
- Lighting and Growing: Once the seeds have germinated (you'll see tiny sprouts emerging), remove the cover and move the container to a sunny windowsill or under grow lights. Mist the microgreens regularly to keep the growing medium consistently moist.
- Monitor and Adjust: Observe your microgreens closely and adjust watering as needed. The growing medium should be moist but not soggy.
Troubleshooting: Common Challenges and Solutions
- Mold: Mold can sometimes develop in humid environments. To prevent mold, ensure good ventilation by removing the cover once the seeds have germinated and providing adequate airflow. If mold does appear, gently remove it with a clean cloth.
- Uneven Germination: Uneven germination can occur if the seeds are not evenly distributed or if the growing medium is not consistently moist. To improve germination, ensure even sowing and consistent watering.
Harvesting and Enjoying Your Bounty
The moment you've been waiting for! Microgreens are ready to harvest when the cotyledon leaves have fully developed and the first true leaves are starting to emerge. This usually takes about 7-21 days, depending on the variety and growing conditions.
- Harvesting: Use sharp scissors or a knife to cut the microgreens just above the soil line.
- Washing and Storage: Gently wash the harvested microgreens in cool water and pat them dry. Store them in a sealed container in the refrigerator for up to a week.
- Serving Suggestions: Microgreens are incredibly versatile and can be used in a variety of dishes. Add them to salads, sandwiches, smoothies, soups, or use them as a garnish for main dishes.

Vertical Microgreen Gardening (Embrace Small Spaces)
Don't have a lot of counter space? No problem! Vertical gardening is a fantastic way to maximize your growing area and create a visually appealing display.
- Benefits of Vertical Gardening: Vertical gardening allows you to grow more microgreens in a smaller space, making it perfect for apartments, condos, or homes with limited counter space.
- DIY Vertical Structures: Get creative and build your own vertical structure using recycled materials like plastic bottles, pallet wood, or even old bookshelves. Simply attach small containers or planters to the structure and follow the same planting and growing instructions as above.
- Suitable Microgreens: Most microgreen varieties thrive in vertical setups, but smaller varieties like radish, broccoli, and cress are particularly well-suited for this method.
Exploring Different Composting Methods for Microgreen Waste (Embrace Sustainability)
Don't let your microgreen waste go to… waste! Composting is a sustainable way to reduce waste and create nutrient-rich compost for your garden.
- Importance of Composting: Composting helps reduce landfill waste and provides a valuable source of nutrients for your soil.
- Different Composting Methods: There are several composting methods to choose from, including vermicomposting (worm composting), Bokashi composting, and traditional composting.
- Suitable Composting Method for Microgreens: Traditional composting is a great option for microgreen waste. Simply add the spent growing medium and leftover microgreen stems to your compost bin and let nature do its thing. Vermicomposting is another great option as worms can feed off these plants.
To compost microgreen waste, follow these steps:
- Collect spent growing medium and leftover microgreen stems.
- Add the waste to your compost bin or vermicomposting bin, layering it with other compostable materials like leaves, grass clippings, and kitchen scraps.
- Turn the compost regularly to ensure proper aeration.
- In a few months, you'll have nutrient-rich compost that you can use to enrich your garden soil.

Grow Beyond - Make Nutritious Tea
Microgreen tea can provide nutrients for your garden. Simply soak the waste material in warm water to make an enriching garden tea.
Embrace the Magic of Microgreens!
Growing microgreens is a simple, rewarding, and sustainable way to enjoy fresh, nutrient-packed greens year-round. Whether you're a seasoned gardener or a complete beginner, you can easily cultivate your own indoor garden and experience the magic of microgreens. So, grab your supplies, sow your seeds, and get ready to harvest a bounty of flavor and goodness!
Ready to start your own microgreen garden? Share this post with your friends and family who are looking for ways to grow fresh greens indoors! What are your favorite microgreen varieties? Let us know in the comments below!
Related Articles on Better Homes and Harvests:
- [Composting 101: A Beginner's Guide to Reducing Waste and Enriching Your Soil](Insert Link Here)
- [Sustainable Home: 5 Easy Ways to Reduce Your Environmental Impact](Insert Link Here)
- [The Ultimate Guide to Seed Starting: From Beginner to Expert](Insert Link Here)