The Cozy Kitchen: Mastering Water Bath Canning for a Winter's Worth of Homegrown Goodness
The crisp air of October is whispering promises of pumpkin spice and cozy nights by the fire, and my garden is still generously offering up a rainbow of tomatoes, peppers, and herbs. But as much as I love a fresh garden salad, I also love the thought of enjoying the flavors of summer all winter long. Imagine pulling a jar of vibrant, homegrown tomato sauce off the shelf in January, ready to transform a simple pasta dish into a taste of sunshine. This water bath canning guide will make that dream a reality, even if you're a beginner. It might seem intimidating at first, but trust me – with a little know-how and a dash of patience, you can create a pantry stocked with delicious, shelf-stable goodness, all made with love and the fruits (and vegetables!) of your labor.
What is Water Bath Canning?
Water bath canning is a simple and safe method of preserving high-acid foods like fruits, jams, jellies, pickles, and certain tomato products. The process involves submerging sealed jars of food in boiling water for a specific amount of time. This high heat kills bacteria, yeasts, and molds that can cause spoilage and creates a vacuum seal, ensuring your food stays fresh and delicious for months to come. While it's not suitable for low-acid foods like meat and most vegetables (which require pressure canning), it's perfect for turning your seasonal harvest into a winter's worth of treats.
Gathering Your Supplies
Before you dive in, gather your supplies. This is key to a smooth and successful canning experience. Here's what you'll need:
- Water Bath Canner: A large pot with a rack to hold the jars off the bottom. If you don’t have a canner, any large stockpot with a rack (or even a folded towel on the bottom) will do. Just make sure the jars are fully submerged by at least an inch of water.
- Canning Jars, Lids, and Rings: Use only jars specifically designed for canning (Ball or Kerr are reliable brands). Examine them for any chips or cracks. New lids are essential for proper sealing. The rings can be reused.
- Jar Lifter: This tool is a lifesaver for safely lifting hot jars out of the canner. Trust me, you don't want to skip this!
- Lid Lifter: A magnetic wand to safely remove sterilized lids from hot water. You can use tongs, too, but the lid lifter is convenient.
- Wide-Mouth Funnel: This makes filling jars much easier and cleaner.
- Bubble Remover/Headspace Tool: A plastic or wooden tool to release trapped air bubbles in the jars and measure headspace (the space between the food and the lid).
- Clean Kitchen Towels: For wiping jars, spills, and everything in between.
- Your Recipe Ingredients: Be sure to use high-quality, fresh ingredients for the best results.

Step-by-Step Water Bath Canning Guide
Here's a breakdown of the canning process:
- Prepare Your Recipe: Start with a tested and trusted recipe. This is crucial for food safety. There are countless recipes available online and in cookbooks. A good place to find organic gardening recipes are sites like the USDA and Ball Canning. Be sure to adjust your recipes for your altitude.
- Sanitize Your Jars and Lids: Wash jars in hot, soapy water and rinse thoroughly. Sterilize them by boiling them in the water bath canner for 10 minutes. Keep the jars hot until you're ready to fill them. Place the lids in a saucepan of simmering (not boiling) water to soften the sealing compound.
- Fill the Jars: Using the wide-mouth funnel, carefully fill the hot jars with your prepared food, leaving the proper headspace (usually 1/4 to 1/2 inch, depending on the recipe). Use the bubble remover tool to release any trapped air bubbles. Wipe the jar rims clean with a damp cloth.
- Seal the Jars: Place a lid on each jar, centering it carefully. Screw on a ring until it is fingertip tight – not too loose, not too tight.
- Process in the Water Bath Canner: Carefully lower the filled jars into the canner using the jar lifter. Make sure the jars are completely covered with water (at least 1 inch above the tops). Bring the water to a rolling boil, then process for the time specified in your recipe. The time varies depending on the food and jar size.
- Cool and Check Seals: Once the processing time is up, turn off the heat and let the jars sit in the canner for 5 minutes. Then, carefully remove them with the jar lifter and place them on a towel-lined surface to cool completely, away from drafts. As the jars cool, you may hear a "popping" sound as the lids seal. After 12-24 hours, check the seals. The lids should be concave and not flex when pressed in the center. If a jar didn't seal, you can reprocess it with a new lid within 24 hours, refrigerate it for immediate use, or freeze the contents.
- Store Properly: Remove the rings (this prevents moisture buildup and rust) and store your sealed jars in a cool, dark, and dry place. Properly canned goods can last for a year or more.

Tips for Canning Success:
- Use tested recipes: This cannot be stressed enough. Food safety is paramount. Rely on reputable sources like the USDA Complete Guide to Home Canning or Ball Blue Book. These sources will use current knowledge on proper PH levels and kill times to ensure your safety.
- Invest in good equipment: While you can get by with basic tools, investing in quality equipment like a good jar lifter and wide-mouth funnel will make the process much easier and more enjoyable.
- Don't overfill the jars: Leaving the proper headspace is crucial for a good seal.
- Avoid temperature shock: Don't place hot jars on cold surfaces or vice versa. This can cause them to crack.
- Adjust processing times for altitude: If you live at a higher altitude, you'll need to increase the processing time to ensure proper sterilization. Check your recipe for specific altitude adjustments.
- Label your jars: Include the date and contents for easy identification.
Making Your Kitchen Cozy While Canning
Water bath canning is more than just a food preservation method; it's an experience! Create a cozy living atmosphere while you work by:
- Playing your favorite music: Put on some tunes that make you happy and relaxed.
- Lighting candles or diffusing essential oils: Create a warm and inviting ambiance.
- Enjoying a cup of tea or coffee: Stay hydrated and energized throughout the process.
- Inviting a friend or family member to join you: Canning can be a fun and rewarding activity to share with others. My favorite thing to can as a family is jelly from the concord grapes we grow on the farm.
- Use beautiful jars: Invest in canning jars that enhance your home. Clear jars highlight the natural beauty of the food you store.
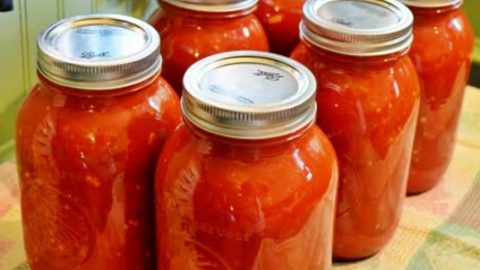
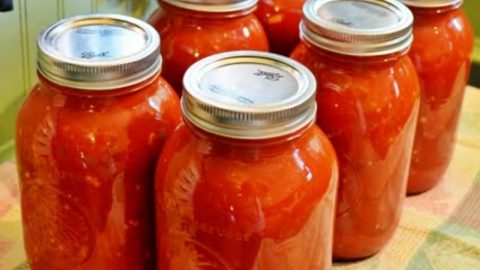
Imagine rows of gleaming jars filled with your homegrown bounty, proudly displayed in your pantry. It's a testament to your hard work and a promise of delicious meals to come. Think of adding heirloom varieties to really brighten up your kitchen. I love the Cherokee purple tomatoes.
Time to Take Action!
Ready to get started? Download this free canning checklist to ensure you have everything you need for a successful canning session: [Insert downloadable link here].
What's your favorite seasonal harvest to preserve, and what's one small step you're committing to take this week to stock your pantry with homegrown goodness? Share your plans in the comments below!