Tap Into Nature's Reservoir: A DIY Rainwater Harvesting System for Your Homestead
Imagine a world where you're less reliant on municipal water, where your garden thrives even during dry spells, and where you're actively contributing to a more sustainable future. This isn't just a dream; it's the reality you can create with a DIY rainwater harvesting system on your homestead. As summer wanes, and the value of every drop becomes even more apparent, now is the perfect time to implement this vital water conservation project.
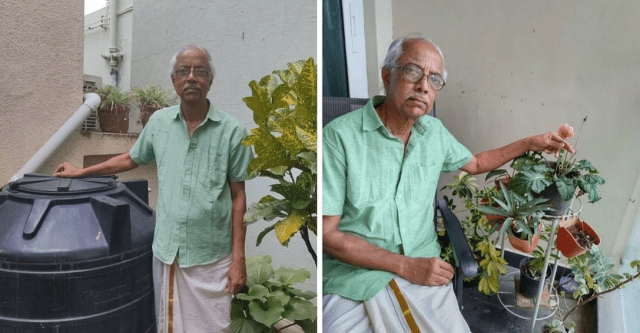
I've spent years honing my homesteading skills, and one of the most rewarding projects has been building my own rainwater harvesting system. Not only has it significantly reduced my water bill, but it's also provided a reliable source of clean, soft water for my garden – a lifeline during those late-summer dry stretches. Today, I'm excited to share my experience and guide you through building your own affordable and effective system. This blog post, aimed at beginner homesteaders, will provide a clear, step-by-step guide that will show you exactly how to get started.
Why Rainwater Harvesting?
Why did I choose to delve into rainwater harvesting? The answer is simple: resourcefulness and sustainability. We live in an area prone to occasional droughts, and I wanted to ensure a backup water supply for my vegetable garden. Municipal water can be expensive, especially during peak gardening season. Plus, rainwater is naturally soft and free of chemicals, making it ideal for plant growth. This project addresses several critical issues: reducing water bills, conserving a precious resource, and providing better water quality for our plants.
Your First Steps: Assessing Your Needs and Resources
Before you start buying materials, take a moment to assess your needs and the resources available to you.
- Rainfall: Research your local average rainfall. This will help you determine the size of your collection system.
- Roof Surface Area: Calculate the square footage of your roof that will be used for collection. More surface area equals more potential water.
- Water Usage: Estimate how much water you typically use for your garden and other outdoor needs. This will help you choose the appropriate storage capacity.
- Budget: Set a realistic budget. A simple system can be built for under $200, while more complex setups can cost considerably more.
Tools and Materials: Gathering Your Arsenal
Here's a list of what you'll need for a basic rainwater harvesting system:
- Rain Barrel(s): Food-grade plastic barrels are ideal. You can often find them used from food processing plants or online marketplaces. Estimated cost: $30-$60 per barrel.
- Downspout Adapter: This connects your downspout to the rain barrel. Estimated cost: $10-$20.
- Spigot: For easy water access. Choose a durable, weather-resistant spigot. Estimated cost: $10-$15.
- Hose Connector: To attach a garden hose to the spigot. Estimated cost: $5-$10.
- Screen/Mesh: To prevent debris and insects from entering the barrel. Estimated cost: $5-$10.
- Overflow Hose: To direct excess water away from your foundation. Estimated cost: $5-$10.
- PVC Pipe and Fittings (optional): For creating a more elaborate diversion system. Estimated cost: varies based on complexity.
- Basic Tools: Drill, hole saw, screwdriver, measuring tape, level.
You can source these materials from local hardware stores, online retailers, and even recycling centers. Don't be afraid to get creative and repurpose materials whenever possible!
Step-by-Step Construction: Building Your Rainwater Harvesting System
Now for the fun part! Follow these steps to build your own rainwater harvesting system:
Prepare the Rain Barrel: Clean the rain barrel thoroughly with soap and water. Rinse it several times to remove any residue.
Cut the Inlet Hole: Using a hole saw, drill a hole near the top of the barrel that matches the diameter of your downspout adapter.
Install the Downspout Adapter: Insert the downspout adapter into the hole and secure it tightly. You may need to use sealant to prevent leaks.
Cut the Overflow Hole: Drill another hole near the top of the barrel, slightly lower than the inlet hole. This will be for the overflow hose.
Install the Overflow Hose: Attach the overflow hose to the overflow hole. Direct the hose away from your foundation to prevent water damage.
Install the Spigot: Drill a hole near the bottom of the barrel for the spigot. Insert the spigot and secure it tightly. Again, sealant may be necessary.
Install the Screen/Mesh: Cover the inlet hole with a screen or mesh to prevent debris and insects from entering the barrel. You can secure it with zip ties or clamps.
Elevate the Barrel: Place the barrel on a stable platform, such as concrete blocks or a wooden stand. This will increase water pressure and make it easier to fill watering cans.
Connect to the Downspout: Position the barrel under your downspout and connect the downspout adapter to the downspout. You may need to cut or extend the downspout to ensure a proper fit.
Test the System: Wait for the next rain and observe your system in action. Check for leaks and make any necessary adjustments.
Potential Challenges and Solutions
No DIY project is without its challenges. Here are some potential issues you might encounter and how to overcome them:
- Leaks: Ensure all connections are tight and properly sealed. Use plumber's tape or sealant to prevent leaks.
- Clogging: Regularly clean the screen/mesh to prevent debris from clogging the system.
- Mosquitoes: Add mosquito dunks to the barrel or cover the inlet hole with a fine mesh screen to prevent mosquitoes from breeding.
- Algae Growth: Paint the barrel a dark color or keep it in a shaded area to prevent algae growth.
- Freezing: In colder climates, disconnect the system and drain the barrel before winter to prevent freezing and damage.
Long-Term Benefits: A Sustainable and Resilient Homestead
The long-term benefits of a rainwater harvesting system are numerous:
- Reduced Water Bills: Save money on your water bill by using rainwater for your garden and other outdoor needs.
- Water Conservation: Conserve a precious resource and reduce your reliance on municipal water.
- Improved Plant Health: Provide your plants with naturally soft and chemical-free water.
- Increased Self-Sufficiency: Become more self-reliant and less dependent on external systems.
- Environmental Benefits: Reduce your environmental footprint and contribute to a more sustainable future.
- Drought Resilience: Even in periods of low rainfall, a back-up supply of water can be critical.

"Test the Waters": A Simple Rain Barrel Trial
Want to see if rainwater harvesting is right for you without committing to a full-scale system? Try this simple "test the waters" approach:
- Find a Container: Use a large trash can or storage tote.
- Position It: Place the container under a downspout.
- Observe: After a rainfall, check how much water you've collected.
This simple experiment will give you a sense of how much rainwater you can collect and whether it's worth investing in a more permanent system.
The Final Harvest
Building a DIY rainwater harvesting system is a rewarding and empowering experience. It's a tangible step towards a more sustainable and self-sufficient homestead. By following these steps and addressing potential challenges, you can create a system that provides you with clean, free water for years to come. So, embrace your inner pioneer, get your hands dirty, and start tapping into nature's reservoir! Remember to naturally weave in those keywords – "homesteading," "water conservation," and "rainwater harvesting" – when sharing your experience and advice online to connect with other like-minded individuals. Now, go forth and conserve!
