Tangy, Homemade Goodness: Fermented Pickled Green Beans and Homesteading Tips for a Bountiful Harvest
As the late summer sun blazes, and your garden overflows with a bounty of crisp green beans, the homesteading spirit calls for preservation! Forget simple blanching and freezing; let's embark on a flavorful journey into fermentation with these tangy, probiotic-rich Fermented Pickled Green Beans, also known as Dilly Beans. This simple yet satisfying recipe transforms your homegrown harvest into a delicious and shelf-stable treat the whole family will love.

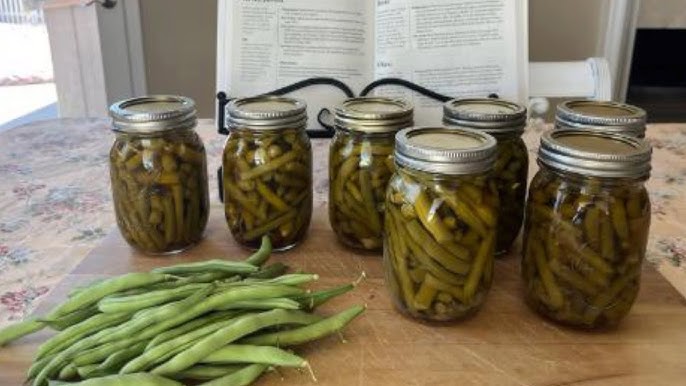
Homemade Dilly Beans: A Homesteading Staple
Dilly beans are more than just a tasty snack; they're a testament to the homesteading ethos of self-sufficiency and resourcefulness. They embody the satisfaction of taking what you've grown and transforming it into something that will nourish you and your family throughout the colder months. They also are a delicious addition to appetizer platters and cocktail garnishes.
Why Ferment Your Green Beans?
Fermenting green beans offers several advantages over traditional pickling methods:
- Health Benefits: Fermentation introduces beneficial bacteria (probiotics) that promote gut health. These probiotics aid digestion and boost your immune system.
- Unique Flavor Profile: The fermentation process creates a complex, tangy flavor that is far more interesting than regular pickled beans. The lactic acid produced during fermentation adds a pleasant sourness.
- Long-Term Storage: Fermented foods, when properly prepared, can be stored for extended periods in the refrigerator, allowing you to enjoy your harvest long after the growing season ends.
- Natural Green Bean Preservation: Fermenting is a natural, no-cook preservation method that helps maintain the crispness and texture of the green beans.
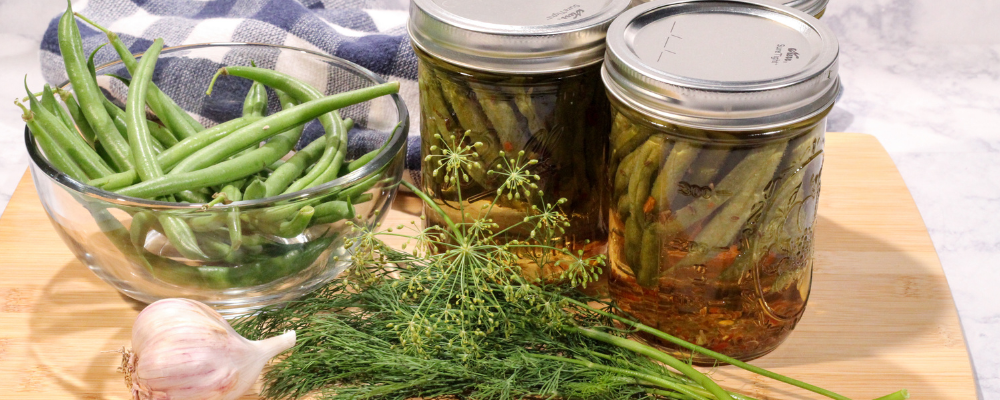
Ingredients You'll Need:
- 1 pound fresh green beans, ends trimmed (Best Green Beans for Pickling)
- 4 cloves garlic, peeled and smashed
- 2 heads fresh dill
- 1 teaspoon red pepper flakes (optional)
- 2 tablespoons sea salt
- 4 cups filtered water
Equipment:
- Wide-mouth mason jars (sterilized) (Best Jars for Pickling Green Beans)
- Fermentation weights (optional, but recommended)
- Measuring cups and spoons
Step-by-Step Fermentation Process:
Prepare the Brine: Combine sea salt and water in a jar or bowl, stirring until completely dissolved. This creates the saline solution necessary for lacto-fermentation.
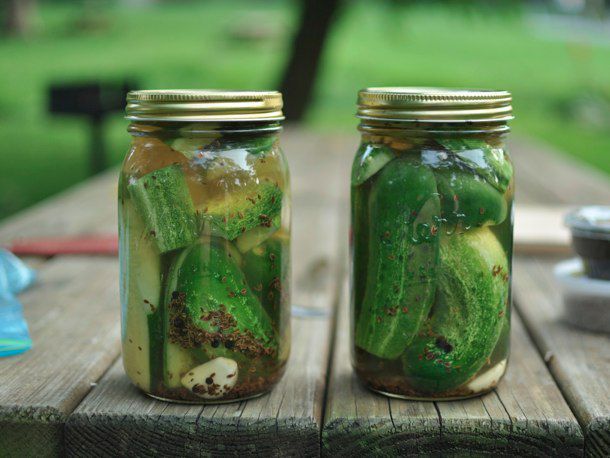
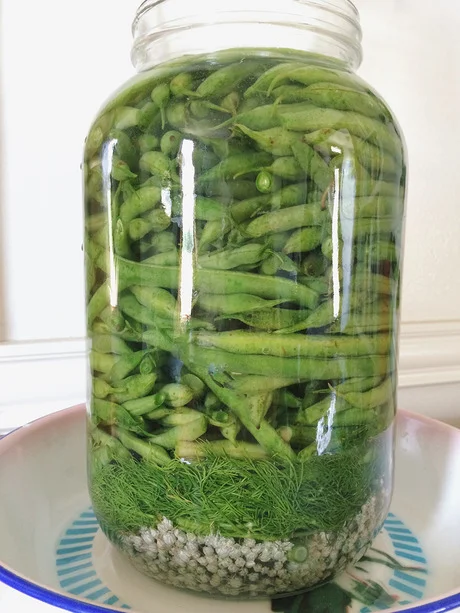
Pack the Jars: Pack the green beans tightly into the sterilized mason jars, leaving about 1 inch of headspace. Add garlic cloves, fresh dill sprigs, and red pepper flakes (if using) to each jar. Don't be afraid to really pack them in there!
Submerge with Brine: Pour the salt brine over the green beans, ensuring they are completely submerged. This is crucial to prevent mold growth. Use fermentation weights to keep them below the surface, if using. How to Make Shelf-Stable Dilly Beans is ensuring the contents are always submerged.
Ferment: Cover the jars loosely with lids or use fermentation airlocks. Let them sit at room temperature (68-72°F is ideal) for 3-7 days, or until they reach your desired level of tanginess. Burp the jars daily to release excess gases produced during fermentation. This prevents pressure buildup.
Personal Anecdote Example: "My grandmother always said the key to great dilly beans was using the freshest dill you could find. I love snipping it straight from my garden, the aroma filling the kitchen and promising a taste of summer all year long."
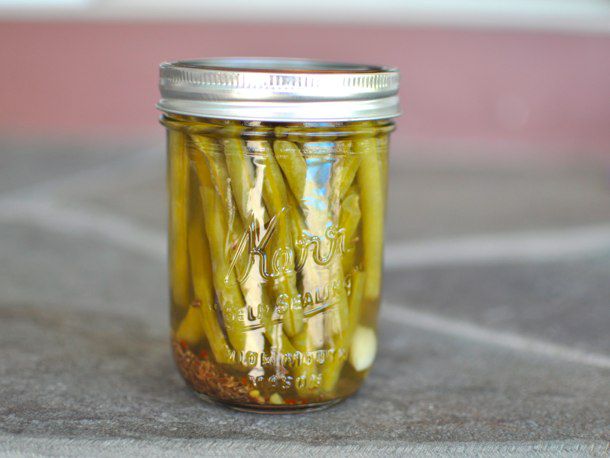
- Refrigerate: Once fermented to your liking, transfer the jars to the refrigerator. This slows down the fermentation process significantly. They will continue to ferment slowly and can be stored for several months. Long Term Storage of Pickled Green Beans is best in a refrigerator to halt fermentation.
Troubleshooting Fermented Green Beans:
- Mold Growth: If you see mold, discard the entire batch. Preventing it requires ensuring the beans are fully submerged.
- Mushy Beans: To prevent mushy fermented green beans, use fresh, crisp beans and avoid over-fermenting.
- Unpleasant Smell: A slightly sour smell is normal. If the smell is repulsive, it could indicate spoilage, and it's best to discard the batch.
Beyond the Beans: Building a DIY Solar Food Dehydrator
While pickling is a delightful way to preserve your harvest, consider harnessing the sun's power with a DIY solar food dehydrator. This simple project is a fantastic way to dry herbs, fruits, and even more green beans for long-term storage.
Materials:
- Old window screen or wire mesh
- Scrap wood (plywood or reclaimed lumber)
- Black paint (non-toxic)
- Clear plastic sheeting or plexiglass
- Hinges and latches
Instructions:
- Build a Box: Construct a rectangular box frame from the scrap wood, ensuring it's large enough to hold the window screen or wire mesh.
- Paint it Black: Paint the inside of the box black to absorb heat.
- Add the Screen: Secure the window screen or wire mesh inside the box to create a drying rack.
- Create a Lid: Build a lid from more scrap wood and cover it with clear plastic sheeting or plexiglass. This will trap heat inside the dehydrator.
- Attach Hinges: Attach the lid to the box frame with hinges.
- Add Ventilation: Drill small holes on the sides of the box to allow for air circulation.
- Latch it Up: Add latches to keep the lid securely closed.
Why should I build a solar dehydrator? A solar dehydrator is a cost-effective and eco-friendly way to preserve your garden bounty. It uses the sun's energy to dry foods, extending their shelf life without electricity.
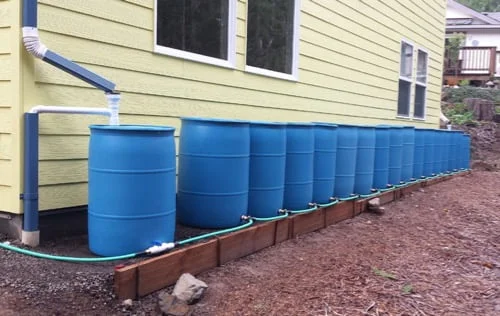
Rainwater Harvesting: Nourishing Your Organic Garden
A thriving homestead begins with sustainable water practices. Rainwater harvesting is a simple yet powerful way to reduce your reliance on municipal water and provide your organic garden with naturally soft, nutrient-rich water.
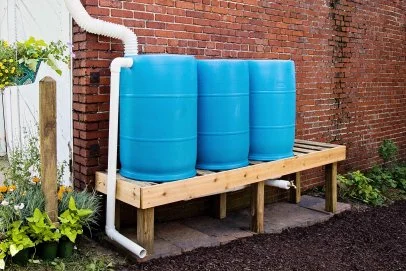
Simple Rainwater Harvesting System:
- Rain Barrel: Purchase a food-grade plastic rain barrel.
- Gutter Connection: Divert rainwater from your gutters into the barrel using a downspout diverter.
- Screen Filter: Install a screen filter at the top of the barrel to keep out debris.
- Spigot: Attach a spigot to the bottom of the barrel for easy access to the water.

Highlight the benefits of using rainwater for organic gardening:
- Naturally soft and free of chlorine and other chemicals.
- Slightly acidic pH is ideal for many plants.
- Reduces reliance on municipal water sources.
- How much rainwater can I collect for my garden? The amount you can collect depends on rainfall in your area and the size of your harvesting system. Even a small system can make a significant difference.
Delicious Ways to Enjoy Your Dilly Beans
Now that you've made a delicious batch of fermented dilly beans, here are a few ways to enjoy them:
- Straight from the Jar: A simple and satisfying snack.
- Charcuterie Boards: Add a tangy crunch to your appetizer platters.
- Cocktail Garnish: Use them to add a flavorful kick to your Bloody Marys or other cocktails.
- Salads: Chop them up and add them to salads for a burst of flavor.

Ensuring Food Safety
While fermentation is generally safe, it's important to follow proper procedures to avoid foodborne illness:
- Sterilize Jars: Always sterilize your mason jars before using them.
- Use the Right Amount of Salt: Salt is essential for inhibiting the growth of harmful bacteria.
- Keep Vegetables Submerged: Ensure that all vegetables are fully submerged in the brine to prevent mold growth.
- Monitor for Spoilage: Discard any batch that shows signs of mold, discoloration, or an off-putting odor.
Resources
- National Center for Home Food Preservation: https://nchfp.uga.edu/
The Call of the Homestead
As the leaves begin to turn and the days grow shorter, take pride in the bounty you've harvested and preserved. From tangy dilly beans to sun-dried herbs, your pantry is now a testament to your hard work and dedication to sustainable living. What are your favorite ways to preserve your seasonal harvest? Share your tips and tricks in the comments below! We'd love to hear from you.