Symphony of Scraps: Unlock Compost Secrets Every Season
Are you tired of watching your vibrant garden slowly fade as the seasons change? Do you long for that dark, rich soil that makes your plants thrive? The secret isn't always in expensive fertilizers or complicated techniques. Often, the answer lies right in your own backyard – in the magic of composting, tailored to each season. Forget about slow, smelly compost piles! This guide will show you how to unlock the secrets of seasonal composting, creating "black gold" for your garden all year round. Save money, reduce waste, and grow healthier, happier plants – let's dive in!

1. Spring Awakening: Vermicomposting and Seed Starting Prep
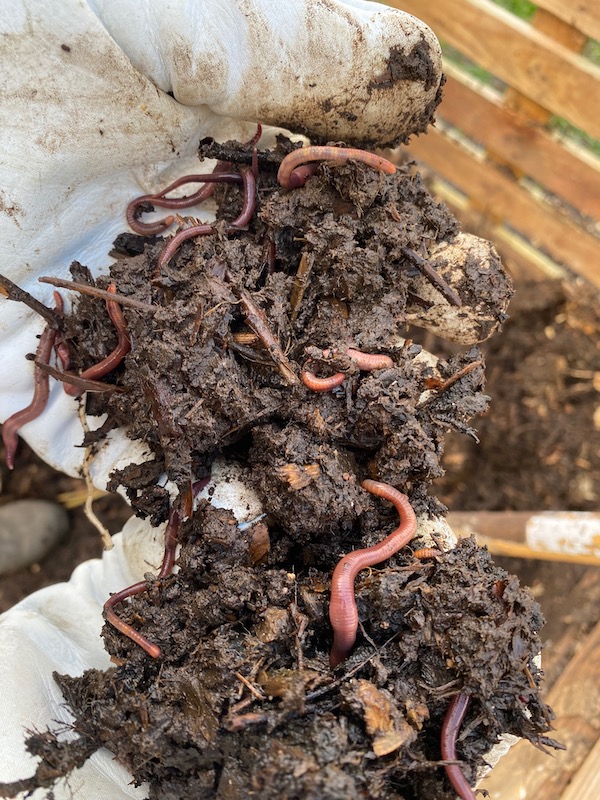
As the world awakens from its winter slumber, so too does our need for nutrient-rich soil to nurture tender seedlings. This is where the magic of vermicomposting shines! Vermicomposting, or worm composting, harnesses the power of earthworms to transform kitchen scraps into a potent soil amendment and the perfect medium for starting your seeds.
Why vermicomposting in spring? Worms are most active in moderate temperatures, making spring an ideal time to kickstart your bin. The resulting vermicompost, also known as worm castings, is a concentrated source of nutrients and beneficial microbes, giving your seedlings a significant head start. Plus, it's a fantastic way to reduce your reliance on store-bought fertilizers.
Setting Up Your Vermicomposting Bin:
- Location, Location, Location: Choose a cool, shady spot for your bin. A garage, basement, or even a sheltered spot on your porch works well. Temperature control is key to keeping your worms happy and productive.
- Choose Your Bin: You can purchase a pre-made vermicomposting bin or build your own using plastic storage totes. Ensure the bin has drainage holes to prevent waterlogging.
- Bedding Basics: Worms need a comfortable bedding to live in. Shredded newspaper, cardboard, coconut coir, and peat moss are all excellent choices. Moisten the bedding until it's damp, but not soggy – think of a wrung-out sponge. Cost: $10-$20 for bedding materials (depending on bin size) Time: 30 minutes

- Worm Power: Red wigglers (Eisenia fetida) are the champions of vermicomposting. You can purchase them online or from local composting suppliers. Start with about 1 pound of worms for a standard-sized bin.
- Feeding Time: Start slowly and observe how quickly your worms process food. Good food sources include vegetable scraps, fruit peels, coffee grounds, and tea bags. Avoid meat, dairy, and oily foods, as they can attract pests and create odors. Bury the food scraps under the bedding to prevent fruit flies.
- Worm Tea Elixir: As the worms work their magic, they produce a liquid called "worm tea" or leachate. This is a nutrient-rich liquid fertilizer that can be diluted with water (1:10 ratio) and used to feed your plants. Drain it regularly using the spigot at the bottom of your vermicomposting bin.
With a little attention, your vermicomposting bin will be teeming with life, transforming your kitchen scraps into a potent elixir for your garden. Expect to see results within a few weeks – healthier, more vibrant seedlings ready to take on the growing season! Time: 5 minutes per week
2. Summer Bounty: Bokashi Composting for Tough Garden Waste
Summer brings an abundance of garden waste, from tough vegetable stalks to cooked food scraps that are often avoided in traditional composting. This is where Bokashi composting steps in as your secret weapon!
Bokashi is an anaerobic (oxygen-free) composting method that uses inoculated bran to ferment food waste. This means you can compost things like meat, dairy, and cooked foods without attracting pests or creating foul odors.
The Science Behind Bokashi:
Bokashi bran is inoculated with beneficial microorganisms that ferment the food waste. This fermentation process preserves the nutrients in the food and creates a slightly acidic environment that inhibits the growth of harmful bacteria.
How to Bokashi Compost:
- Get Your Bucket: You'll need a Bokashi bucket, which is an airtight container with a spigot for draining liquid. You can purchase one online or from a gardening supply store. Cost: $30-$50 Time: 10 minutes (to buy)
- Layer Up: Place a layer of food scraps in the bottom of the bucket, followed by a generous sprinkle of Bokashi bran. Repeat this process, layering food scraps and bran until the bucket is full.
- Seal it Tight: Press down on the food scraps to remove any air pockets and seal the bucket tightly.
- Drain the Leachate: As the food ferments, it will produce a liquid called leachate. Drain this liquid every few days and use it as a diluted fertilizer for your plants (dilute 1:100).
- Bury the Treasure: Once the bucket is full, let it ferment for at least two weeks. Then, bury the fermented material in your garden or compost bin. It will break down quickly and enrich the soil with valuable nutrients. Time: 5 minutes per week

Bokashi composting is a fantastic way to reduce landfill waste, control odors, and create nutrient-rich soil for your summer crops. Imagine feeding your thriving tomato plants with the very scraps they helped produce!
3. Autumn Abundance: Traditional Hot Composting for Leaf Litter and Garden Cleanup
As the leaves begin to fall and your garden beds are cleared, autumn presents a golden opportunity to create a massive compost pile using the abundance of organic matter. Hot composting is the perfect technique for processing large amounts of fall garden waste, transforming it into a valuable soil amendment for winter preparation.
The Principles of Hot Composting:
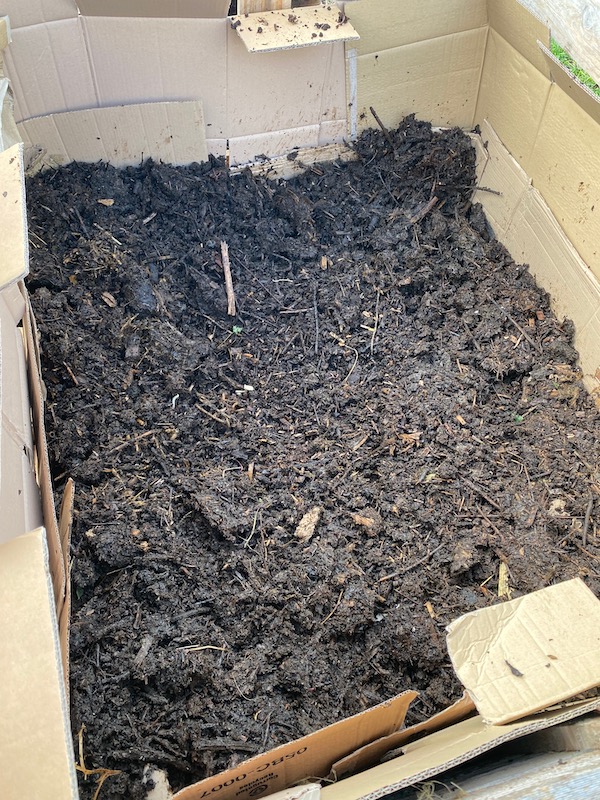
Hot composting relies on a specific balance of carbon and nitrogen, along with adequate moisture and aeration, to generate high temperatures that accelerate decomposition. This method effectively kills weed seeds and pathogens, resulting in a clean and nutrient-rich compost.
Building a Hot Compost Pile:
- Location: Choose a sunny location with good drainage.
- Layering: Alternate layers of "brown" materials (carbon-rich, like leaves, straw, and shredded paper) with "green" materials (nitrogen-rich, like grass clippings, vegetable scraps, and coffee grounds). Aim for a ratio of approximately 3 parts brown to 1 part green. Time: 1-2 hours to build
- Moisture: Keep the pile consistently moist, like a wrung-out sponge. Water the pile as needed, especially during dry periods.
- Turning: Turn the pile regularly (every few days or once a week) to aerate it and promote even decomposition. Use a pitchfork or compost turner to mix the materials.
- Troubleshooting:
- Odor: If the pile smells bad, it's likely lacking oxygen. Turn the pile more frequently.
- Slow Decomposition: If the pile is not heating up, it may be lacking nitrogen or moisture. Add more green materials or water.

By following these steps, you can create a hot compost pile that will transform your fall garden waste into a valuable soil amendment for winter preparation and spring planting.
4. Winter Rest: Composting for Soil Building and Overwintering
Even as the snow falls and the garden slumbers, compost continues to play a vital role in soil health. Using finished compost as a winter soil cover provides insulation, suppresses weeds, and slowly releases nutrients into the soil.
Winter Composting Strategies:
- Compost Mulch: Spread a layer of finished compost around perennial plants to protect their roots from freezing temperatures. This also helps to suppress weeds and improve soil structure. Cost: Free (if you made your own!) Time: 1 hour
- Lasagna Gardening (Sheet Composting): Build new garden beds over the winter using layers of cardboard, leaves, grass clippings, and compost. This method allows the materials to decompose over the winter, creating a rich and fertile soil for spring planting.
- Worm Bin Maintenance: Continue to care for your vermicomposting bin throughout the winter, providing the worms with food and moisture. The vermicompost produced during this time will be ready to use for starting seeds in the spring.

Even in the depths of winter, compost is silently working its magic, preparing your garden for a bountiful spring.
The Compost Cycle – A Full-Circle Homesteading Practice
Seasonal composting is more than just a way to get rid of waste; it's a holistic and sustainable practice that connects us to the rhythms of nature. By tailoring our composting methods to each season, we can maximize efficiency, reduce waste, and create nutrient-rich soil that nourishes our gardens and our souls.

As you enjoy the warmth of your cozy home this winter, remember that your garden is still working underground, thanks to the magic of compost!
What are your favorite composting tips? Share your wisdom and experiences in the comments below. Let's build a community of compost enthusiasts and cultivate thriving gardens together! And, be sure to download our free composting guide to learn even more!