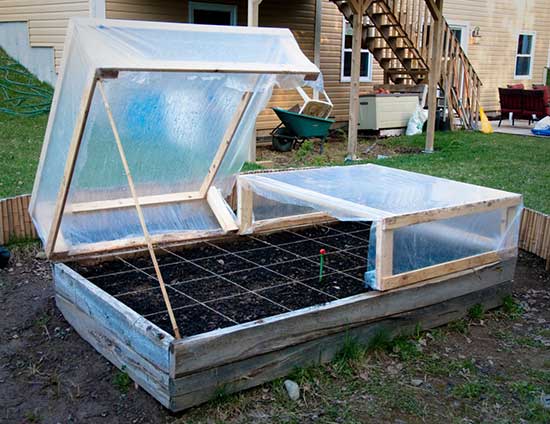
Supercharge Your Spring: Building a High-Efficiency, Low-Cost Cold Frame
For seasoned homesteaders like us, extending the growing season isn't just a hobby – it's a way of life. We're always looking for innovative, cost-effective ways to get a jumpstart on spring and squeeze every last drop out of fall. That's where the humble cold frame comes in.
But we’re not talking about any old cold frame. We're diving deep into building a high-efficiency, low-cost cold frame using primarily reclaimed and readily available materials. This project is perfect for those who are reasonably handy and looking to level up their self-sufficiency game. Get ready to enjoy fresh greens weeks earlier (and later!) than your neighbors.
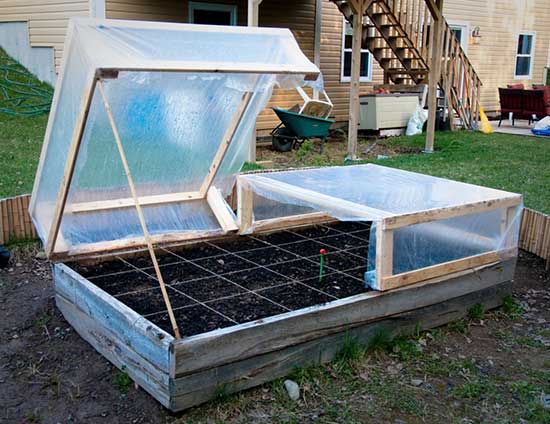
Let's get started!
What is a Cold Frame, and Why Do You Need One?
Before we dive into the "how," let's quickly cover the "why." A cold frame is essentially a miniature greenhouse that protects plants from frost, wind, and extreme temperatures. It traps solar heat during the day and insulates plants overnight, allowing you to:
- Start seeds early: Give your seedlings a head start before the last frost.
- Harden off seedlings: Acclimate young plants to outdoor conditions gradually.
- Extend the harvest: Grow cool-season crops like lettuce, spinach, and kale well into the fall and even winter in milder climates.
- Protect tender plants: Shelter vulnerable plants from unexpected cold snaps.
Our focus today is on a DIY cold frame that maximizes these benefits while minimizing cost and environmental impact.
The Ultimate DIY Reclaimed Cold Frame: Step-by-Step Guide
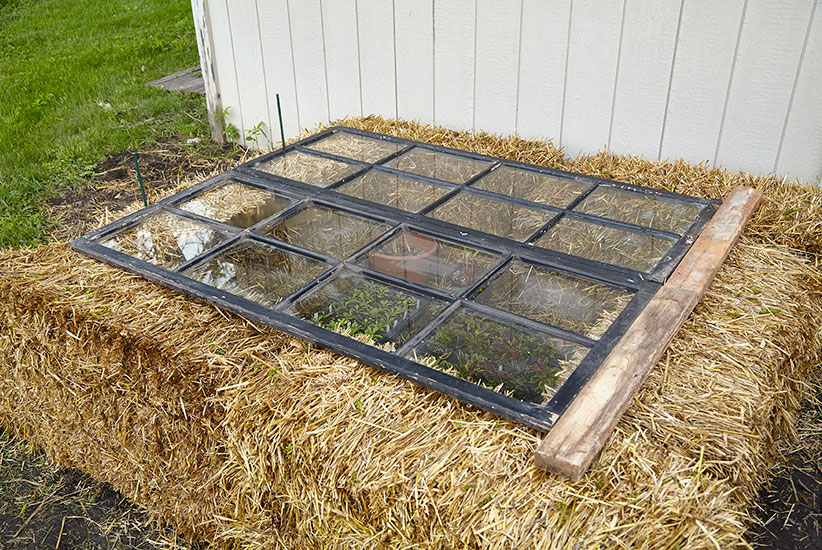
This guide will walk you through building a basic, yet highly effective, cold frame using reclaimed materials. Feel free to adapt the dimensions and materials to suit your needs and available resources. The goal is a functional and affordable structure that extends your growing season. We are going to be optimizing for a cold frame built with an old window as the primary glazing.
Materials List (Estimated Costs):
- Reclaimed Window (Free - $20): The heart of your cold frame! Look for old windows at salvage yards, construction sites, or online marketplaces like Craigslist or Facebook Marketplace. Double-paned windows offer better insulation.
- Reclaimed Lumber (Free - $30): Pallets, old fence boards, or leftover lumber from previous projects work great. You'll need enough to build a box frame.
- Screws or Nails (Approximately $5): For assembling the frame.
- Hinges (2-3) (Approximately $5 - $10): To attach the window to the frame.
- Handle or Knob (Optional) (Approximately $2 - $5): For easy opening and closing.
- Insulation (Optional) (Free - $15): Straw bales, rigid foam insulation, or bubble wrap for added insulation in colder climates.
- Paint or Wood Preservative (Optional) (Approximately $10 - $20): To protect the wood from the elements and prolong its lifespan.
Tools You'll Need:
- Saw (circular saw, hand saw, or miter saw)
- Drill or Screwdriver
- Measuring Tape
- Level
- Hammer (if using nails)
- Safety Glasses
- Gloves
Step 1: Gather Your Materials and Prepare the Site
The first step is securing your reclaimed window and lumber. Clean the window thoroughly, removing any loose paint or debris. Inspect your lumber for any rot or damage and cut it to the desired lengths. Remember, the back of the cold frame should be taller than the front to create a slanted roof that maximizes sunlight exposure. A good rule of thumb is a 6-12 inch difference in height.
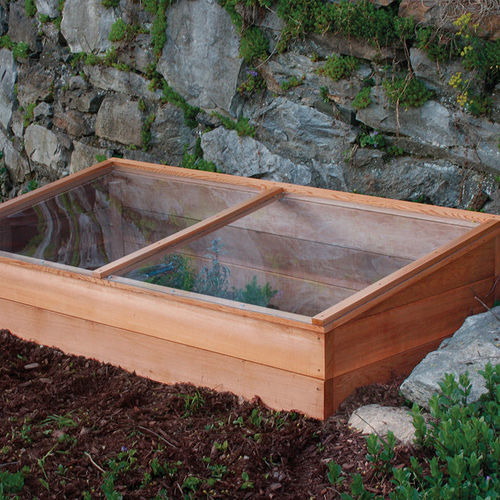
Choose a sunny location for your cold frame, ideally with southern exposure. Ensure the area is well-drained and relatively level.
Step 2: Build the Frame
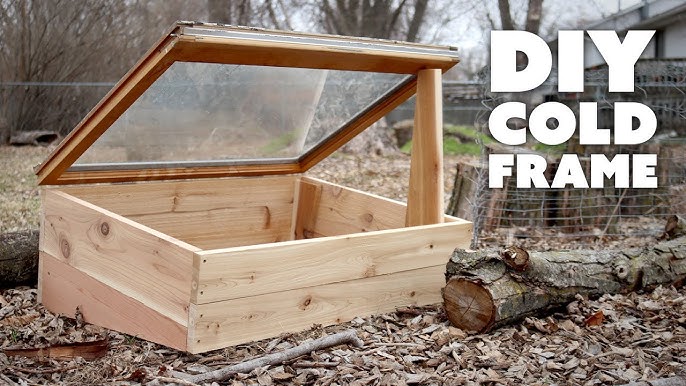
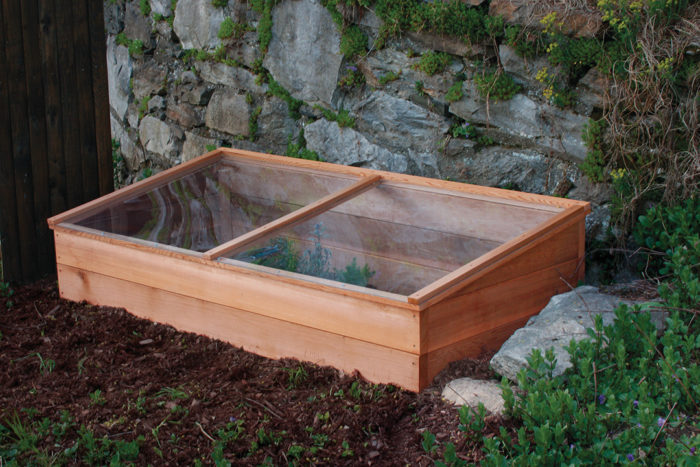
Construct a rectangular box frame using your reclaimed lumber. The dimensions of the frame will depend on the size of your reclaimed window. Make sure the frame is slightly larger than the window to allow for easy opening and closing. Use screws or nails to securely join the frame pieces together.
Here's where the height difference comes in. The back boards should be taller than the front boards. This creates a slope that allows for more sunlight to enter, especially during the lower-angled winter months.
Step 3: Attach the Window
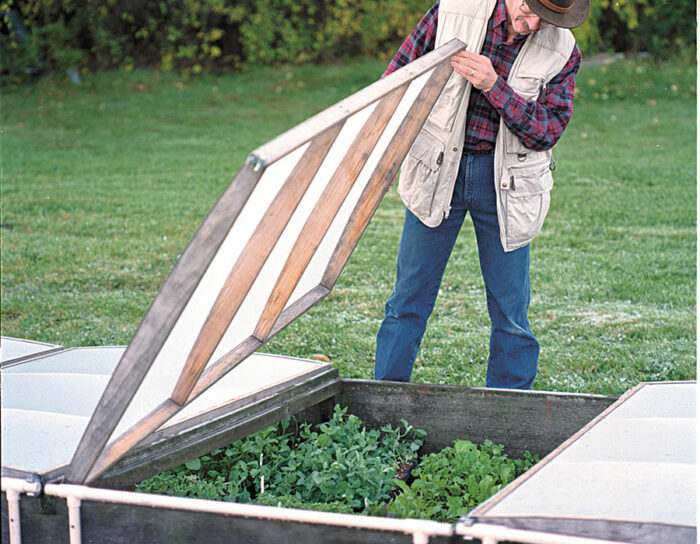
Attach the window to the top of the frame using hinges. Position the hinges so that the window can be easily opened and closed. You may need to experiment with the placement of the hinges to achieve the desired range of motion.
Step 4: Add a Handle (Optional)
Attach a handle or knob to the window for easy opening and closing. This is especially helpful on cold days when you're wearing gloves.
Step 5: Insulate (Optional but Recommended)
For added insulation, consider lining the inside of the frame with rigid foam insulation or bubble wrap. You can also stack straw bales around the outside of the cold frame for extra protection. This is especially useful in colder climates.
Step 6: Paint or Preserve (Optional)
To protect the wood from the elements, consider painting or applying a wood preservative to the frame. This will help prolong the life of your cold frame.
Step 7: Placement and Fine-Tuning
Place your cold frame in the prepared location, ensuring it's level and stable. Check the window's operation, making sure it opens and closes smoothly. You might need to add shims or adjust the hinges for optimal performance.
Step 8: Ventilation is Key
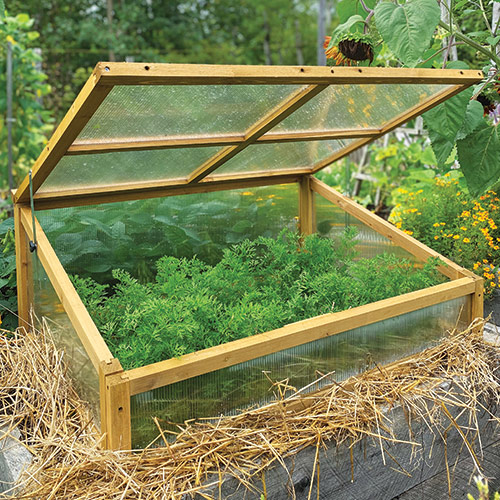
Even on cold days, the inside of your cold frame can heat up quickly. Proper ventilation is crucial to prevent overheating and scorching your plants. On sunny days, prop the window open slightly to allow for airflow. You can use a simple stick or brick to hold the window in place. Invest in a thermometer to monitor the temperature inside the cold frame.
Maximizing Efficiency and Minimizing Costs: Pro Tips
- Orientation Matters: Face your cold frame south for maximum sunlight exposure.
- Insulation is Your Friend: Don't underestimate the power of insulation, especially in colder climates.
- Ventilate Regularly: Monitor the temperature inside the cold frame and ventilate as needed.
- Water Wisely: Water your plants sparingly, as the cold frame will retain moisture.
- Start Small: If you're new to cold frame gardening, start with a small, simple design.
- Embrace Reclaimed Materials: Get creative with finding and repurposing materials. Pallets, old doors, and even storm windows can be used to build a cold frame.
- Consider a Thermal Mass: Adding dark-colored rocks or water-filled containers inside the cold frame will help absorb heat during the day and release it slowly at night.
- Upcycle Old Windows: Windows are designed to let in light, so they're perfect for a cold frame.
What to Grow in Your DIY Cold Frame
Cold frames are ideal for growing a variety of cool-season crops, including:
- Lettuce
- Spinach
- Kale
- Arugula
- Radishes
- Carrots
- Swiss Chard
- Mustard Greens
You can also use your cold frame to start seeds early for warm-season crops like tomatoes, peppers, and eggplants.
Troubleshooting Tips
- Overheating: If your cold frame is overheating, increase ventilation. You may need to prop the window open further or even remove it entirely on very warm days.
- Frost Damage: If you're expecting a severe frost, cover the cold frame with a blanket or tarp for extra protection.
- Pests and Diseases: Monitor your plants regularly for pests and diseases. Take action promptly to prevent problems from spreading.
- Poor Drainage: If your soil is poorly drained, amend it with compost or other organic matter. You may also need to elevate the cold frame slightly to improve drainage.
Beyond the Basics: Advanced Cold Frame Techniques
Once you've mastered the basic cold frame, you can explore more advanced techniques to further extend your growing season and improve your harvests. Consider experimenting with:
- Heated Cold Frames: Using a soil heating cable or other heat source to provide additional warmth.
- Automatic Vent Openers: Installing a vent opener that automatically adjusts the ventilation based on the temperature inside the cold frame.
- Cold Frame Covers: Using a shade cloth or other cover to protect plants from excessive sunlight during the summer months.
Share Your Cold Frame Creations!
Building a DIY cold frame is a rewarding project that can significantly extend your growing season and boost your self-sufficiency. Don't be afraid to experiment with different materials and designs to create a cold frame that perfectly suits your needs and available resources. And most importantly, have fun!
We'd love to see your cold frame creations! Share photos of your DIY projects in the comments below. Do you have any questions or tips to share? Let us know! And be sure to subscribe to the Better Homes and Harvests newsletter for more homesteading tips and inspiration. Happy gardening!