Sunshine in February: Bringing the Garden Indoors with Seed Starting

As the snow falls outside and the wind howls, it’s easy to feel like gardening season is a distant dream. But for us here at Better Homes and Harvests, February is a time of anticipation and planning. It’s the perfect time to bring the garden indoors and get a head start on the growing season by starting seeds! There's something magical about watching tiny seeds sprout and grow, transforming into vibrant plants that will eventually grace your garden and your table. Imagine the satisfaction of harvesting your first homegrown tomatoes weeks before your neighbors!
Starting your own seeds isn’t just about getting a jump on the season, though that's certainly a huge plus. It’s also a fantastic way to save money – those seed packets are significantly cheaper than buying established seedlings. Plus, you get to choose from a much wider variety of plants, including heirloom and unique options that you won’t find at your local garden center. Did you know that the average American household spends over $500 annually on groceries that could be grown at home? Starting your own seeds allows you to reclaim some of that spending and reinvest it in your sustainable home!
This blog post is your essential guide to seed starting success. We'll walk you through everything you need to know, from gathering the right supplies to nurturing your seedlings until they’re ready to brave the great outdoors. By following this guide, you’ll be well on your way to a bountiful seasonal harvest and experiencing the joys of homegrown produce earlier than you ever thought possible!
Key Takeaway: Starting seeds indoors is a great way to get a head start on the growing season and enjoy fresh, homegrown produce earlier than you would otherwise.
Section 1: Gathering Your Supplies
Before you even open a seed packet, it’s essential to have all your supplies ready. Think of it as setting the stage for your little green actors! Here's what you'll need to create a successful seed-starting setup in your farmhouse life:
Containers: You have several options here. Seed trays with individual cells are excellent for organization and preventing root entanglement. Peat pots are biodegradable and can be planted directly into the ground, minimizing transplant shock. And don't forget about repurposing! Yogurt containers, egg cartons, and even cut-off milk jugs can all work well, just be sure to poke drainage holes in the bottom. The key is ensuring proper drainage; soggy roots are a seedling’s worst enemy.
Growing Medium: This is not the time to use garden soil! Garden soil is too heavy and compacts easily, hindering root growth and potentially introducing diseases. Invest in a high-quality seed starting mix. This mix is typically a blend of peat moss (or coco coir), vermiculite, and perlite. It’s light, sterile, and provides excellent drainage. You can even make your own! A simple recipe is equal parts peat moss (or coco coir), vermiculite, and perlite.
Lighting: Adequate light is crucial for healthy seedling development. A sunny windowsill might seem tempting, but it often doesn’t provide enough consistent light, leading to leggy, weak seedlings stretching desperately toward the sun. Grow lights are your best bet. Fluorescent shop lights work well and are relatively inexpensive. LED grow lights are even more energy-efficient. Aim for 14-16 hours of light per day. If your seedlings are getting leggy (tall and spindly), it means they need more light! Lower the lights closer to the seedlings or add additional lighting.
Watering: Consistent moisture is key to germination and seedling growth. The soil should be moist, but not soggy. Avoid overwatering, which can lead to damping-off, a fungal disease that can wipe out your seedlings. A gentle spray bottle is perfect for watering from the top, or you can water from the bottom by placing the seed trays in a shallow tray of water and allowing the soil to absorb it.
Heating: Seed heating mats provide gentle bottom heat, which speeds up germination. They're especially beneficial for seeds that require warmer soil temperatures. A warm spot in your home, like on top of the refrigerator, can also work.

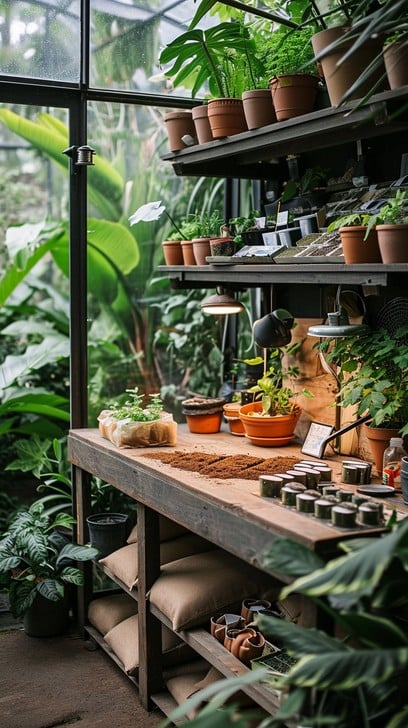
Image Caption: A well-organized seed starting setup, showcasing essential supplies like seed trays, a seed starting mix, grow lights, and watering tools.
Key Takeaway: Having the right supplies will set you up for seed-starting success. Don't skip the quality seed starting mix and adequate lighting!
Section 2: Choosing the Right Seeds
Not all seeds are created equal, and not all seeds are suitable for starting indoors. Thoughtful selection will improve your odds of creating a thriving, organic gardening experience.
Seed Selection: Opt for high-quality seeds from reputable sources. Consider organic and heirloom varieties for the best flavor and disease resistance. Heirloom seeds have been passed down through generations, offering unique characteristics and often better adaptation to local climates.
What to Start Indoors: Some plants thrive when started indoors, while others prefer direct sowing into the garden. Plants with a long growing season, like tomatoes, peppers, eggplants, and herbs (basil, oregano, thyme), benefit from starting indoors 6-8 weeks before the last expected frost. Cool-season crops like lettuce, spinach, and kale can also be started indoors, but they can also be directly sown. Root vegetables like carrots, radishes, and turnips generally don't transplant well and are best directly sown. Consider the seasonal harvest you want in the spring, and plant backwards to determine the appropriate timing for your indoor seed starting.
Seed Packet Reading: Before you start, always read the seed packet! It contains valuable information about days to maturity, spacing, and specific growing conditions. Pay attention to whether the seeds need light to germinate (surface sow them) or darkness (cover them with soil). The seed packet will also provide the recommended time to start seeds indoors relative to your region's last frost date. This is crucial for timing your planting correctly.

Image Caption: A collection of colorful seed packets, showcasing the variety of choices available to the home gardener, and emphasizing the importance of seed selection.
Key Takeaway: Carefully selecting the right seeds for your climate and starting them at the right time is crucial for a successful garden.
Section 3: The Seed Starting Process: A Step-by-Step Guide
Now for the fun part: getting those seeds in the soil! Here’s a step-by-step guide to the seed starting process:
Step 1: Preparing Your Containers: Fill your chosen containers with seed starting mix, leaving about ½ inch of space at the top. Gently tap the containers to settle the mix.
Step 2: Sowing the Seeds: Follow the instructions on the seed packet for spacing and planting depth. Generally, small seeds should be sown close to the surface (1/8 inch deep), while larger seeds can be planted deeper (¼-½ inch deep). Evenly space the seeds in each cell. After sowing, gently water the soil to moisten it.
Step 3: Creating the Ideal Environment: Cover the containers with a humidity dome or plastic wrap to retain moisture. This helps to create a warm, humid environment that promotes germination. Place the containers in a warm location, ideally on a heat mat or in a room with a consistent temperature of 70-75°F.
Step 4: Monitoring and Watering: Check the soil moisture daily. The soil should be consistently moist, but not soggy. Water gently as needed, using a spray bottle or bottom watering method.
Step 5: Germination: Germination times vary depending on the type of seed. Some seeds may germinate in a few days, while others may take a week or two. Once the seedlings emerge, remove the humidity dome or plastic wrap.
Troubleshooting: Dampening off is a common problem that can be prevented by using a sterile seed starting mix, ensuring good air circulation, and avoiding overwatering. Leggy seedlings indicate insufficient light. Slow growth may be due to cool temperatures or lack of nutrients.

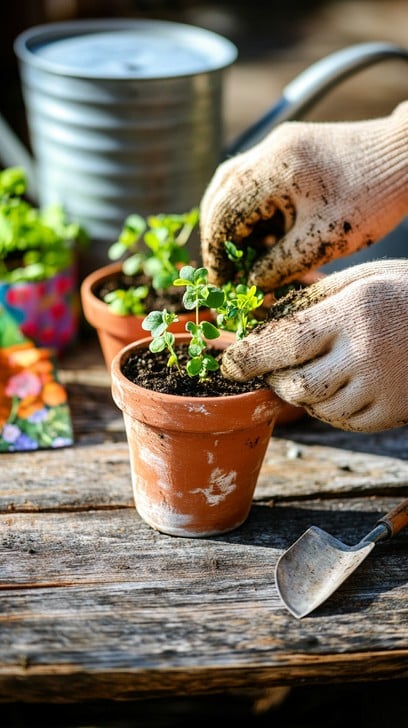
Image Caption: A close-up of hands carefully planting seeds into a seed tray, emphasizing the delicate and intentional process of seed starting.
Key Takeaway: Starting seeds is a simple process, but attention to detail in each step ensures success.
Section 4: Nurturing Your Seedlings
Once your seeds have germinated, the real work begins! Nurturing your seedlings requires consistent care and attention.
Lighting: Provide adequate light to prevent leggy seedlings. As mentioned earlier, grow lights are essential. Keep the lights close to the seedlings, adjusting the height as they grow. Rotate the seedlings regularly to ensure even light exposure.
Watering: Continue to monitor the soil moisture and water as needed. Allow the top inch of soil to dry out slightly between waterings to prevent overwatering.
Fertilizing: Once the seedlings have their first true leaves (the second set of leaves that appear after the initial seed leaves), begin fertilizing them with a diluted liquid fertilizer. Use a balanced fertilizer diluted to half strength. Fertilize every 1-2 weeks.
Hardening Off: This is a crucial step that is often overlooked. Hardening off acclimates your seedlings to outdoor conditions before transplanting. Start by placing the seedlings outdoors in a sheltered location for a few hours each day, gradually increasing the amount of time they spend outside over a week or two. Protect them from direct sunlight, wind, and frost.
Key Takeaway: Healthy seedlings need the right amount of light, water, and nutrients. Don’t forget to harden them off before planting outdoors!
Section 5: Transplanting Seedlings into the Garden
The moment you've been waiting for – transplanting your seedlings into the garden!
Timing: Choose the appropriate time to transplant based on weather conditions and plant hardiness. Tomatoes, peppers, and eggplants are warm-season crops and should be transplanted after the last expected frost. Cool-season crops like lettuce and spinach can be transplanted earlier.
Preparing the Garden Bed: Amend the soil with compost to improve drainage and fertility. Ensure the garden bed is well-drained.
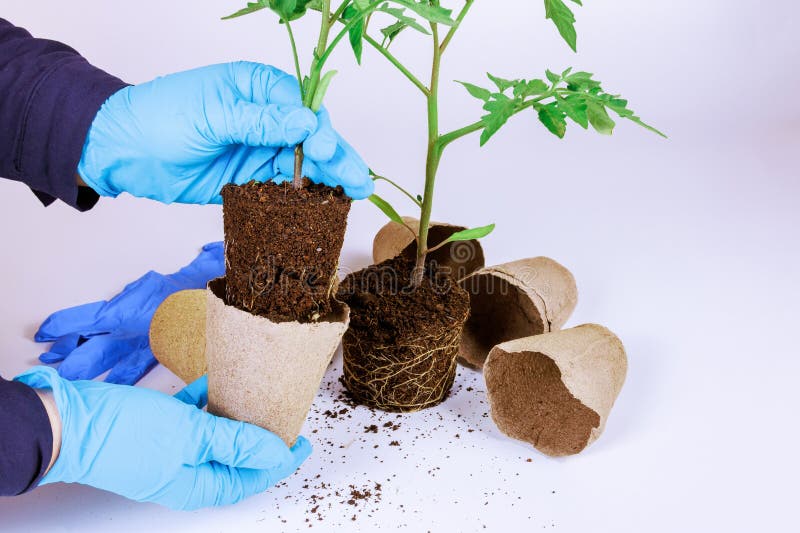
Transplanting Technique: Gently remove the seedlings from their containers. If using peat pots, you can plant the entire pot directly into the ground. Otherwise, carefully loosen the roots and plant the seedling at the same depth it was growing in the container. Water thoroughly after transplanting.
Protection: Protect newly transplanted seedlings from pests and harsh weather. Use row covers or netting to protect them from insects. Water regularly, especially during dry periods.
Key Takeaway: Transplanting successfully requires careful timing and gentle handling of the seedlings to minimize transplant shock.
Conclusion: From Tiny Seeds to a Bountiful Harvest
There's nothing quite like the satisfaction of nurturing a plant from seed to harvest. The feeling of holding a sun-ripened tomato, grown with your own hands, is a reward in itself. Starting seeds indoors is a journey that connects us to the earth, teaches us patience, and provides us with fresh, homegrown food. It's a tangible expression of our cozy living values and the essence of farmhouse life.
As you plan your garden for the coming year, consider starting seeds indoors. It's a rewarding experience that will enhance your gardening skills and provide you with a bountiful seasonal harvest. Remember to plan ahead for the next season. Consider starting seeds for fall crops like kale, spinach, and lettuce in late summer.
Call to Action: Share Your Seed Starting Journey!
We'd love to hear about your seed starting experiences! Share your tips, successes, and even your failures in the comments section below. What are your favorite varieties of tomatoes or peppers to grow from seed?
Share photos of your seedlings on social media using the hashtag #BetterHomesAndHarvestsSeeds.
Subscribe to the Better Homes and Harvests newsletter for more gardening tips, seasonal inspiration, and exclusive content!
Related Blog Posts:
- Composting 101: A Beginner's Guide to Creating Black Gold
- Building a Raised Garden Bed: A Weekend DIY Project
- Natural Pest Control Methods for a Thriving Garden