Stop Wasting Wood: Build a DIY Seasoned Firewood Shed
[VISUAL: Stacked firewood with visible cracks]
Remember that bone-chilling night last winter? You rushed to the fireplace, eager for warmth, only to be met with the frustrating sizzle and hiss of damp firewood. Smoke filled the room, and instead of a roaring fire, you got a sulky, sputtering ember. Sound familiar? The culprit? Unseasoned firewood.
Properly seasoned firewood is the unsung hero of efficient winter heating. It burns hotter, cleaner, and more efficiently, meaning you'll use less wood, save money on heating costs, and reduce harmful creosote buildup in your chimney, making your home safer. It’s also better for the environment, producing less smoke and emissions. The solution? Building your own wood storage shed! This weekend, we'll guide you through creating a compact, well-ventilated firewood fortress that will transform your winter heating experience. Get ready to say goodbye to frustrating fires and hello to cozy, efficient warmth! In this blog post, we’ll walk you through every step, from planning and design to construction and maintenance, ensuring your wood is perfectly seasoned and ready to fuel your winter warmth.
Section 1: Planning and Design
[VISUAL: Sketched wood shed design blueprint]
Before you even pick up a hammer, careful planning is crucial. A well-thought-out design will ensure your wood shed meets your specific needs and delivers optimal firewood seasoning.
Size Considerations: How much firewood do you typically burn in a season? A cord of firewood, the standard measurement, is a stack 4 feet high, 4 feet wide, and 8 feet long (128 cubic feet). A good rule of thumb is to store enough wood to last you through the coldest months, plus a little extra. For example, if you burn about 2 cords of wood each winter, you’ll need a shed large enough to accommodate that volume. If you only burn occasionally, a half-cord shed might suffice. Measure the area where you plan to store the wood. Account for space for ventilation to prevent mildew and mold
Location, Location, Location: Choosing the right location is paramount. Opt for a well-drained, sunny spot. Sunlight helps dry the wood faster, and good drainage prevents moisture from seeping into the pile from the ground. Consider the proximity to your house – you'll want easy access during snowy weather! Also, think about the location of your wood source. Minimizing the distance you have to haul wood will save you time and energy.
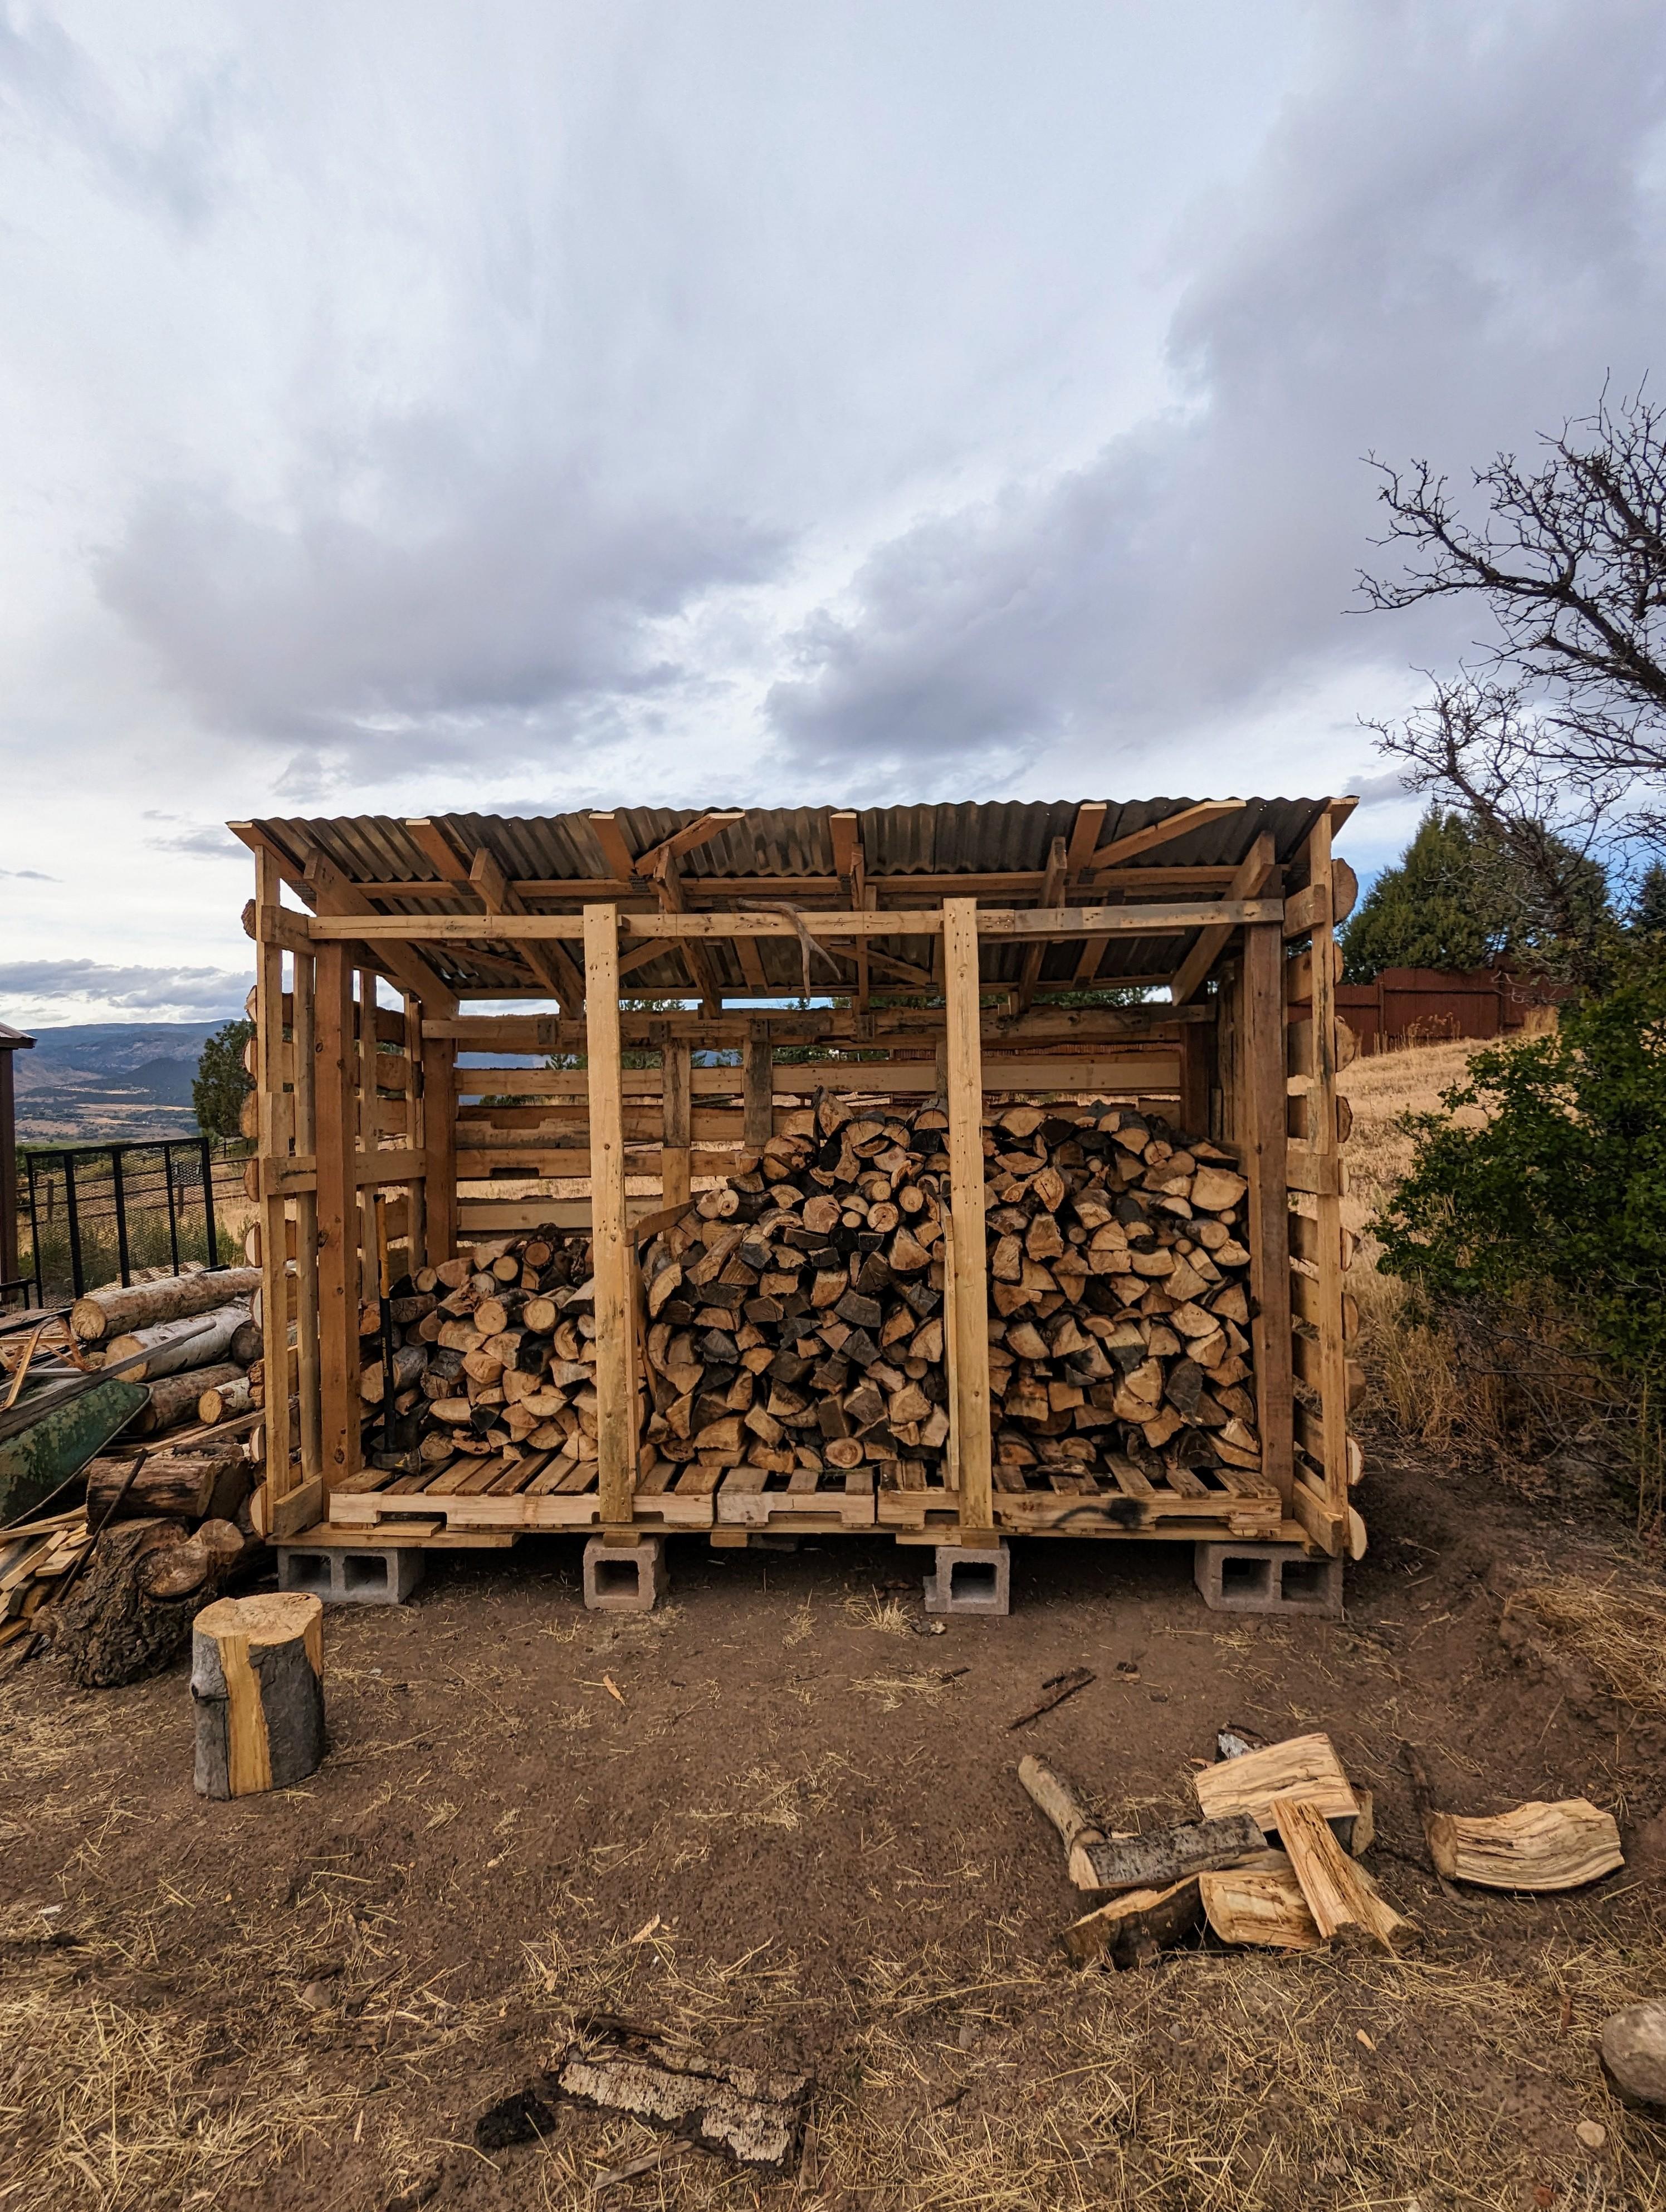
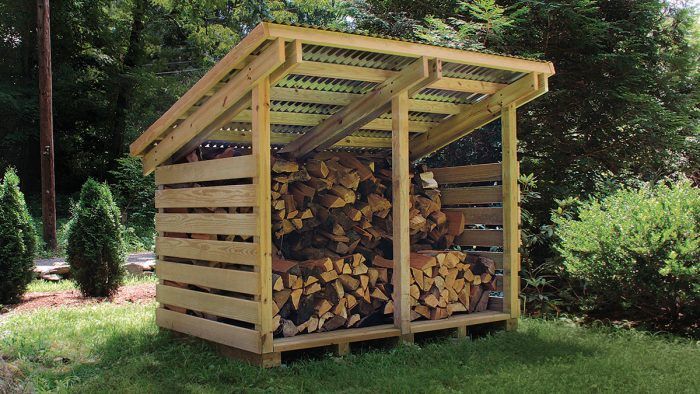
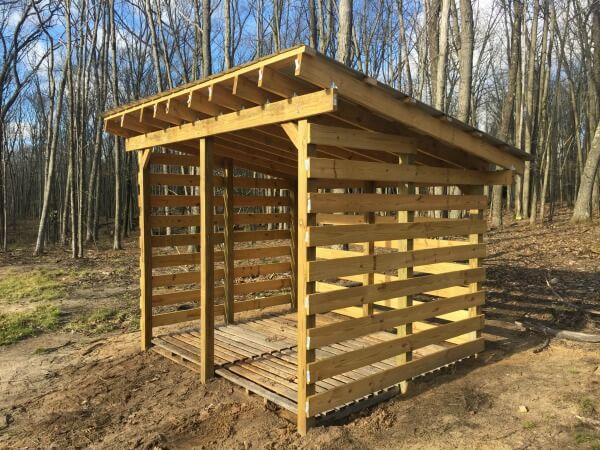
Design for Ventilation: Airflow is the magic ingredient for seasoning firewood. The design should prioritize maximizing air circulation. This means a raised floor (using pallets or concrete blocks) to keep the wood off the ground, open sides to allow for cross-ventilation, and a roof overhang to protect the wood from rain and snow while still allowing air to circulate. The science is simple: moisture evaporates faster with air circulation. Think of it like hanging laundry outside to dry versus leaving it in a damp pile. Proper ventilation is the key to unlocking dry, burnable wood.
Choosing Materials: Affordability and sustainability should be top of mind. Pallet wood is a fantastic option for the sides and back (be sure to inspect for any chemical treatments first!). Reclaimed lumber can add character and reduce costs. For the base, consider treated lumber to resist rot, or even concrete blocks for a more permanent solution. Balance cost with durability to ensure your shed lasts for years to come.
Safety First: Before starting any project, gather your personal protective equipment (PPE). This includes safety glasses to protect your eyes from flying debris and work gloves to protect your hands. Familiarize yourself with safe tool handling practices, especially when using power tools like saws and drills.
Key Takeaways:
- Careful planning ensures the shed meets your specific needs.
- Proper placement and ventilation are key for effective wood seasoning.
- Selecting affordable and sustainable materials keeps costs down.
Section 2: Gathering Materials and Tools
[VISUAL: all materials and tools wood shed project neatly arranged]
Once you have a plan, it's time to gather your supplies. A well-organized workspace will make the construction process smoother and more efficient.
Detailed Materials List with Estimated Costs:
- Lumber (treated lumber for base, untreated lumber for framing, pallet wood or reclaimed boards for siding): $50 - $150
- Screws and Nails (various sizes for different connections): $10 - $20
- Roofing Material (metal roofing sheets, asphalt shingles, or reclaimed roofing): $30 - $80
- Concrete Blocks or Pallets (for the base): Free - $20
- Optional: Paint or Stain (for weather protection and aesthetics): $15 - $30
Tools Required:
- Saw (circular saw, hand saw, or reciprocating saw)
- Drill with various drill bits
- Measuring Tape
- Level
- Hammer
- Safety Glasses
- Work Gloves
Sourcing Materials: Check with local lumberyards for the best prices on lumber and roofing materials. Salvage yards are goldmines for reclaimed wood and other building supplies at discounted rates. Don't underestimate the power of repurposing!
Tip: Scour Craigslist or Facebook Marketplace for free or low-cost materials. You can often find people giving away pallets, lumber, or even roofing materials they no longer need. This is a fantastic way to save money and reduce your environmental impact by giving these materials a second life. Reusing pallets can cut costs by up to 50%. Plus, you will be helping the environment by not contributing to the landfill waste!
Key Takeaways:
- Compile a comprehensive list before starting.
- Prioritize affordable and sustainable material options.
- Ensure you have all necessary tools ready to go.
Section 3: Step-by-Step Construction
[VISUAL: Assembling wood shed frame using drill]
Time to get your hands dirty! Here's a breakdown of the construction process:
Step 1: Building the Base: Construct a sturdy foundation. Use treated lumber to create a rectangular frame that's slightly larger than the planned dimensions of your shed. Ensure the frame is level. Place concrete blocks or pallets underneath the frame to raise it off the ground, creating crucial airflow.
Step 2: Framing the Structure: Assemble the frame for the sides, back, and front of the shed. Use accurate measurements to ensure the frame is square and stable. Secure the connections with screws or nails. Remember, a solid frame is the backbone of your shed.
Step 3: Adding Walls: Install the wall cladding using pallet wood, reclaimed boards, or other siding material. Leave small gaps between the boards for ventilation. Overlap the boards slightly to provide some weather protection.
Step 4: Building the Roof: Construct a simple slanted roof to allow water to run off easily. Ensure the roof overhangs the sides of the shed to protect the wood from rain. Install roofing material, overlapping the sheets or shingles properly to prevent leaks.
Step 5: Finishing Touches: Add a door if desired (this is optional, but it can provide extra protection from the elements). Reinforce the structure with additional bracing if needed. Consider painting or staining the shed for weather protection and aesthetics.
Key Takeaways:
- Follow the steps carefully and measure accurately.
- Prioritize structural integrity and ventilation.
- Adapt the design to suit your materials and skill level.
Section 4: Maintaining Your Wood Shed and Firewood
[VISUAL: neatly stacked, seasoned firewood inside wood shed]
Your wood shed is built, but the work doesn't stop there! Regular maintenance will ensure your shed lasts for years to come, and proper firewood management will guarantee perfectly seasoned wood.
Regular Inspections: Periodically inspect the shed for any signs of damage, such as rot or insect infestations. Address any issues promptly to prevent them from worsening.
Proper Firewood Stacking: Stack firewood neatly inside the shed, leaving air gaps between the rows. Crisscrossing the ends of the stacks will help improve stability and airflow.
Covering Firewood: During periods of heavy rain or snow, consider covering the top of the firewood pile with a tarp to prevent it from getting soaked. However, be sure to leave the sides open for ventilation.
Rotating Firewood: Rotate the firewood periodically to ensure even seasoning. Use the oldest wood first and move the newer wood to the back of the pile.
Monitoring Moisture Content: Ideally, use a firewood moisture meter to check the moisture content of your firewood. The ideal moisture content for burning is 15-20%. If you don't have a moisture meter, you can visually inspect the wood. Seasoned firewood will have cracks in the ends and will be lighter in weight than unseasoned wood.
Key Takeaways:
- Regular maintenance extends the life of your shed and firewood.
- Proper stacking and covering maximize drying.
- Monitoring moisture content ensures optimal burning efficiency.
Conclusion: Enjoy the Benefits of Seasoned Firewood
[VISUAL: Roaring fire in fireplace cozy homestead setting]
Building your own wood storage shed is an investment that pays off in countless ways. Not only will you save money on heating costs by burning efficiently seasoned firewood, but you'll also enjoy the satisfaction of knowing you've taken control of your winter preparedness. Imagine the crackling warmth of a perfectly lit fire, the comforting scent of burning wood, and the peace of mind knowing you're prepared for whatever winter throws your way.
I remember the first winter after I built my wood shed. The difference between that year and previous years was night and day. Instead of wrestling with damp, smoky wood, I had a stack of perfectly seasoned firewood that lit easily and burned hot. The house was warmer, the air was cleaner, and I felt a sense of accomplishment knowing I had tackled a project that made a real difference in my life.
Don't wait any longer to experience the benefits of seasoned firewood. Start your DIY wood shed project today and transform your winter heating experience!
Call-to-Action Suggestions:
- Leave a Comment: "Have you built your own wood storage shed? Share your tips and experiences in the comments below!"
- Share the Post: "If you found this post helpful, please share it with your friends and family!"
- Subscribe to the Newsletter: "Sign up for our newsletter to receive more homesteading tips and DIY project ideas."
- Related Article Link: "Check out our other article on [Related topic: Efficient wood stove usage/Firewood sourcing] for more winter preparedness tips!"
- Join our Facebook Group "Share your wood shed progress and join the conversation in our Facebook Homesteading Group!"