Spring's Foraged Feast: Dandelion Greens, Hugelkultur, and Lye Soap
As the snow melts and the first whispers of green, not always welcome mind you, emerge from the earth, the homestead awakens from its winter slumber. This is the season of foraged feasts and rediscovering the hidden treasures that nature provides, even in the most unexpected places. Forget manicured lawns and perfectly weeded gardens; embrace the wild abundance of dandelions! Today, we'll transform these often-despised plants into a surprisingly delicious salad, learn how to build a Hugelkultur raised garden bed, and take on the challenge of crafting lye soap from wood ash – a truly self-sufficient skill our grandmothers relied on. Don't let the 'weed' aspect scare you off; this is about using everything wisely.

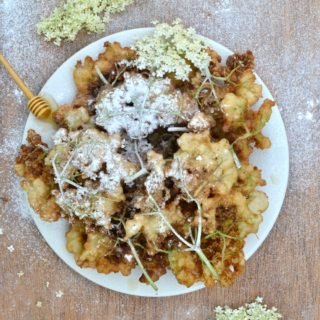
Dandelion Green Salad with Hot Bacon Dressing and Candied Dandelions: A Taste of Spring's First Harvest
Spring brings a symphony of flavors, and the humble dandelion plays a surprisingly delightful tune. This salad is a celebration of those first, sometimes bitter, greens, transformed into a dish worthy of any homestead table. The hot bacon dressing wilts the greens slightly, adding a savory depth, while the candied dandelions offer a touch of sweetness and whimsy.
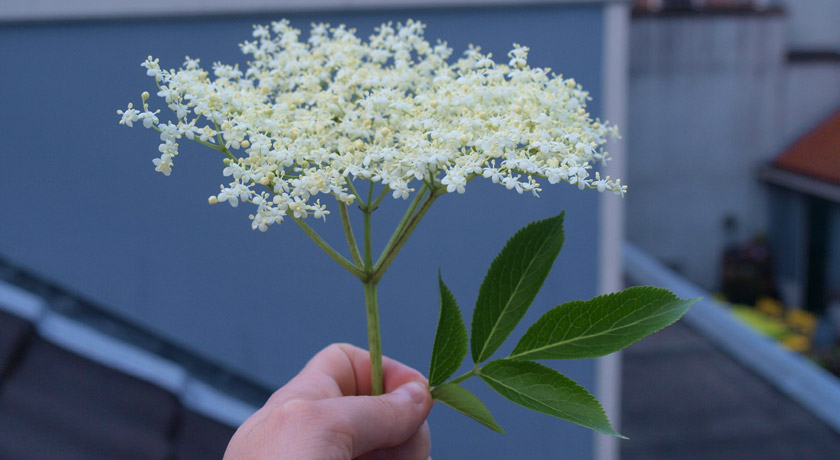
Ethical Foraging:
Before you even think about harvesting those dandelions, listen close. Only forage from areas free of pesticides, herbicides, and pollution. This ain't a suggestion, it's gospel. Choose young, tender leaves for the best flavor, they are less bitter, and avoid harvesting near roadsides or areas with heavy foot traffic. Make sure the dandelion plants haven't been sprayed with anything that smells remotely like chemicals. And, as always, only take what you need, leaving plenty for the bees and other pollinators. Imagine your grandmother is watching, would she be proud of how you harvest?
Ingredients You'll Need:
- 4 cups young dandelion greens (thoroughly washed, use a clean tea towel, and dried, chopped coarsely. Think bite-sized.)
- 4 slices thick-cut bacon (pasture-raised if possible, look for heritage breeds, diced small)
- 2 tablespoons unfiltered apple cider vinegar
- 1 tablespoon raw, local honey or pure maple syrup, grade A dark amber if you have it
- 1 tablespoon coarse-ground Dijon mustard
- 2 tablespoons extra virgin olive oil, cold pressed
- 1/4 cup toasted pine nuts (toast them lightly in a dry skillet until fragrant and golden)
- Coarse sea salt and freshly cracked black pepper to taste
For the Candied Dandelions:
- 1 cup dandelion petals (picked fresh in the morning after the dew has dried, carefully rinsed and dried on a clean tea towel)
- 1/2 cup organic granulated sugar
- 1/4 cup filtered water
Equipment:
- Large mixing bowl (ceramic or stoneware is best)
- 10-inch cast iron skillet (well-seasoned)
- Small, heavy-bottomed saucepan (stainless steel)
- Wire whisk (stainless steel)
- Slotted spoon (wooden)
- Parchment paper (unbleached)
Step-by-Step Salad Creation:
- Make the Candied Dandelions (Optional but Recommended - it's worth the effort): In a small saucepan, combine the sugar and water. Bring to a gentle simmer over medium heat, stirring constantly with a wooden spoon until the sugar is completely dissolved and the mixture is clear. Add the dandelion petals and simmer very gently for 5-7 minutes, watching closely, or until they become translucent and slightly sticky. Remove from the heat and carefully transfer the petals to a sheet of parchment paper, using a fork or small tongs to spread them out in a single layer. Let them cool and harden completely, which will take about an hour.
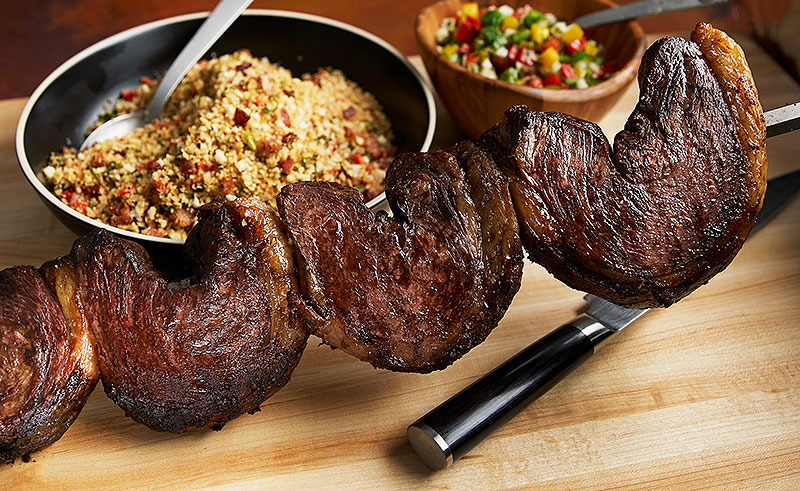
- Cook the Bacon: In a cast iron skillet, cook the diced bacon over medium heat until crispy and golden brown. Remove the bacon with a slotted spoon and set aside on paper towels to drain, reserving the bacon grease in the skillet.

- Make the Hot Bacon Dressing: Whisk together the apple cider vinegar, honey or maple syrup, and Dijon mustard in a small bowl. Add the olive oil in a slow, steady stream, whisking constantly with a wire whisk until the dressing is emulsified and slightly thickened.
- Assemble the Salad: In a large mixing bowl, combine the dandelion greens and toasted pine nuts. While the dressing is still warm, pour it over the greens and toss gently to coat, ensuring every leaf is lightly dressed. Crumble the crispy bacon over the salad.
- Garnish and Serve: Top the salad with the candied dandelions and season with coarse sea salt and freshly cracked black pepper to taste. Serve immediately in chilled bowls to prevent the greens from wilting too quickly, and enjoy the surprising flavor of spring's first, often overlooked, harvest.

Personal Anecdote Example: "My grandfather, a weathered old farmer with hands like gnarled roots, always said, 'A weed is just a plant whose virtues haven't been discovered yet.' He taught me to look beyond the conventional and to appreciate the bounty that nature offers freely, even in the most unlikely of places. This salad is a tribute to his wisdom and a reminder that even the most humble ingredients, like these dandelions growing right in your front yard, can be transformed into something truly extraordinary with a little creativity and resourcefulness."
Building a Hugelkultur Raised Garden Bed: A Sustainable Gardening Method
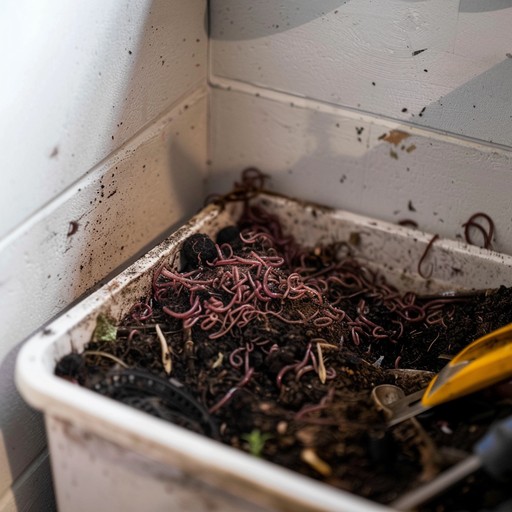
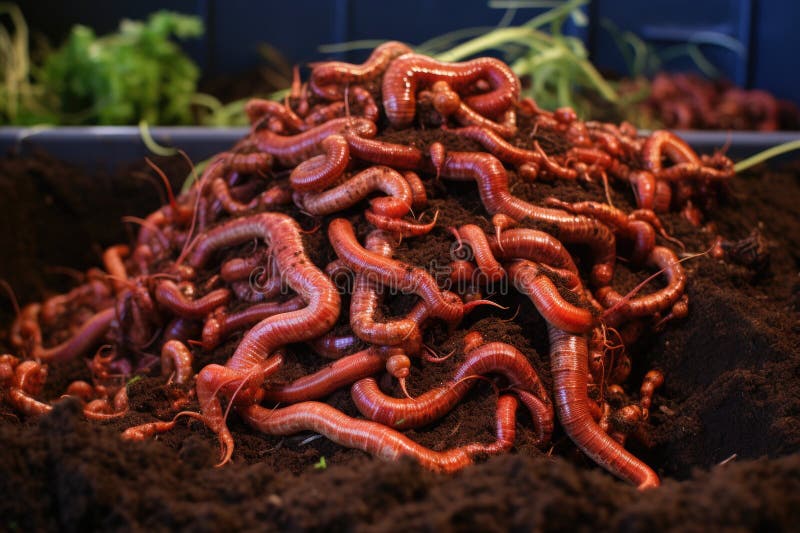
Hugelkultur, or 'hill culture,' is a permaculture technique handed down through generations, a technique that involves building raised garden beds filled with decaying wood debris and other organic matter. This method creates a self-fertilizing, water-retentive, and incredibly productive garden bed, mimicking the natural processes of decomposition and nutrient cycling that occur in a forest ecosystem. It's a fantastic way to recycle wood waste, clearing out the old to make way for the new, and build healthy soil, rich with nutrients for your garden.
Materials:
- Decaying logs and branches (various sizes, the more decomposed, the better - think rotting oak or maple)
- Smaller branches and twigs (prunings from your fruit trees work great)
- Finished compost (the darker and more broken down, the better)
- Grass clippings (avoid clippings treated with herbicides)
- Autumn leaves (shredded leaves decompose faster)
- Well-rotted manure (optional, but adds valuable nutrients, aged cow manure is ideal)
- Rich topsoil (sandy loam is best for drainage)
- Shovel (a sturdy spade shovel)
- Wheelbarrow (for hauling materials)
- Gardening gloves (heavy-duty leather gloves)
Instructions:
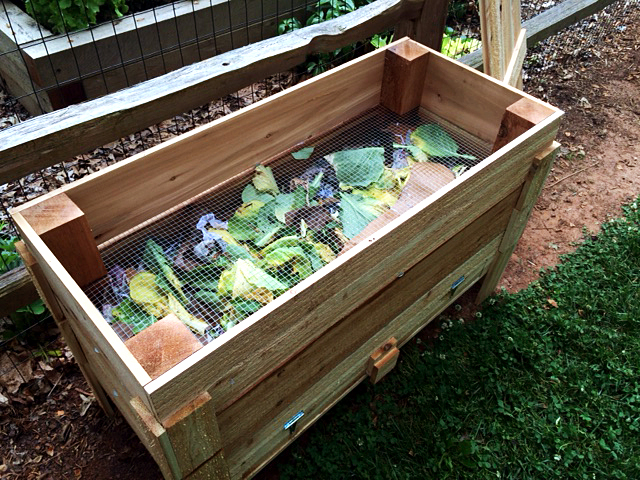
- Choose a Location: Select a sunny location for your Hugelkultur bed, ideally one that receives at least 6-8 hours of direct sunlight per day. The bed can be any size or shape, but a typical size is 4 feet wide by 8 feet long and 3 feet high.
- Dig a Trench (Optional): Dig a shallow trench (about 1 foot deep) where the bed will be located. This helps to create a stable base for the bed and allows the wood to make direct contact with the soil, which will speed up decomposition.
- Layer the Wood: Place the largest logs at the bottom of the trench (or directly on the ground if you skip the trench). Pack them tightly together. Cover the logs with smaller branches and twigs, filling in any gaps.
- Add Organic Matter: Add layers of compost, grass clippings, leaves, and manure (if using) over the wood. Alternate layers of "browns" (dry leaves, twigs) and "greens" (grass clippings, compost) to ensure balanced decomposition. Water each layer thoroughly as you build it up to help everything settle.
- Top with Topsoil: Cover the entire bed with a thick layer of topsoil (at least 6 inches). Gently compact the soil to create a firm surface for planting.
- Plant Your Garden: Plant your vegetables, herbs, or flowers in the topsoil. Water regularly until the plants are established. Mulch around the plants with straw or wood chips to conserve moisture and suppress weeds.
Lye Soap Making from Wood Ash: A Traditional Homestead Skill
For centuries, resourceful homesteaders, often women out of necessity, have relied on the simple ingredients of wood ash and rendered animal fats to create their own soap. Lye soap making is a challenging but rewarding skill that connects us to the resourcefulness of our ancestors and reminds us that waste is often just a resource in disguise. It requires careful attention to detail and a deep respect for the chemical processes involved, but the result is a truly self-sufficient and natural cleaning product that's gentle on the skin and the environment.
Safety First: Making Lye Soap from Wood Ash Requires Extreme Caution. This is not a task to be taken lightly. Always Wear Heavy-Duty Protective Gloves and Safety-Rated Eye Protection. Work outdoors in a well-ventilated area, far away from children and pets. Work deliberately, focusing on each step. Have a bucket of vinegar nearby to neutralize any splashes. Never add water to lye, always add lye to water (in this case, wood ash liquid).
Materials:
- Hardwood ash (from a clean, untreated wood fire using hardwoods like oak, maple, or hickory. Avoid ash from softwoods like pine or fir, as they contain resins that will make a poor quality soap. Sift the ash to remove any large chunks.)
- Rainwater or distilled water (soft water is best to prevent mineral buildup in your soap. If using rainwater, filter it through a clean cloth.)
- Rendered animal fat (tallow, lard, or a combination. Ideally, use ethically sourced fats from pasture-raised animals or even better, render your own fat from butcher scraps for maximum self-sufficiency.)
- Large stainless steel or enamel pot (do not use aluminum, as the lye will react with it.)
- Heat-resistant gloves (long, heavy-duty rubber or neoprene gloves)
- Eye protection (goggles or a full face shield)
- Long wooden stirring spoon (sturdy and able to withstand high heat)
- Soap molds (wooden boxes lined with parchment paper or silicone molds, ensure they are clean and free of any residue)
- pH test strips or a potato (for testing the lye strength. A potato works, but pH strips offer more accurate results)
- White Vinegar (for neutralizing any lye spills on skin or surfaces. Keep a spray bottle handy.)
Instructions:
- Make the Lye Water: In a large, non-reactive container (stainless steel or enamel), place the sifted hardwood ash. Slowly and carefully pour in rainwater or distilled water until the ash is completely submerged. Stir well with a long wooden spoon. Let the mixture sit for 24-48 hours, stirring occasionally. The water will leach out the lye (potassium hydroxide) from the ash, turning the water a dark amber color.
- Test the Lye Strength: There are two methods for testing the lye strength. Remember, safety is paramount!
- Potato Test: Carefully float a peeled potato in the lye water. If the potato floats high enough that about an inch of it remains above the surface, the lye is considered strong enough. This is an imprecise method, but it's a traditional indicator.
- pH Test Strips: The more accurate method. Dip pH test strips into the lye water. A pH of 12 or 13 is ideal for soap making. If the pH is too low, let the mixture sit for another 24 hours and test again.
- Drain the Lye Water: Carefully drain the lye water from the ash, using a strainer lined with several layers of cheesecloth to remove any remaining ash particles. This step is crucial for ensuring a smooth soap.
- Melt the Animal Fat: In a large stainless steel or enamel pot, melt the rendered animal fat over very low heat. Do not overheat the fat, as this can affect the quality of the soap.
- Slowly Add the Lye Water: Slowly and carefully add the lye water to the melted fat, stirring constantly with a long wooden spoon. The mixture will begin to thicken and change color. This process can take some time, so be patient.
- Cook the Soap: Continue stirring the mixture over low heat for several hours, or until it reaches a "trace." Trace is when a drizzle of the soap mixture on the surface leaves a visible trail for a few seconds before disappearing back into the mixture. This indicates that the saponification process is well underway.
- Pour into Molds: Once the soap reaches trace, pour the mixture into the prepared soap molds. Tap the molds gently to release any trapped air bubbles.
- Cure the Soap: Cover the molds with a cloth or towel and let the soap cure in a cool, dry, well-ventilated place for 4-6 weeks before using. This allows the saponification process to complete fully, the soap to harden, and the pH to stabilize. The longer the soap cures, the milder and longer-lasting it will be.
Closing Reflection:
As we embrace the challenges and rewards of self-sufficient living, let's never forget the ingenuity and resilience of those who came before us. From foraging for wild edibles like dandelions, often dismissed as mere weeds, to building sustainable gardens with Hugelkultur beds, a technique that turns waste into abundance, and crafting our own soap from wood ash, a skill that once defined self-reliance, the homesteading lifestyle offers a unique opportunity to learn, grow, and thrive in harmony with the natural world. It's not always easy, but it's deeply rewarding. What are your favorite unusual foraged foods and time-honored homesteading practices? Share your tips, tricks, and even your hard-won lessons in the comments below! We'd love to hear from you and learn from your experiences as we all navigate this journey toward a more self-reliant and sustainable existence.
Keywords: organic gardening, seasonal harvest, homegrown, sustainable home, cozy living, backyard projects, farmhouse life, dandelion greens, foraging, Hugelkultur, raised garden beds, lye soap, soap making, wood ash, self-sufficiency, traditional skills, permaculture