Slow Stitching, Soul Soothing: A Homestead Holiday Banner Tradition
[VISUAL: close-up hands stitching banner fabric]
The holidays. A time for joy, connection, and… overwhelming pressure? The glossy magazines scream perfection, the stores glitter with manufactured cheer, and the weight of expectations – to create the perfect meal, give the perfect gift, and host the perfect gathering – can feel crushing. But what if we could choose a different path? What if we could embrace imperfection, slow down, and create something truly meaningful with our own two hands?
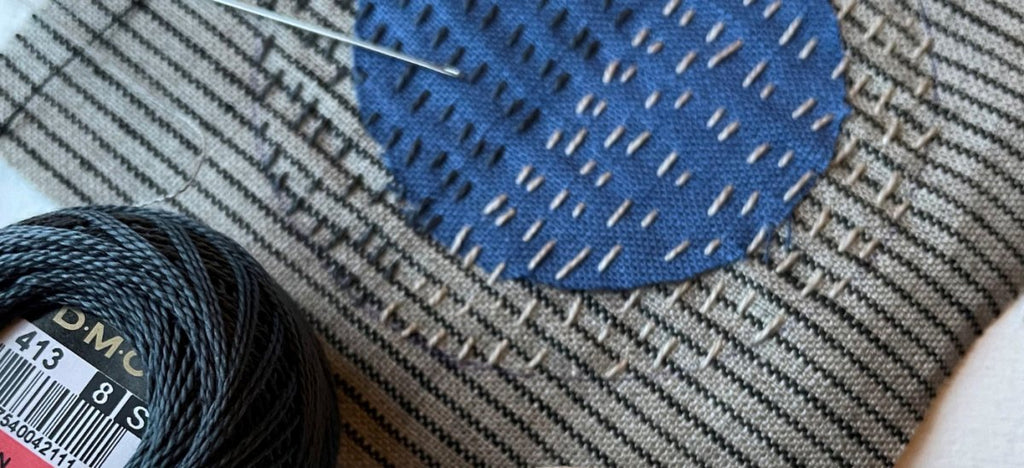
For us, on our little homestead, that path is paved with simple stitches and salvaged fabric. It’s the path of slow stitching, a meditative practice that has become a cherished winter solstice tradition. Forget the pressure of Pinterest-perfect decorations and overflowing shopping carts. Instead, imagine yourself nestled by the fire, needle in hand, transforming scraps of fabric into a family heirloom. It’s about the process, the presence, and the connection to the past – and to each other. We create a holiday banner each year, piece by piece, memory by memory, and it hangs as a constant reminder that the best things in life are often the simplest. Let's explore how you can create your own meaningful holiday banner, a sustainable project that embodies the spirit of slow living and connects you to nature, family, and the changing seasons. It is a simple, handmade, imperfect beauty.
Gathering Your Homestead Treasures
[VISUAL: basket of fabric scraps natural findings]
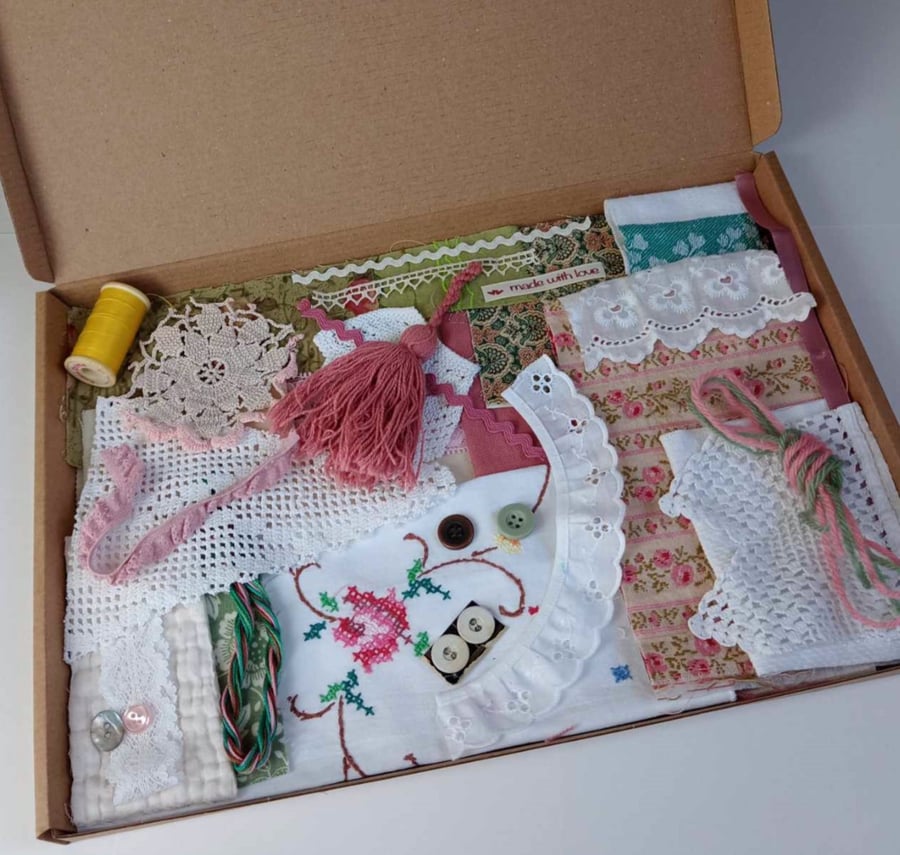
Before you even thread a needle, the first step in creating your slow-stitched holiday banner is gathering your materials. This is where the "homestead" aspect truly comes into play. Instead of heading to the craft store, take a walk around your property (or even just rummage through your closets!). The goal is to unearth forgotten treasures, repurpose discarded items, and connect with the natural world.
Here's what we typically look for:
- Fabric Scraps: This is the foundation of your banner. Old clothing, linens, curtains, tea towels, even feed sacks – anything goes! The beauty of using scraps is that each piece carries its own story. That faded blue square? It was once part of my daughter’s favorite dress. That piece of floral print? It came from a set of curtains my grandmother made. Think about the history behind each piece of fabric and let it inspire your design.
- Thread & Embellishments: Embroidery floss in various colors, yarn scraps, buttons salvaged from old garments, beads from broken jewelry – all these can add texture and visual interest to your banner. We also love to incorporate natural elements. Dried flowers (pressed in the summer and fall), cinnamon sticks (their scent adds a wonderful festive touch), small pinecones, feathers, and even strips of repurposed ribbon can all find a home on your banner.
- Tools: Of course, you'll need some basic sewing supplies: needles in various sizes, sharp scissors, pins, and optionally, an embroidery hoop. A simple hoop can be helpful for holding smaller pieces of fabric taut while you stitch, but it's by no means essential.
- Backing Fabric: A larger piece of fabric will be needed to act as the backing for the entire banner. A piece of old canvas, a linen tablecloth, or anything sturdy will do the trick.
Don’t feel pressured to buy anything new. The beauty of this project lies in using what you already have. It's about transforming what might otherwise be considered "waste" into something beautiful and meaningful.
Foraging for natural elements adds another layer of connection to the land. When gathering items like dried berries, small twigs, or pressed leaves, be mindful of your impact on the environment. Only take what you need, and always leave plenty behind for the birds and other wildlife. Remember to thoroughly dry anything you gather before attaching it to your banner to prevent mold.
Consider experimenting with natural dyes to further customize your materials. Onion skins, avocado pits, and even coffee grounds can be used to create a range of earthy tones for your fabric scraps or threads.
Before you start stitching, gather all your materials in a basket or tray. This will not only keep everything organized but also serve as a visual reminder of the abundance and beauty that surrounds you.
Simple Stitches, Big Meaning
[VISUAL: hands demonstrating basic stitching techniques banner]
You don't need to be an expert seamstress to create a stunning slow-stitched holiday banner. In fact, the imperfections and irregularities are what give it character! The focus is on the process, not the product. It is about savoring the moment and letting the rhythm of the needle and thread soothe your soul.
Here are a few basic stitches that you can use to assemble your banner:
- Running Stitch: This is the simplest stitch of all, and it's perfect for attaching fabric scraps to the backing. Simply weave the needle in and out of the fabric, creating a dashed line.
- Back Stitch: This stitch creates a solid line and is ideal for outlining shapes or adding details. Bring the needle up through the fabric, then back down a short distance away. Bring the needle up again, slightly ahead of your previous stitch, and then back down into the end of the previous stitch. Repeat.
- Blanket Stitch: This decorative stitch is perfect for finishing the edges of fabric scraps or adding a touch of whimsy. Bring the needle up through the fabric, then insert it a short distance away. Before pulling the thread tight, loop it around the needle. Pull the thread tight to create a small loop along the edge of the fabric.
- French Knot (Optional): If you're feeling a bit more ambitious, the French knot can add a touch of elegance. Wrap the thread around the needle several times, then insert the needle back into the fabric very close to where it came out. Pull the thread tight to create a small knot on the surface of the fabric.
To attach small pieces of fabric to the banner, simply use a running stitch or blanket stitch around the edges. For embellishments like buttons, beads, and dried flowers, a few simple stitches will suffice.
Consider creating small pockets or sleeves on the banner to hold little notes, wishes, or quotes. These can be added using a running stitch or back stitch.
If you are creating segments for each family member. Perhaps Grandma's favorite color, a scene depicting a shared family memory, or symbols of the winter solstice. These segments can then be sewn together or displayed separately.
The key is to relax, experiment, and enjoy the process. Don't worry about making mistakes. Embrace the imperfections, and let your creativity flow. The story you tell while creating this banner will make it all the more special.
Personalizing Your Holiday Story
[VISUAL: finished banner displaying different family memories]
The heart of a slow-stitched holiday banner lies in its ability to tell a story – your family's story. This is where you can truly personalize the project and make it a reflection of your unique values, traditions, and dreams.
- Symbols and Colors: What symbols resonate with your family? The sun, stars, and evergreens are all classic winter solstice symbols. Perhaps you could incorporate images of your favorite animals, plants, or landscapes. Choose colors that are meaningful to you. Warm reds, oranges, and yellows can evoke the warmth and comfort of the season, while cool blues and greens can represent the stillness and peace of winter.
- Memories and Traditions: Think about your family's favorite holiday traditions. Do you bake cookies together? Decorate a tree? Sing carols? Try to represent these traditions on your banner. You could use fabric scraps from old aprons or tablecloths used during holiday meals. You could even stitch images of your favorite holiday treats.
- Hopes for the New Year: What are your hopes and dreams for the year ahead? Stitch symbols that represent your aspirations, such as a heart for love, a seed for growth, or a star for guidance.
- Gratitude for the Harvest: Take time to reflect on the blessings of the past year. Stitch images of the fruits and vegetables you harvested from your garden, or symbols of the natural world that sustained you.
- Beyond Christmas: While this project can certainly be adapted for Christmas, consider focusing on universal winter celebrations. The winter solstice is a time for reflection, renewal, and gratitude. Incorporate symbols that represent these themes, regardless of your religious or cultural background.
Involve children and other family members in the process. Ask them to contribute fabric scraps, ideas, and stitches. This is a wonderful way to create a shared experience and build lasting memories.
Add dates or initials to mark the year and make the banner a family heirloom. Each year, you can add new elements to the banner, making it a continually evolving testament to your family's history and connection to the land.
Displaying and Caring for Your Heirloom
[VISUAL: finished banner rustic wall decorations]
Once your slow-stitched holiday banner is complete, it's time to display it with pride. Here are a few ideas:
- Mantelpiece: Drape the banner across your mantelpiece for a cozy and festive focal point.
- Wall: Hang the banner on a wall as a unique and eye-catching decoration.
- Door: Welcome guests with a handmade holiday banner on your front door.
- Bookshelf: Drape the banner across a bookshelf or window for a touch of rustic charm.
- Table Runner: Use the banner as a table runner or centerpiece for your holiday meals.
To care for your banner, store it in a safe place when not in use. Hand wash it gently if needed, and repair any loose stitches or embellishments.
The most important thing is to cherish your banner and enjoy the memories it evokes. Each year, as you bring it out, it will serve as a reminder of the simple joys of slow living and the importance of connecting with nature, family, and the changing seasons.
Stitching a More Meaningful Holiday
[VISUAL: family sitting by fireplace banner hanging]
In a world that often feels rushed and overwhelming, the practice of slow stitching offers a welcome respite. It’s a chance to slow down, connect with our creativity, and create something truly meaningful with our own hands. By transforming discarded materials into a beautiful and personal holiday banner, we can embrace the spirit of sustainability, reject the pressures of consumerism, and create a lasting family heirloom.
As you gather around the fireplace this winter solstice, take a moment to appreciate the beauty of your handmade banner. Share the stories behind the fabric scraps and embellishments with your family. Reflect on the memories and traditions that are woven into its very fabric. And remember that the most precious gifts are often those that are made with love and intention. This year, let us choose the beauty of the slow stitch.
What are your favorite handmade holiday traditions? Share them in the comments below!