Simple Solstice Lanterns: A Homesteading Celebration of Light
The winter wind howls outside, rattling the windows of our cozy homestead. The days are short, the nights long, and the world outside is draped in a blanket of snow. But even in the depths of winter, there's a quiet anticipation in the air – the anticipation of the Winter Solstice, the turning point when the days begin to lengthen, and the promise of spring stirs beneath the frozen ground. While the commercial world rushes headlong into holiday frenzy, filling shopping lists and stressing over the perfect gift, on our homestead, we find solace in slowing down, reflecting, and honoring the natural rhythms of the year. This year, we’re embracing the darkness with simple Solstice lanterns, a way to bring warmth, light, and intention into our home. They are a beautiful, sustainable alternative to mass-produced holiday lights, and a way to reconnect with nature and involve the whole family in a meaningful activity. For centuries, cultures across the globe have marked the winter solstice with celebrations centered around light, symbolizing hope and the overcoming of darkness. Our Solstice lanterns are our little tribute to that enduring tradition.

A snow-covered homestead glows softly in the evening light, setting the scene for a cozy Winter Solstice celebration and the simple Solstice lanterns within.
Gathering Your Gifts from Nature
Before we can craft our lanterns, we must first gather our materials, and what better place to find them than in the heart of nature herself? But foraging responsibly is paramount. We always adhere to the principle of "take only what you need and leave the rest," ensuring that we don't disrupt the delicate balance of our ecosystem.
For our lanterns, we seek out treasures like fallen pinecones, sturdy twigs, dried seed heads that still stand proud in the snowy landscape, and perhaps a few dried leaves preserved from autumn. In some regions, you might even find colorful berries (but always be absolutely certain of their identification and toxicity before handling!). Natural twine or raffia will bind our creations together.
It's crucial to remember safety when foraging. Avoid picking anything you can't identify with 100% certainty, and be particularly cautious around potentially poisonous plants. If you lack access to certain natural materials, don’t worry! Dried orange peels, for example, offer a wonderful aromatic alternative to berries, and readily available craft store materials like small birch branches can substitute for foraged twigs.
Once gathered, the materials need proper preparation. Pinecones may require a gentle scrub to remove dirt and debris, and then can be baked at low temperature to kill any hitchhiking insects (and open them up for a more dramatic look!). Leaves and orange peels need to be fully dried to prevent mold. Twigs should be inspected for rot and breakage.
Key Takeaways: Sustainable foraging is a respectful way to connect with nature and gather materials. Preparing materials properly ensures a long-lasting and beautiful lantern.
Two Simple Solstice Lantern Designs
Now comes the fun part: bringing our vision to life. Here are two simple Solstice lantern designs that are easy to follow and highly adaptable. Feel free to adjust them based on your available materials and personal preferences.
Design 1: Pinecone Lantern
This design utilizes the natural beauty and texture of pinecones to create a rustic and charming lantern.
Materials Needed:
- Pinecones (various sizes)
- Twine or thin wire
- Small glass jar or tea light holder
- Tea light or battery-operated candle
- Hot glue gun (optional)
Instructions:
- Start by cleaning and preparing your pinecones. As mentioned above, baking them can also help remove sap.
- Cut lengths of twine (about 6-8 inches each).
- Using the twine, tie each pinecone securely. Wrap the twine tightly around the base of the pinecone scales.
- Once all the pinecones have twine attached, begin tying them together to form a circle. Overlap the twine ends and knot them tightly.
- Continue adding pinecones until you have a circle of your desired size.
- If needed, use hot glue to secure the pinecones together for added stability, especially where the twine knots might slip.
- Place the glass jar or tea light holder in the center of the pinecone circle. If the circle is not stable enough to support the jar, you may need to glue the jar to the pinecones as well.
- Place a tea light or battery-operated candle inside the jar.

The warm glow of a tea light shines through the gaps in a completed pinecone lantern, casting a soft, inviting light that evokes a feeling of cozy winter warmth.

Close-up of hands carefully tying twine around a pinecone, demonstrating the initial steps in creating a charming pinecone lantern.
Design 2: Twig & Leaf Lantern
This design offers a more delicate and ethereal look, highlighting the beauty of dried leaves and the rustic charm of twigs.
Materials Needed:
- Small twigs (straight and relatively uniform in size)
- Dried leaves (various shapes and colors)
- Natural glue (such as a non-toxic craft glue) or twine
- Small glass jar
- Tea light or battery-operated candle
Instructions:
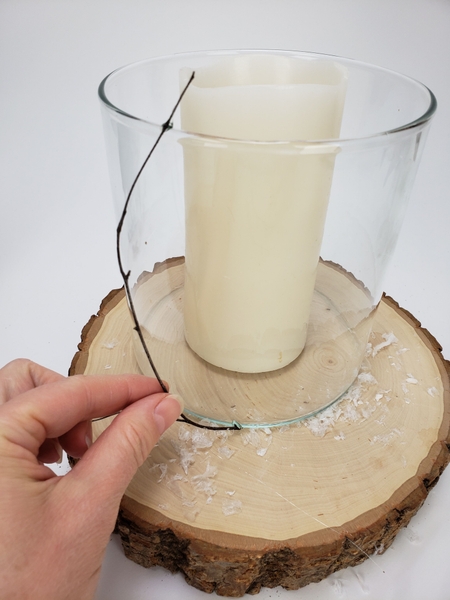
- Gather your twigs and create a frame for the lantern. You can either create a square, rectangle, or circle. Use glue or twine to secure the twigs at the corners.
- Once the frame is dry, begin attaching the dried leaves to the twigs. Use small dabs of glue to adhere the leaves to the frame, overlapping them slightly for a fuller look.
- Allow the glue to dry completely.
- Secure the glass jar inside the frame, either by gluing it to the base or using twine to tie it in place.
- Place a tea light or battery-operated candle inside the jar.

A twig and leaf lantern emits a gentle, diffused light, highlighting the intricate textures of the natural materials and creating a tranquil atmosphere.

A photograph depicts leaves carefully glued onto a twig frame, demonstrating the step-by-step process of creating a beautiful and natural twig and leaf lantern.
Key Takeaways: These simple lantern designs are easy to follow and can be adapted to individual preferences and available materials. Clear instructions and visuals make the process accessible to all skill levels.
Lighting the Way: Sustainable & Safe Illumination
Choosing the right light source for your Solstice lanterns is just as important as the lantern itself. We want to prioritize both sustainability and safety.
Here are a few options to consider:
- Traditional Tea Lights: Beeswax tea lights are a great option, as beeswax is a renewable resource and burns cleanly. Avoid paraffin wax tea lights, as they are derived from petroleum and release harmful chemicals when burned.
- Battery-Operated Tea Lights: These are a safe and convenient option, especially if you have small children or pets. They eliminate the risk of fire and can be left unattended. Look for rechargeable options to further reduce waste.
- Solar-Powered Fairy Lights: For outdoor lanterns, solar-powered fairy lights are an eco-friendly choice. They harness the power of the sun during the day and provide a soft, enchanting glow at night.
Safety First! Never leave a burning candle unattended, and always keep lanterns away from flammable materials. If using real candles, ensure adequate ventilation to prevent carbon monoxide buildup.
Key Takeaways: Choosing sustainable and safe lighting options is crucial for both the environment and personal well-being. Considering the pros and cons of each option allows for informed decision-making.
Creating a Solstice Ritual with Your Lanterns
Once your Solstice lanterns are complete, you can incorporate them into a meaningful Solstice ritual. Think of the lanterns as symbols of hope, resilience, and the return of light.
Here are a few ideas:
- Line a Pathway: Place lanterns along a pathway to guide guests to your home or to create a magical ambiance in your garden.
- Solstice Feast Centerpieces: Use lanterns as centerpieces for your Solstice feast, creating a warm and inviting atmosphere.
- Lantern Walk: Organize a lantern walk in nature, symbolizing the journey through darkness towards the light.
- Meditation and Reflection: Create a quiet space for meditation and reflection, bathed in the soft glow of the lanterns.
Encourage family members to write down their intentions for the new year and place them near the lanterns, setting the stage for a year filled with hope, growth, and positive change. Allow the gentle light to reflect on the past year and anticipate a brighter future.

A family enjoys a lantern walk along a snow-covered path, creating a cherished memory and embracing the quiet beauty of the Winter Solstice.
Key Takeaways: Lanterns can be more than just decorations; they can be powerful symbols and tools for creating meaningful Solstice rituals.
A Homestead Lit From Within
Creating these simple Solstice lanterns is more than just a craft project; it's an act of connecting with nature, slowing down, celebrating the season in a meaningful way, and promoting sustainability. It’s about embracing the spirit of slow living holidays and finding joy in simplicity. The warmth they bring to our home isn't just from the flickering candles, but from the love and intention poured into their creation.
Let's remember that the true light of the holidays comes from within – from the connection to family, nature, and tradition. Embrace the darkness, and let your inner light shine.
A hand holds a lit lantern against a snowy backdrop, symbolizing hope, resilience, and the radiant warmth that emanates from within during the Winter Solstice.
What natural materials will you use for your Solstice lanterns? Share your ideas and favorite Solstice traditions in the comments below! And be sure to subscribe to the Better Homes and Harvests newsletter for more homesteading tips and inspiration.
